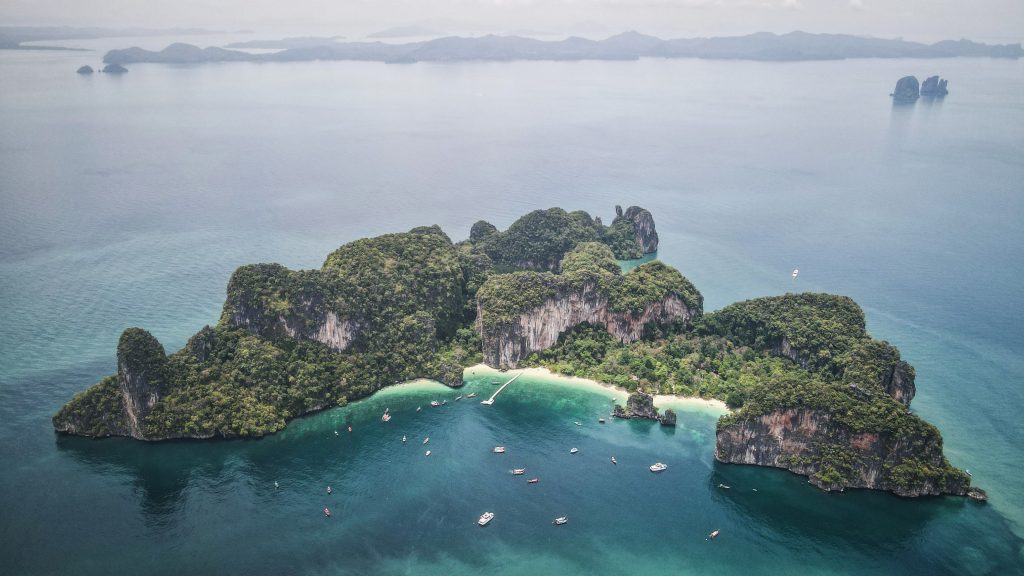
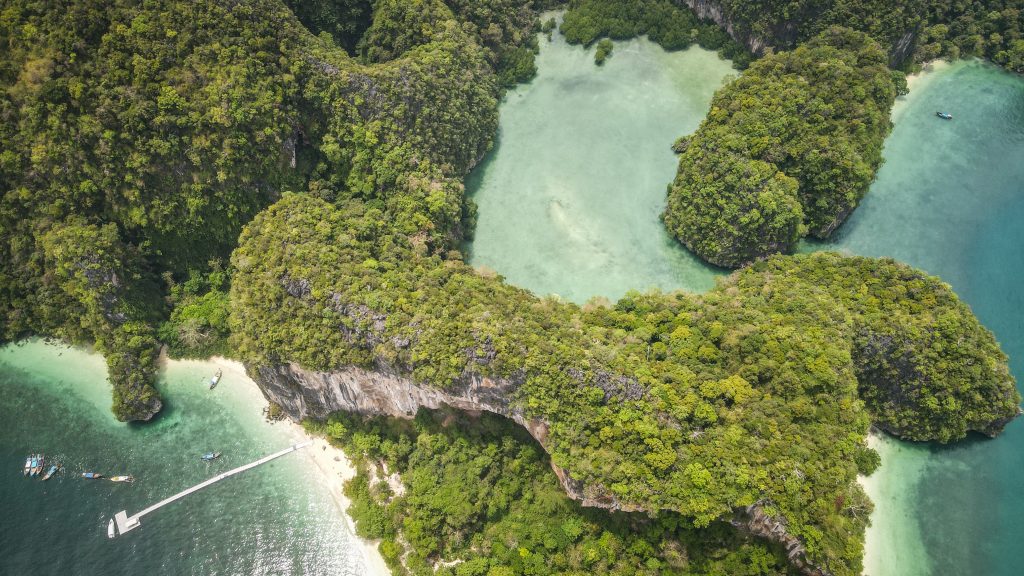
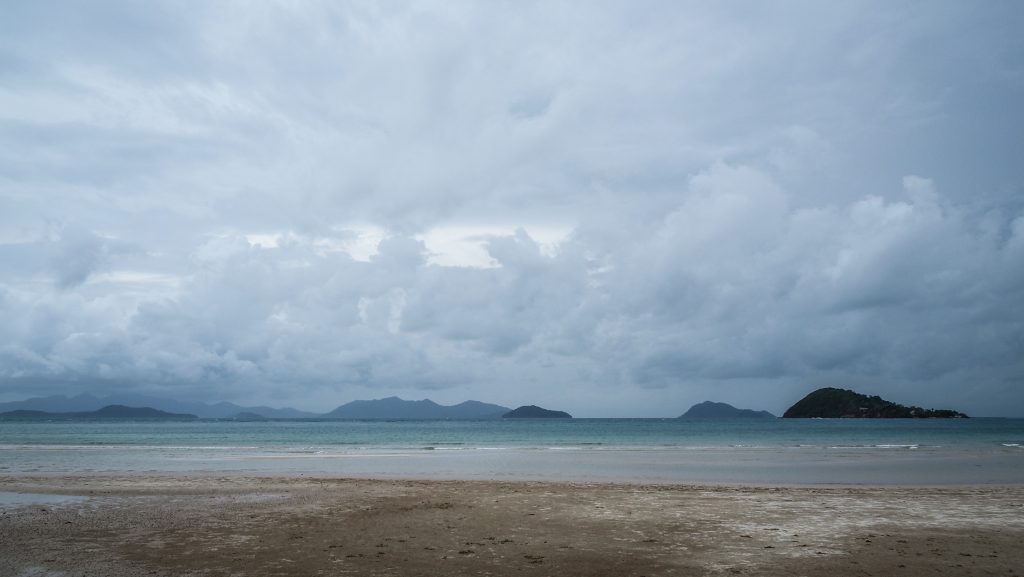
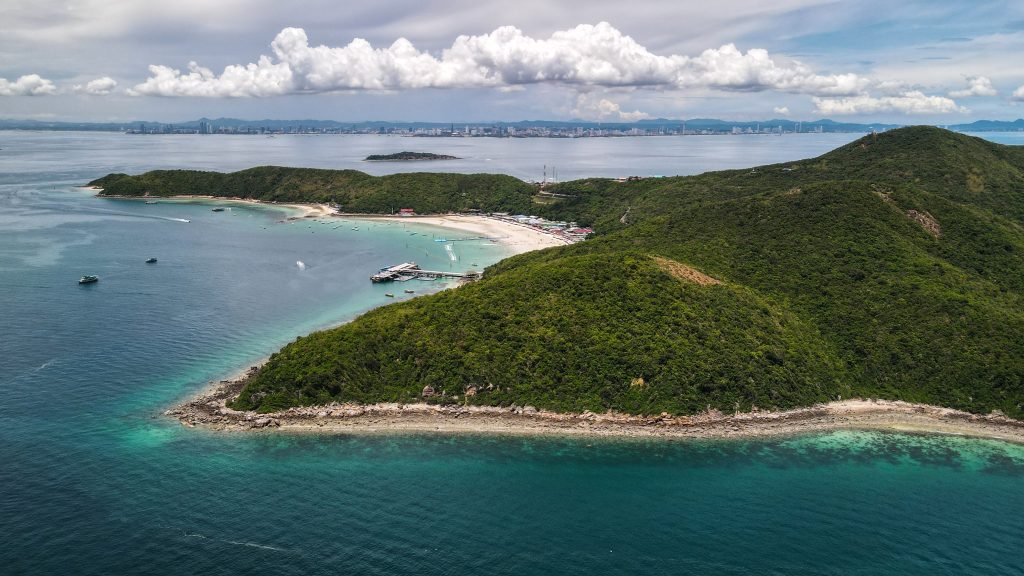
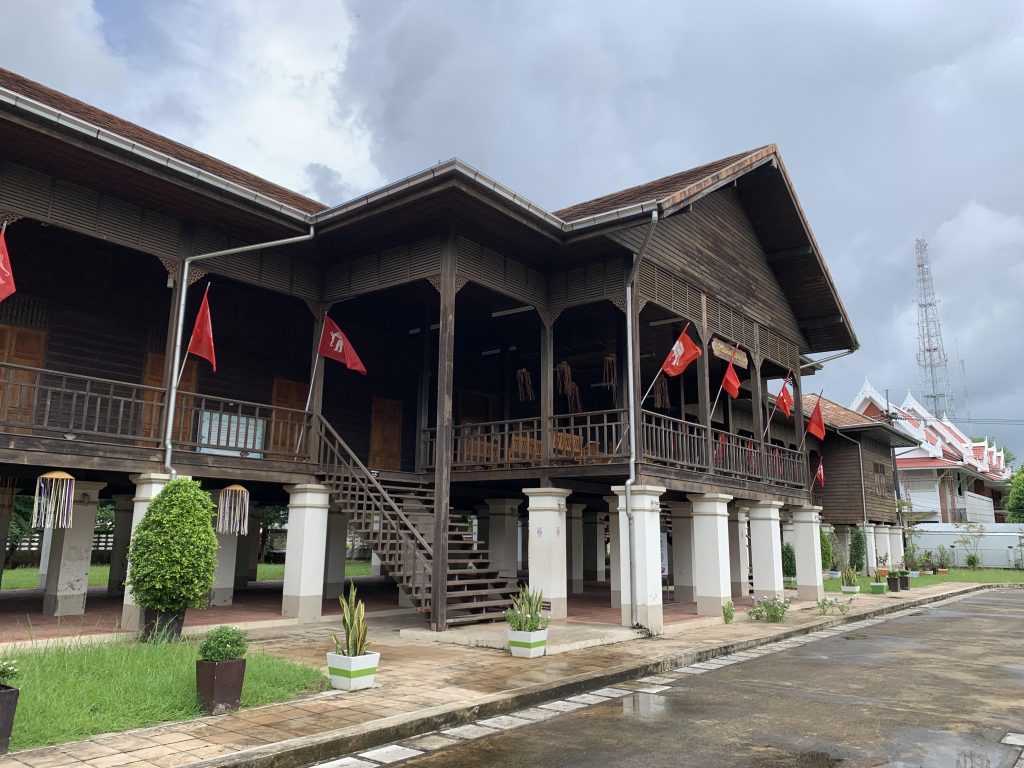
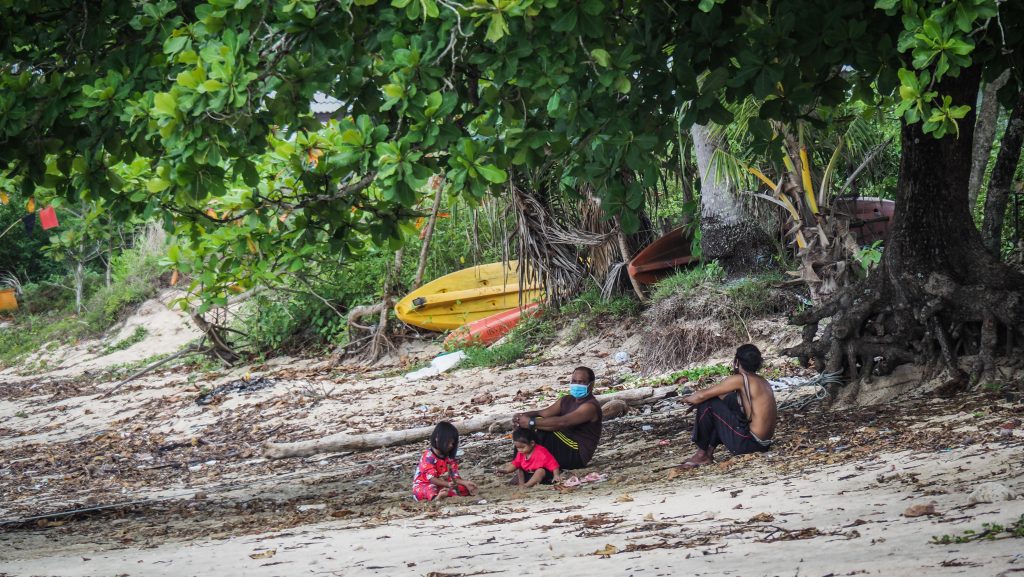
Koh Hong is located in theKrabi Province in the South of Thailand. The island is a popular day trip destination, famous for its impressive limestone formations, beautiful beach and good snorkelling. It’s also worth mentioning Hong Lagoon, which can only be reached by passing through a narrow rock opening. The island is a part of the Than Bok Khorani National Park, therefore you will need to pay the entrance fee.
There are two small shops near the beach where you can buy drinks, but most probably you will have them included in your boat trip together with lunch so there is no need to spend extra money.
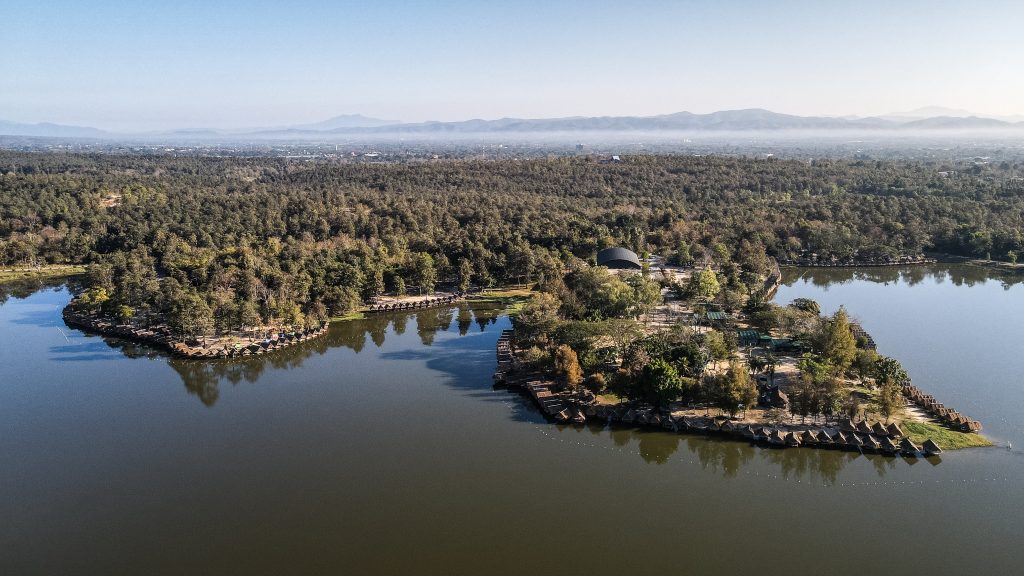
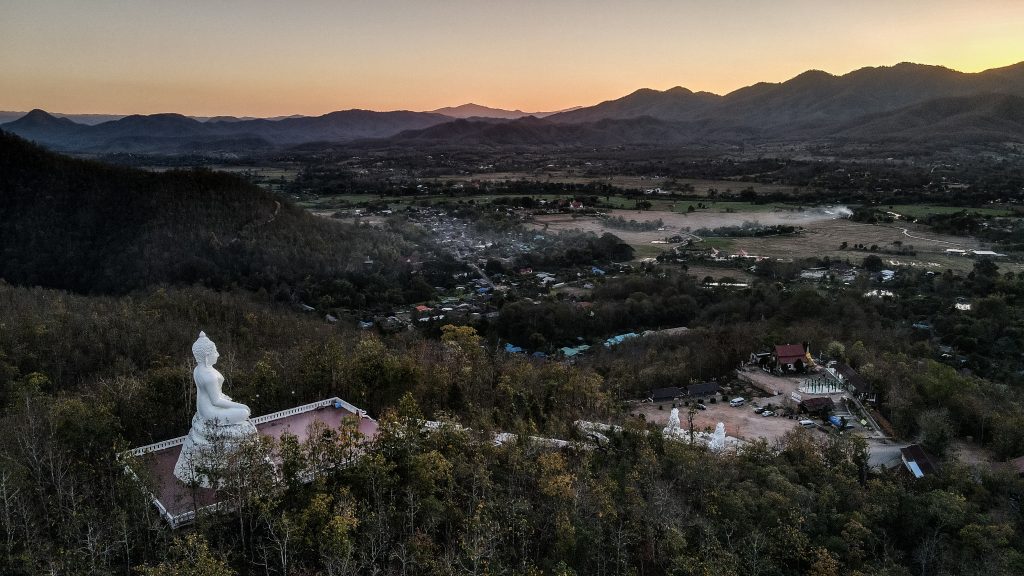
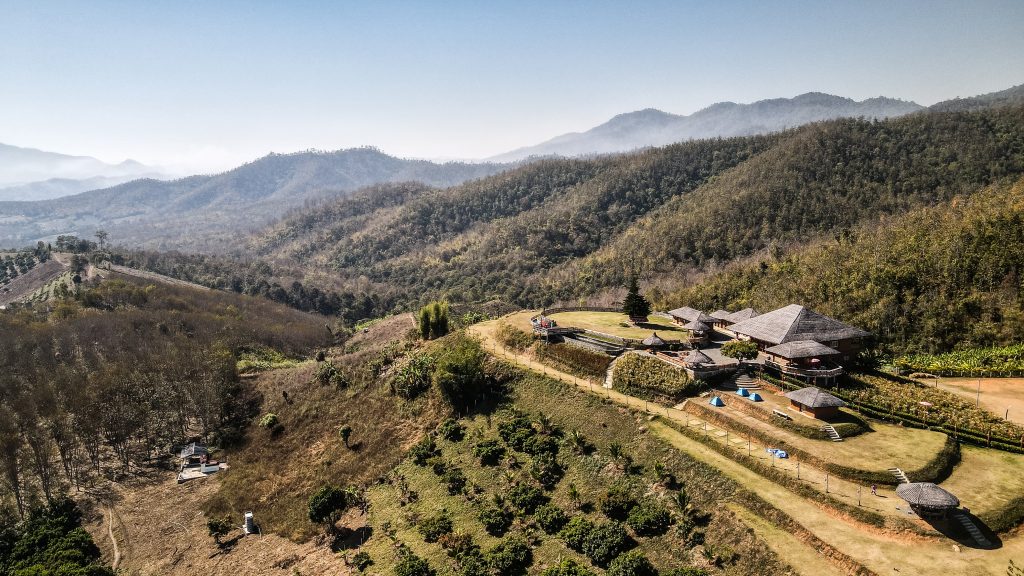
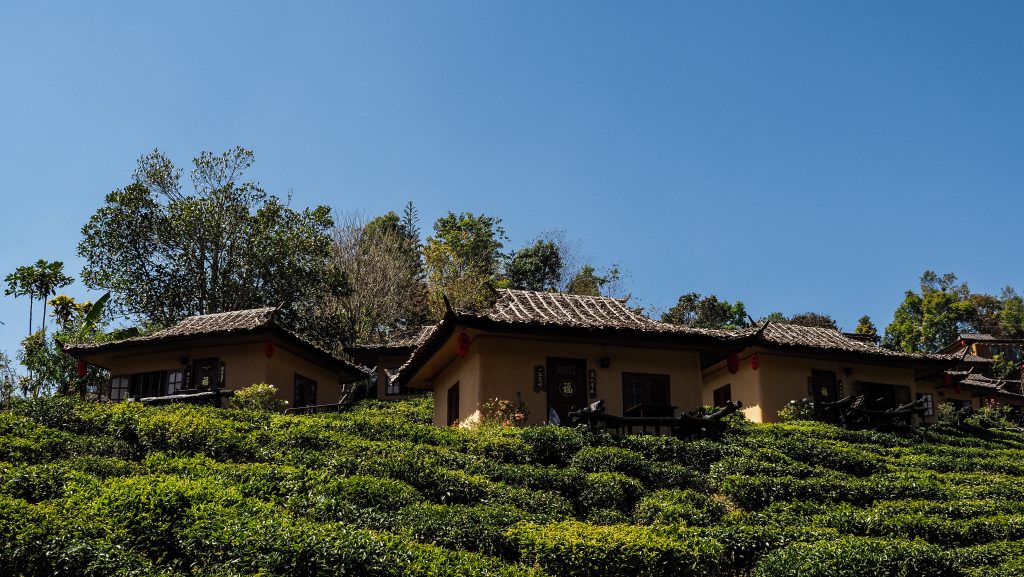
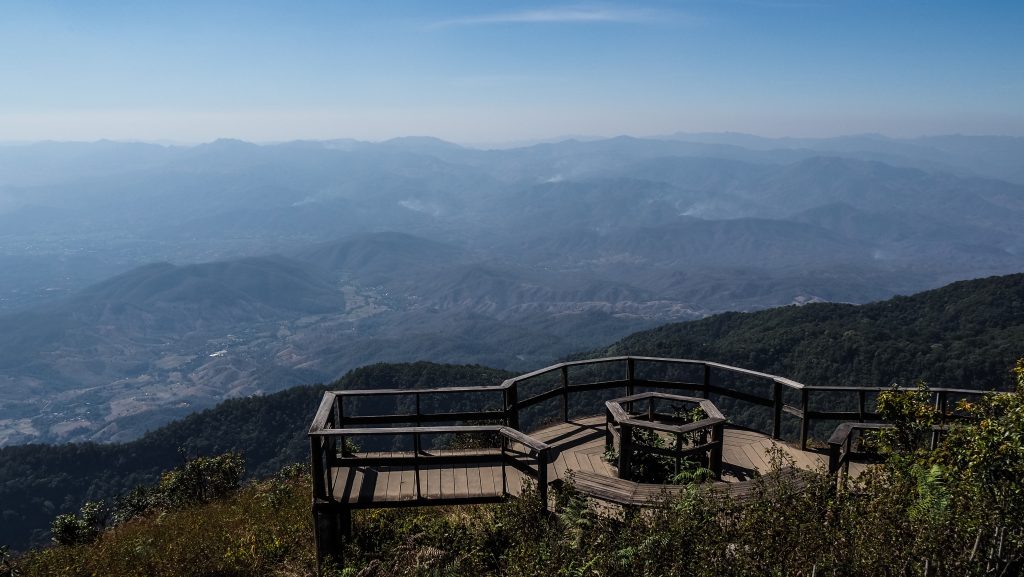
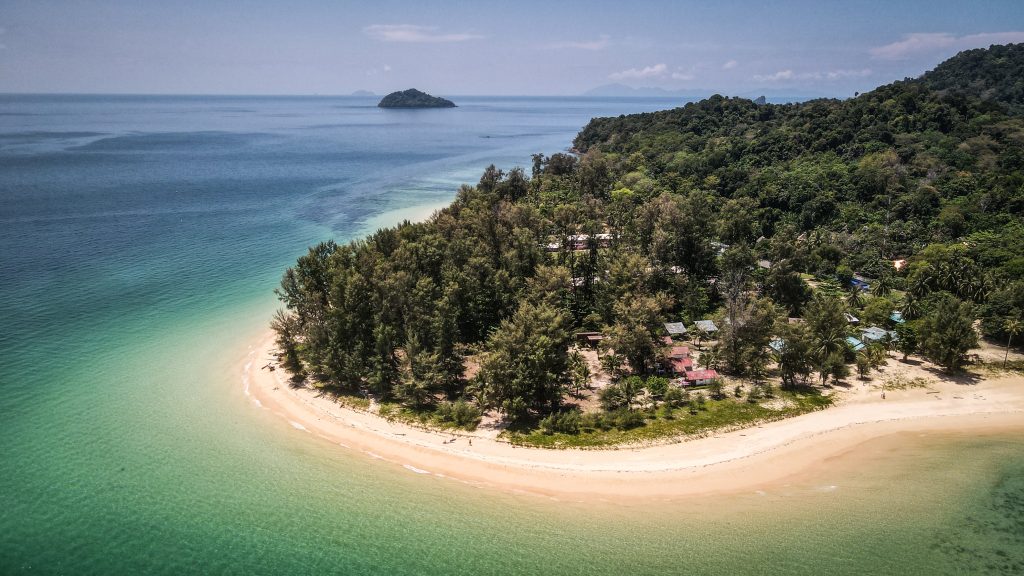
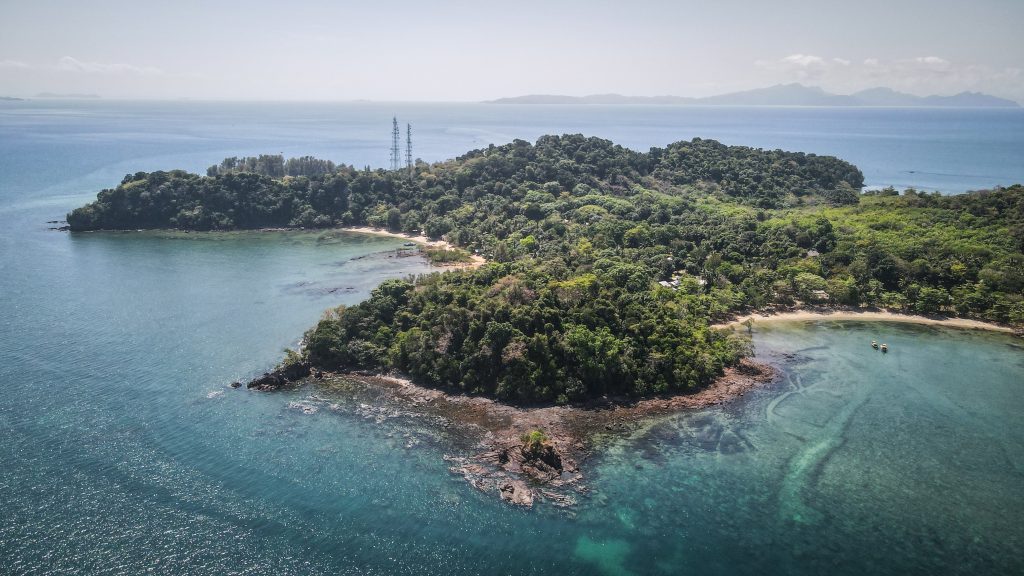
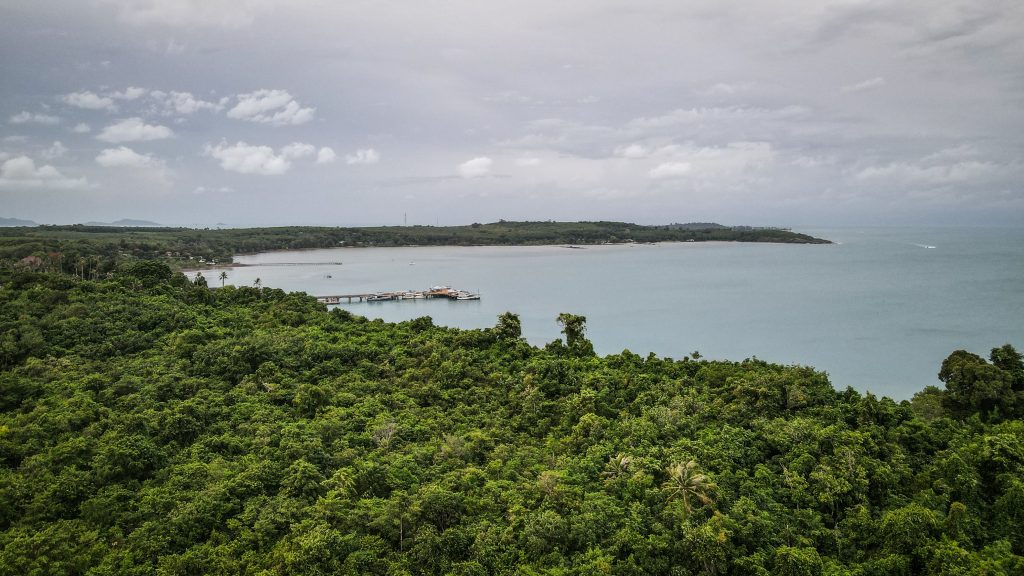
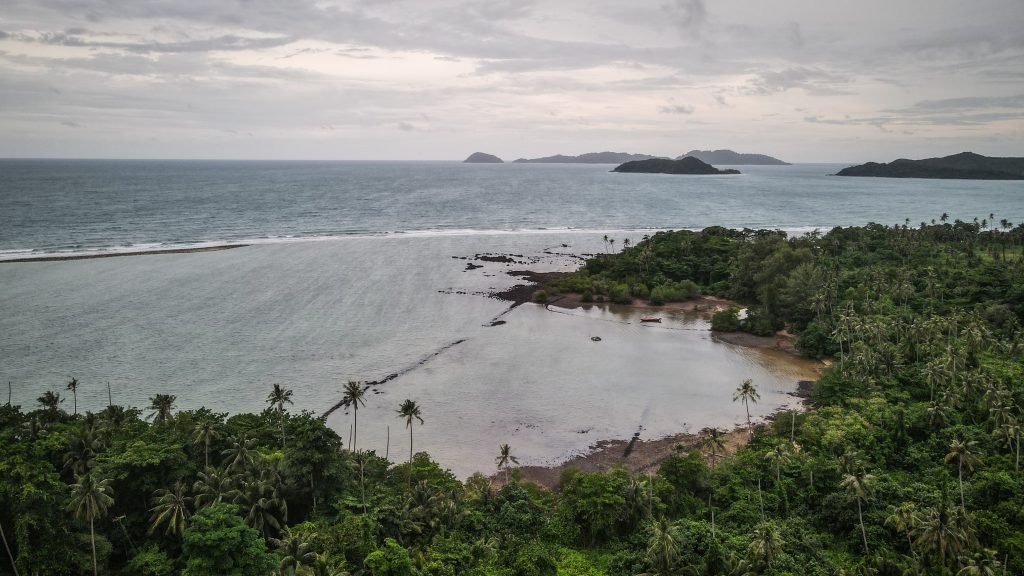
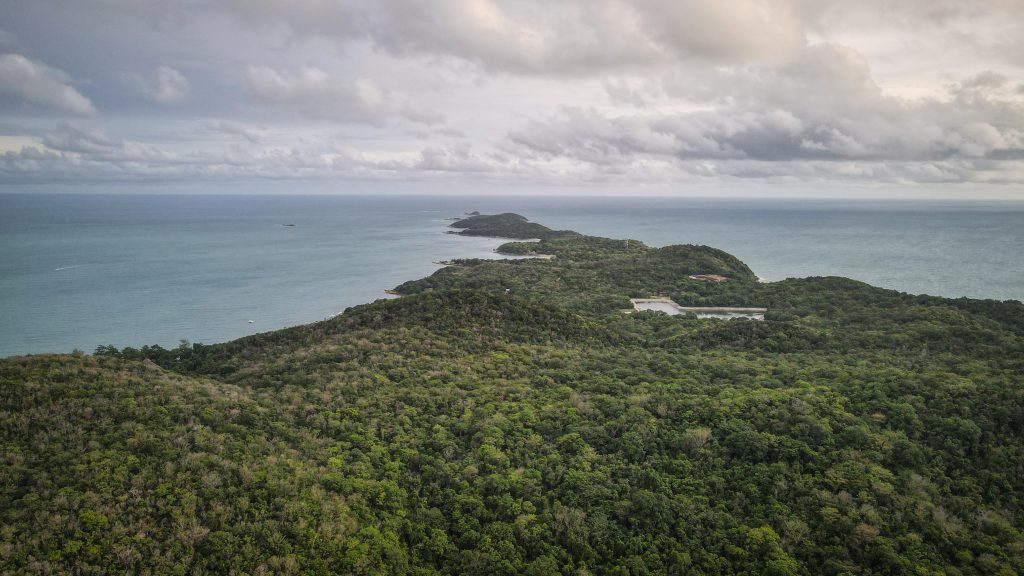
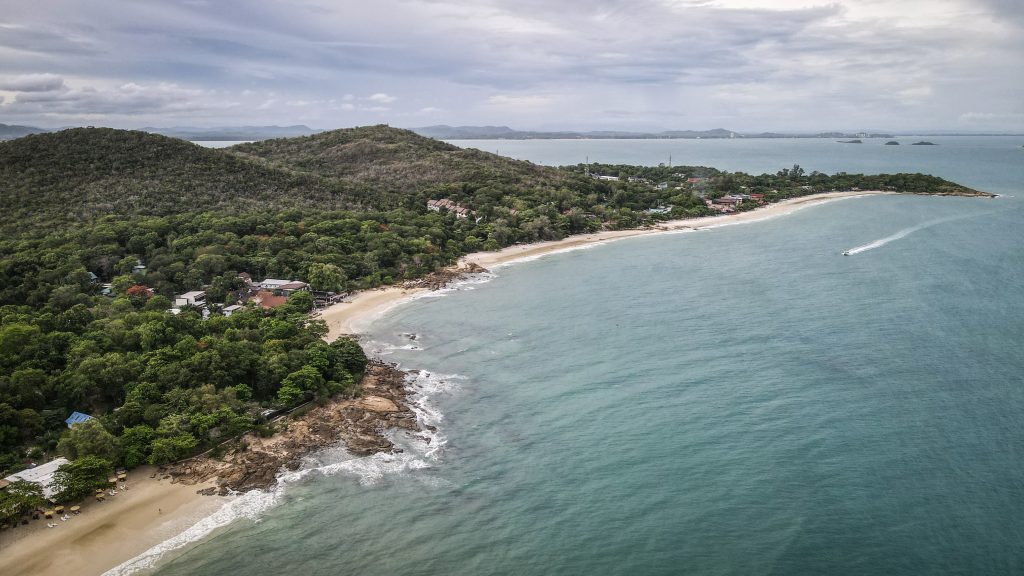
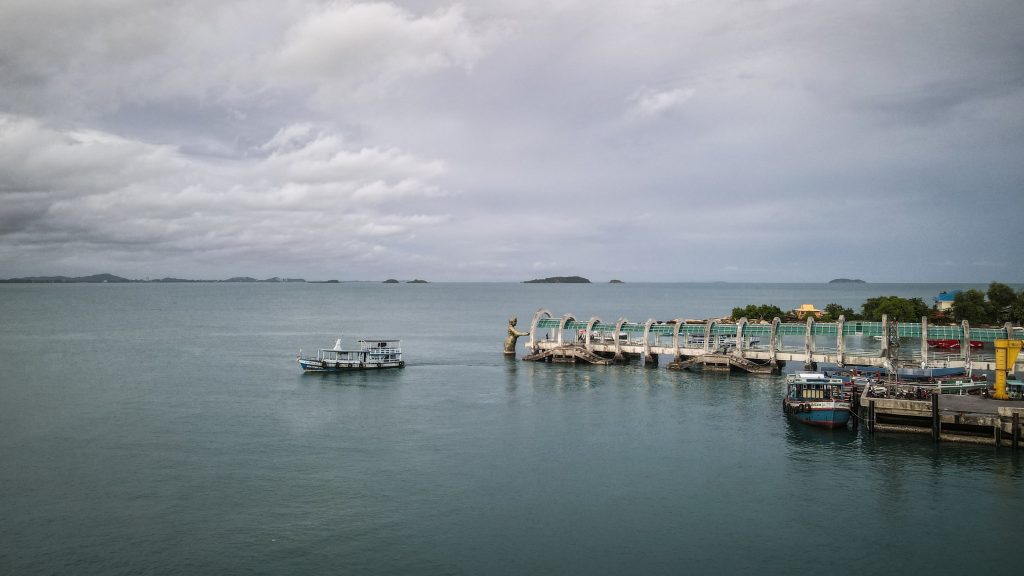
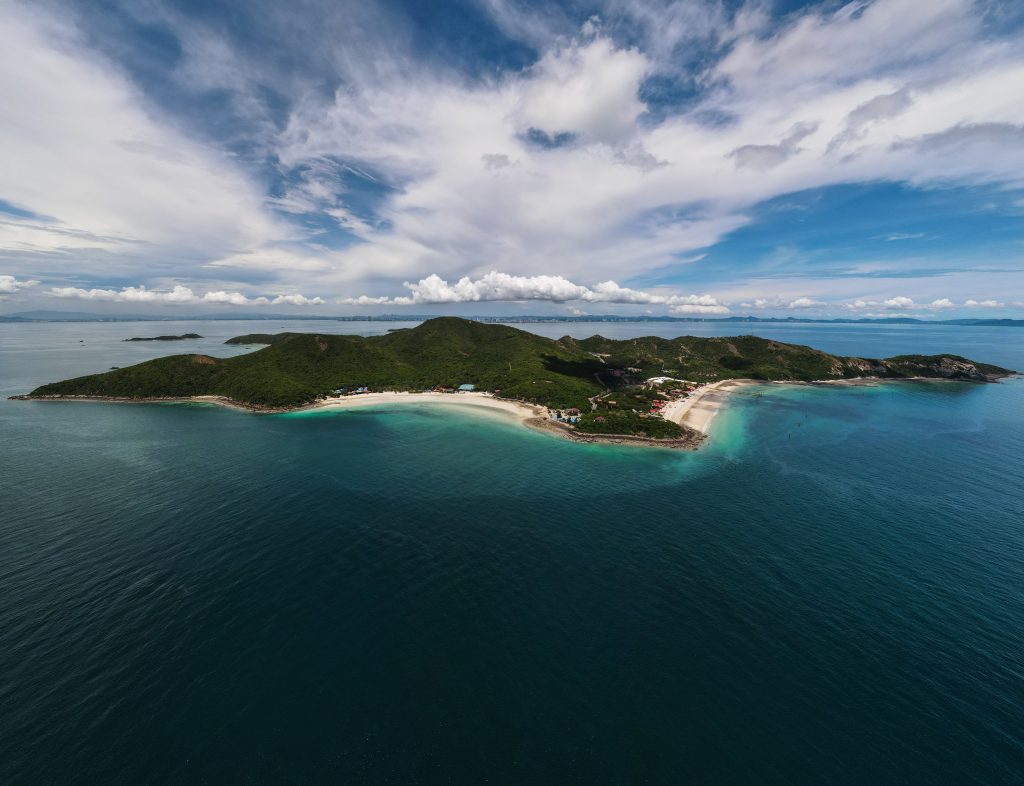
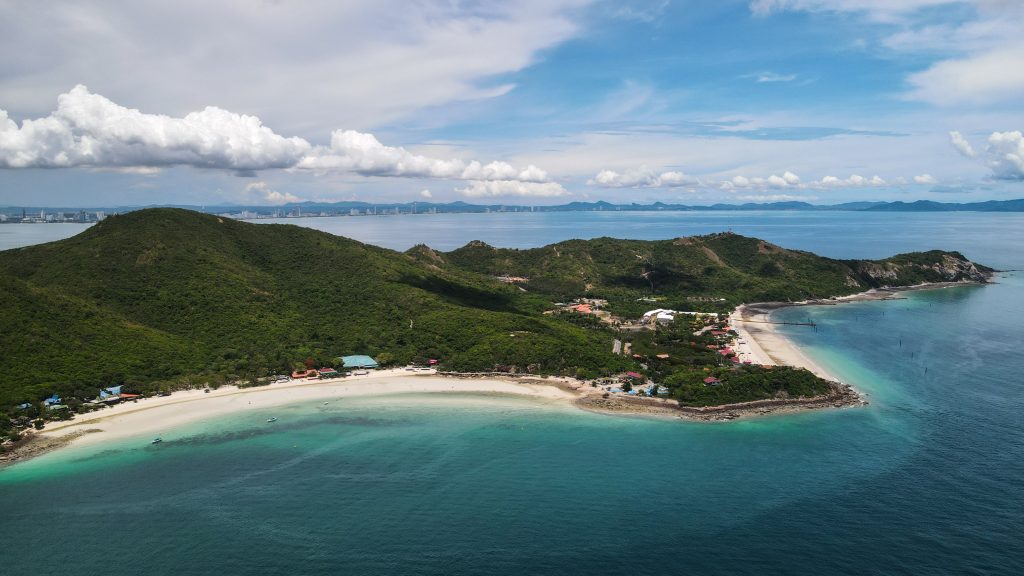
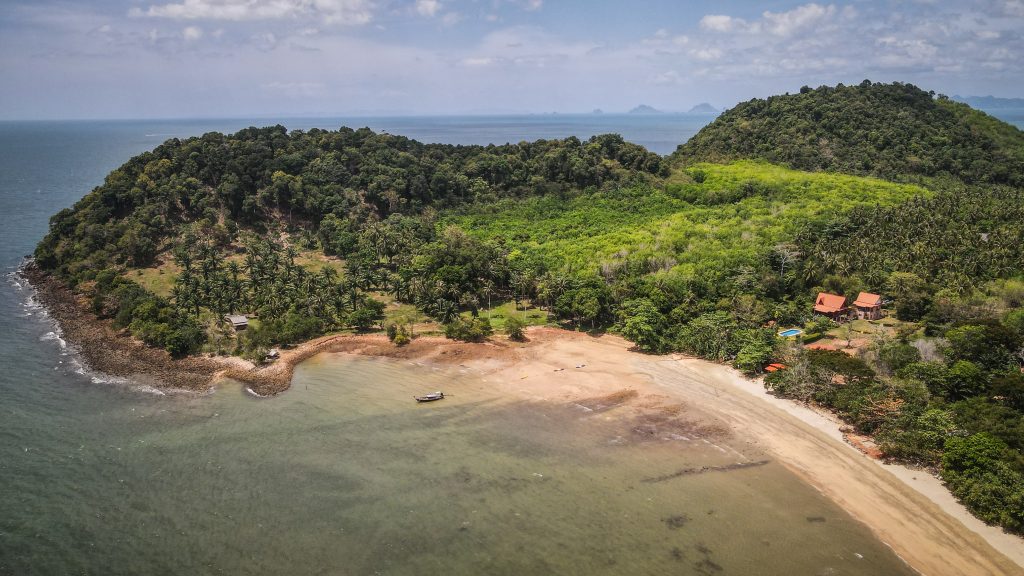
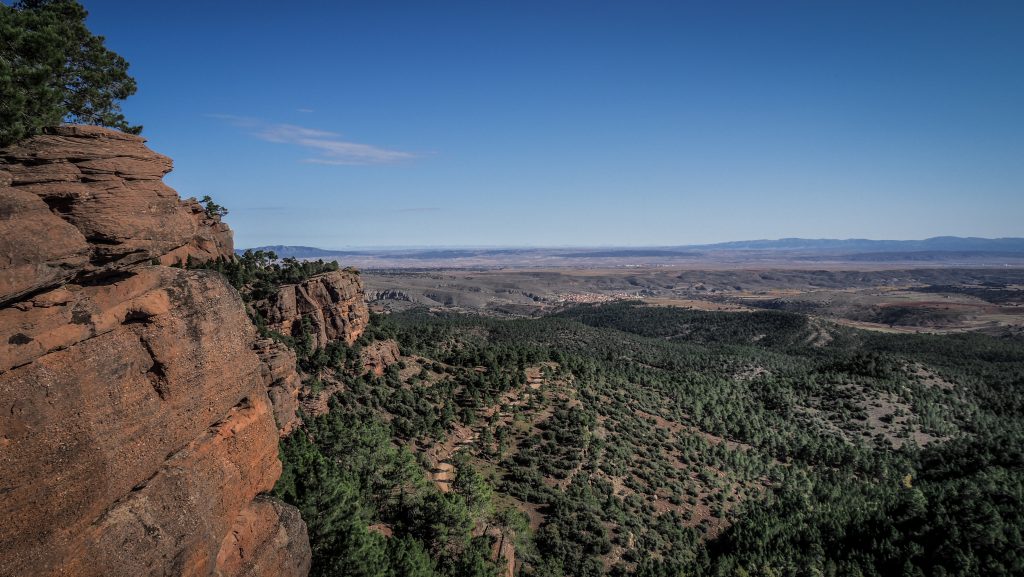
Aerial view of Koh Hong
How to get to Koh Hong?
There are two basically only two options. You can either join one of the organized group tours or charter your own long-tail boat or speedboat. The first one is obviously way cheaper. I contacted Say Yes Krabi Tourist Information through Line and the communication as well as booking process with Ton was very easy. You may also go to their office in person. The tour was organized very well and there was nothing to complain about. Price was about 1000 THB plus 300 THB for the entrance ticket to the national park. Lunch and non-alcoholic drinks were provided. Additionally, we stopped at Lading Island, which is also beautiful!
When to go?
I strongly recommend travelling in the high season, between October and April. In the rainy season, trips may be infrequent or the seas could be a bit rough making the trips uncomfortable.
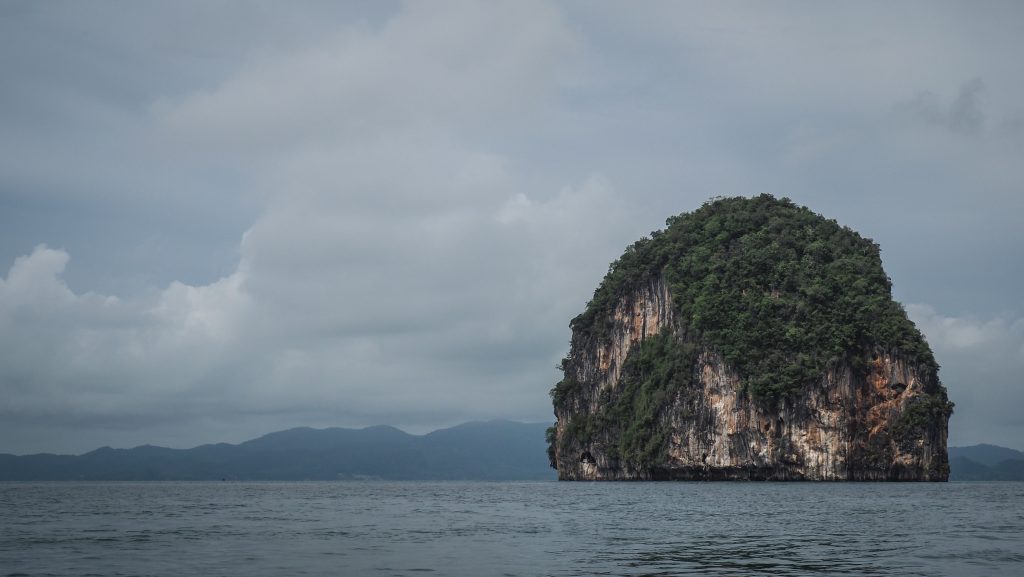
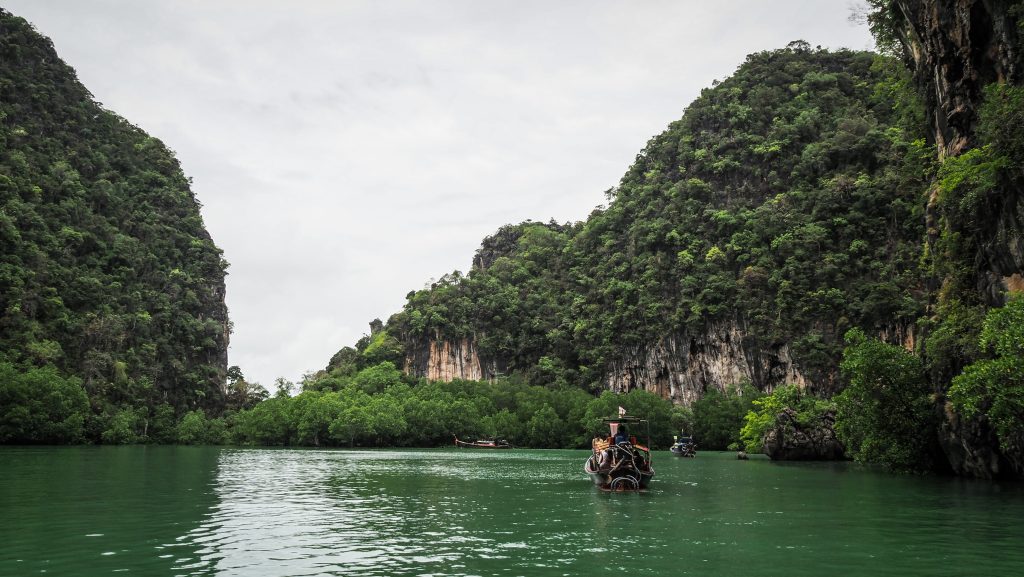
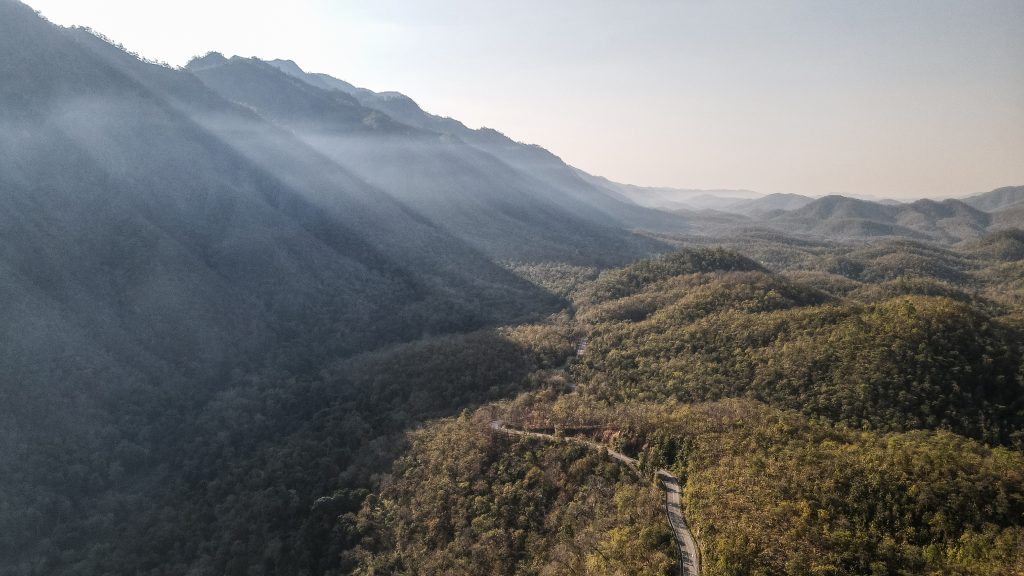
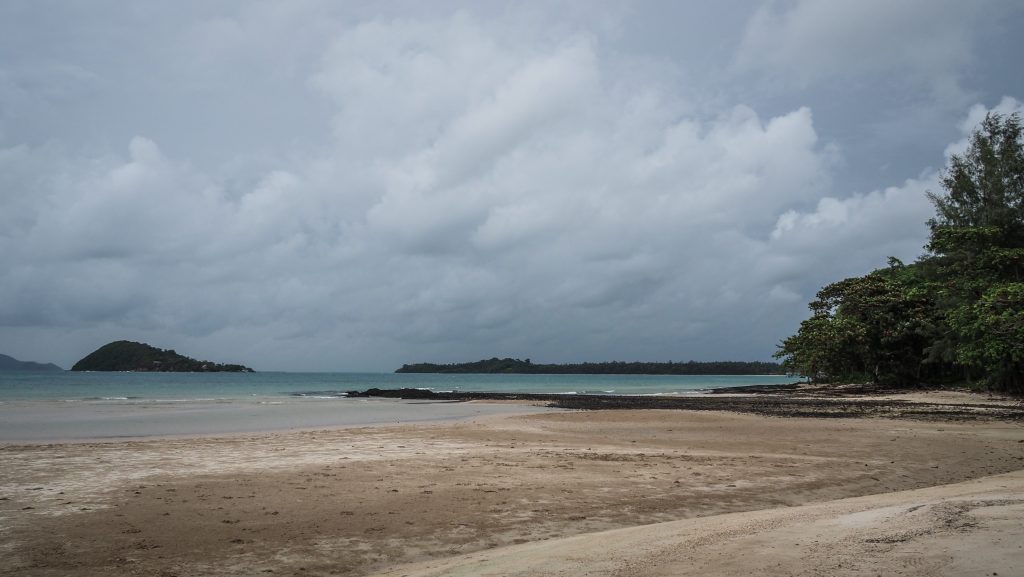
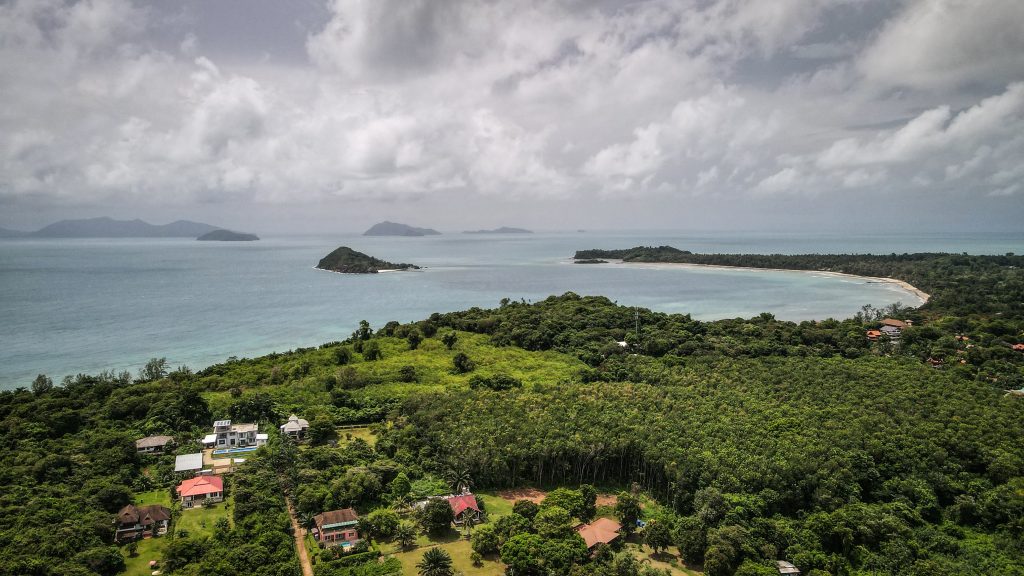
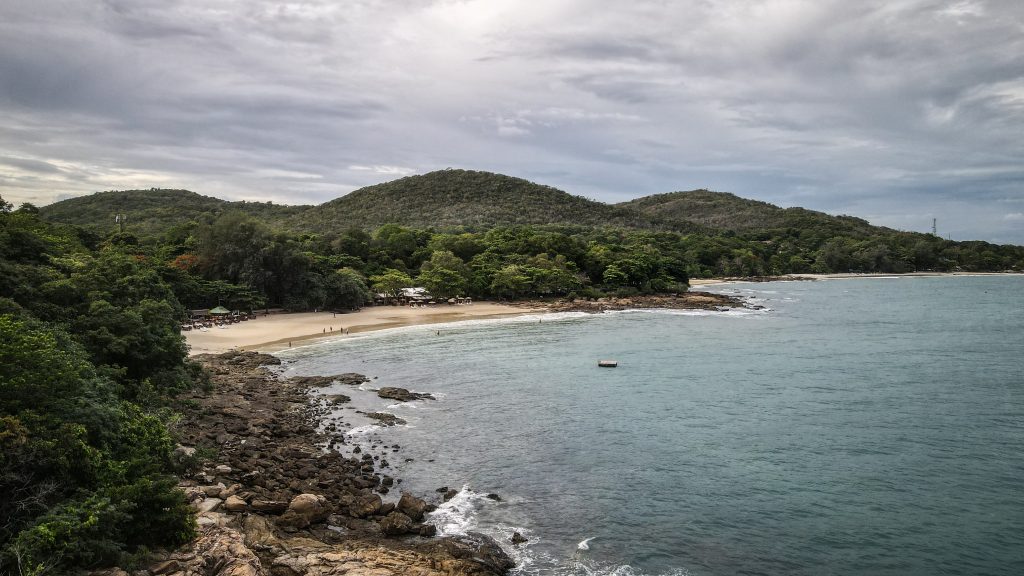
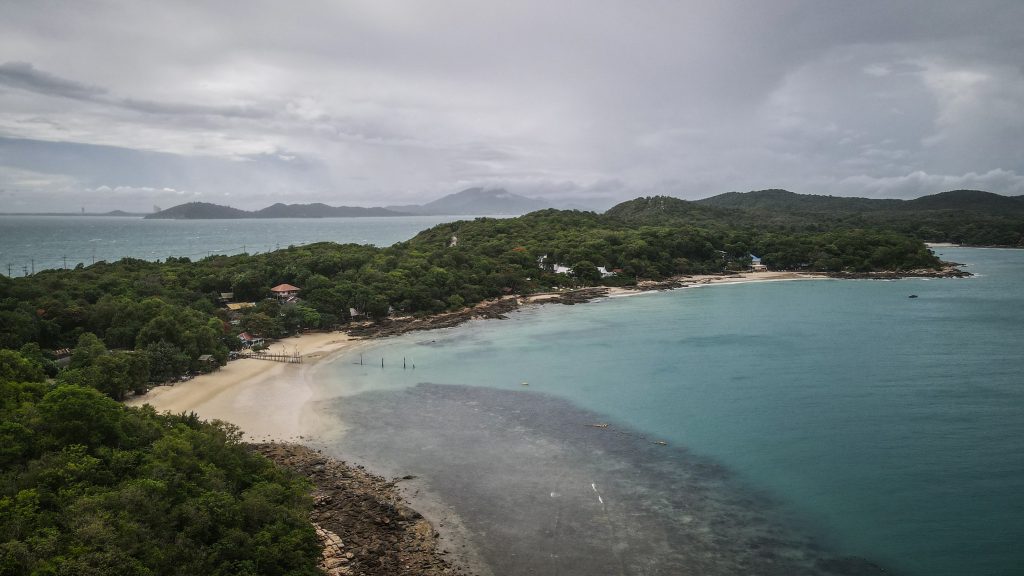
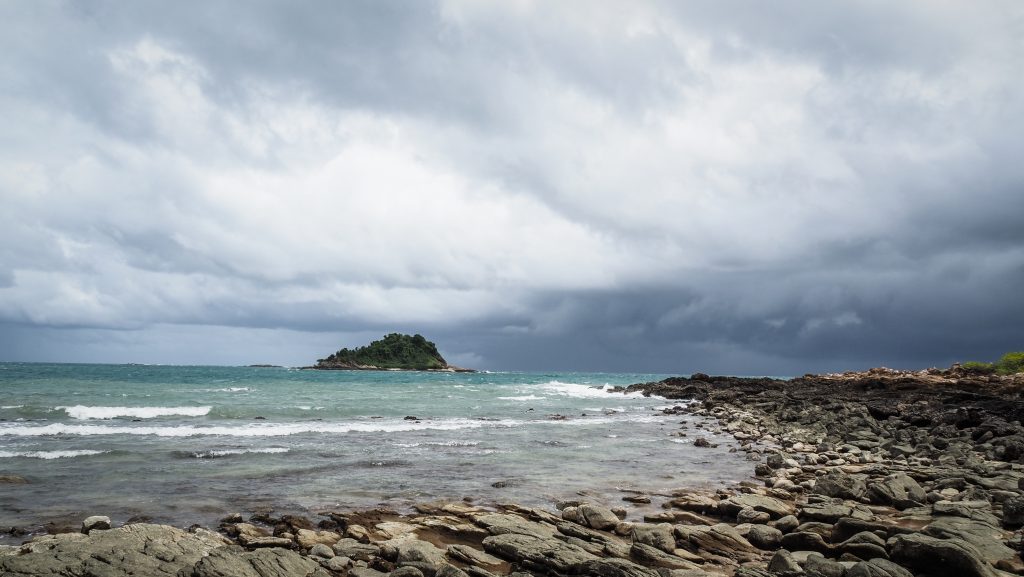
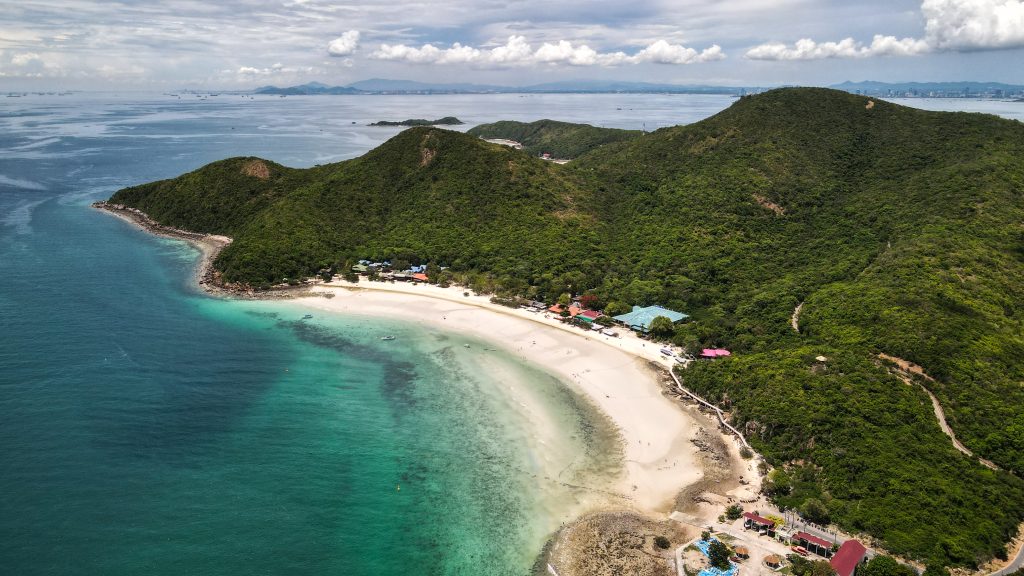
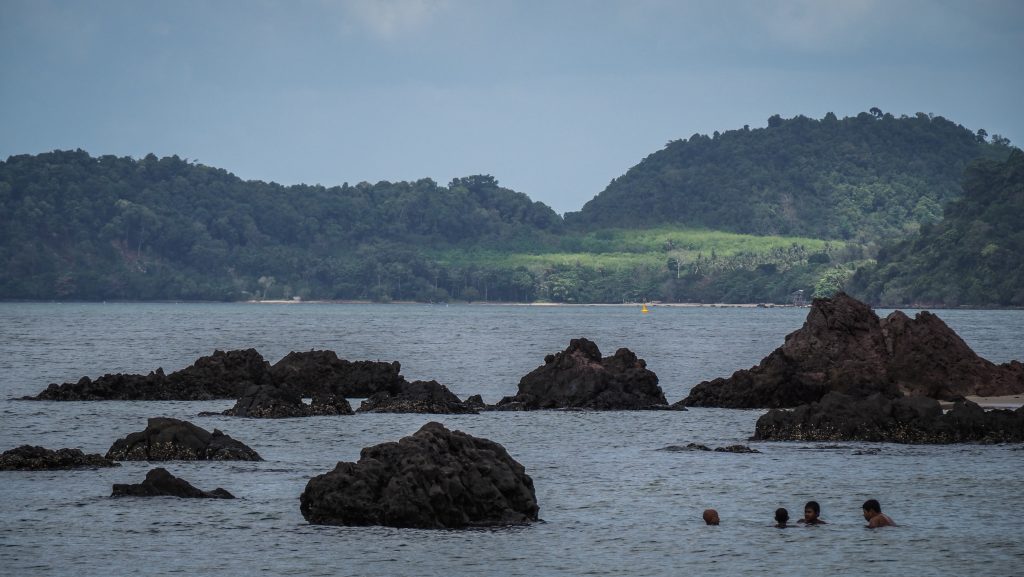
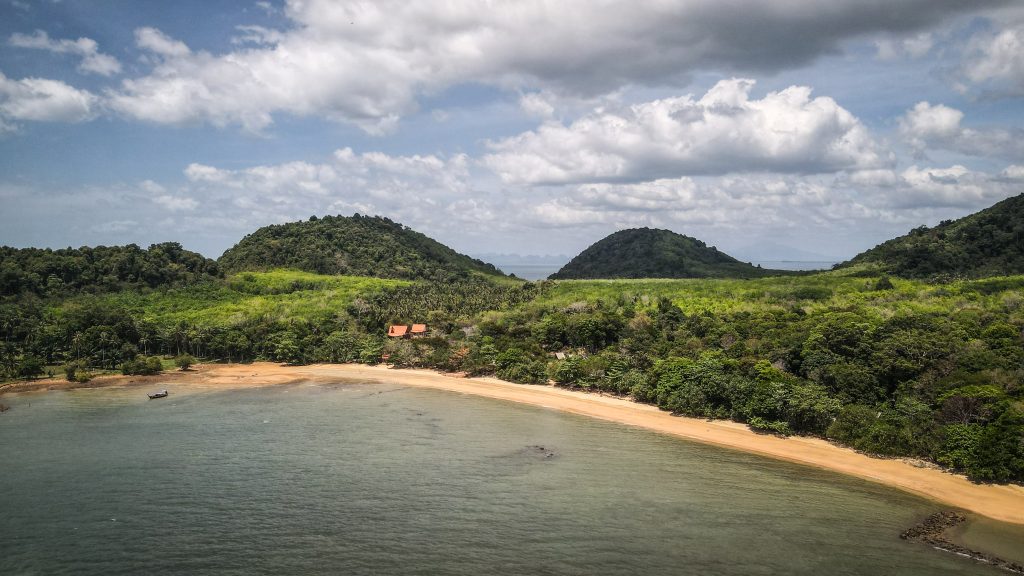
You will pass a lot of small islands en route to Koh Hong
How long to stay?
The trips usually stop at the beach for about 2 – 3 hours and I would say it is enough to visit the viewpoint and relax. The remaining time will be spent visiting Hong Lagoon and Lading Island.
Where to stay?
There are no accommodation facilities on Hong Island. I recommend staying in Ao Nang, Krabi or Railay Beach. In Ao Nang, there is a very nice place called The Krabi Forest Homestay where I stayed for a few nights.
Getting around the island
Options are limited to… walking! There are absolutely no roads or anything like that, just a beach and the stairs leading up to the viewpoint.
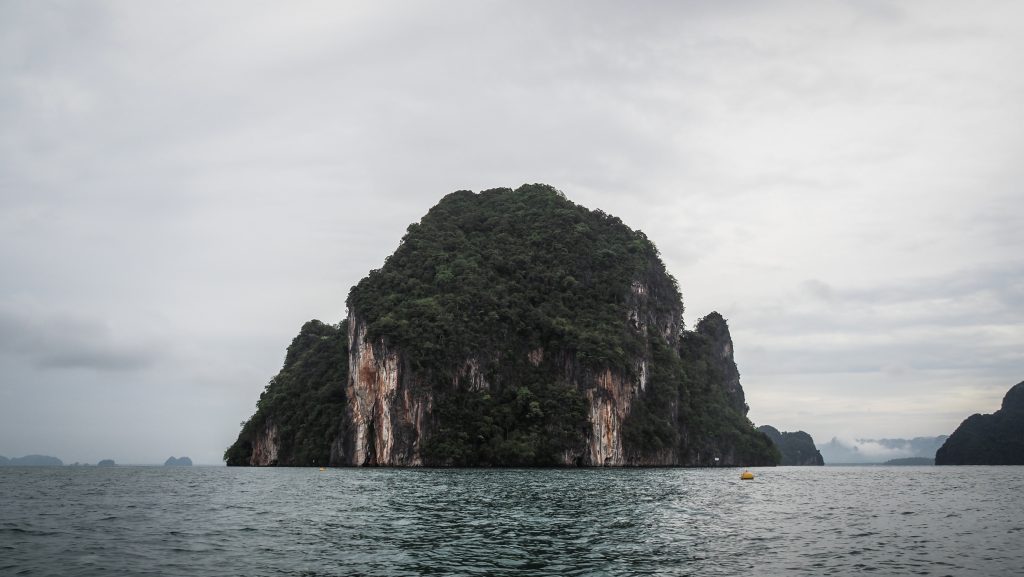
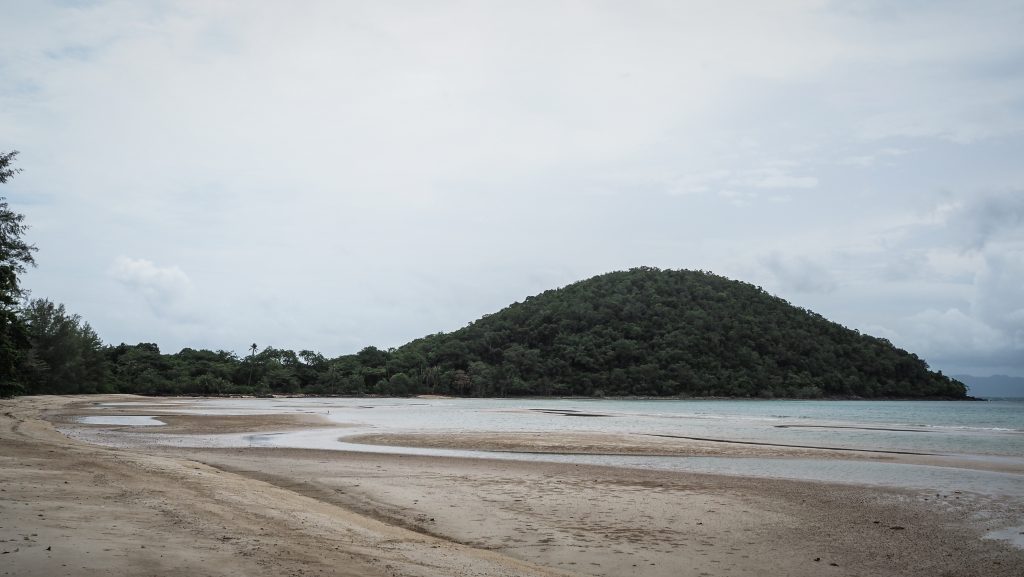
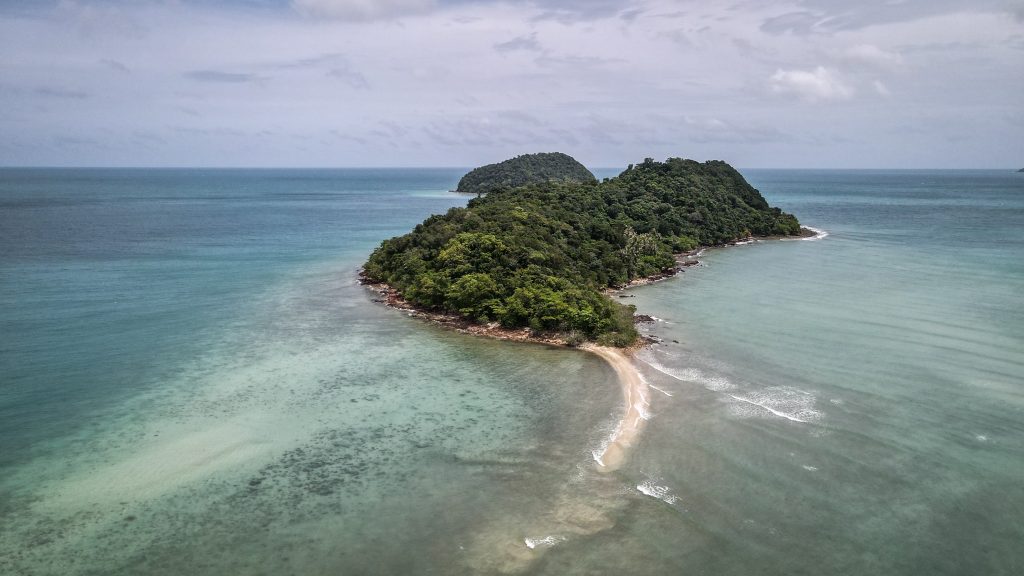
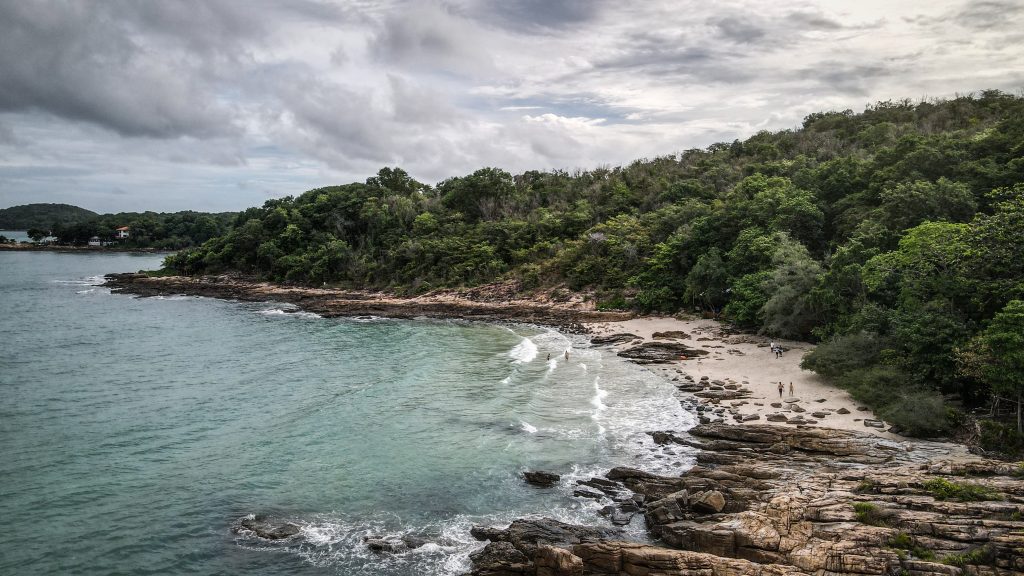
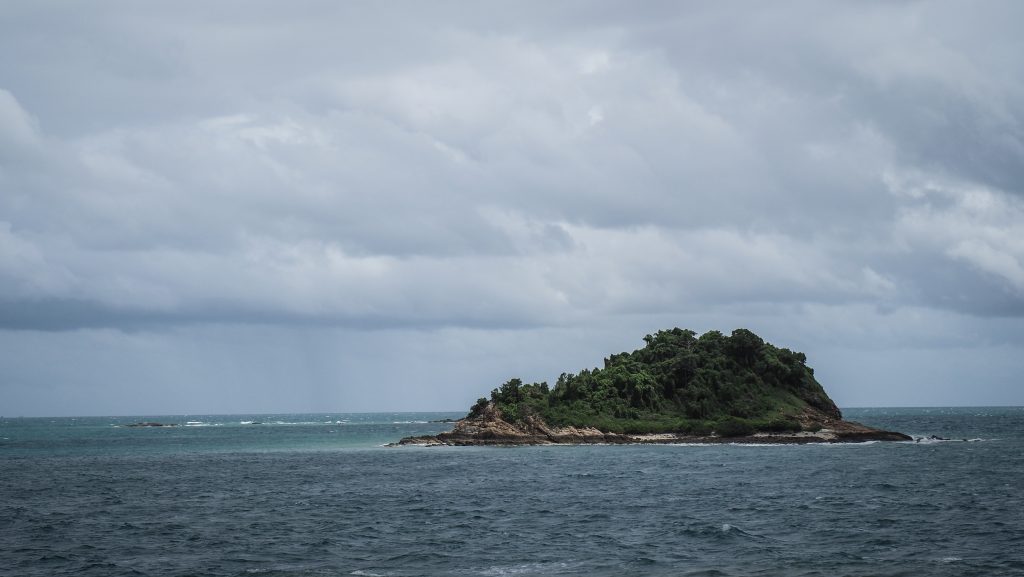
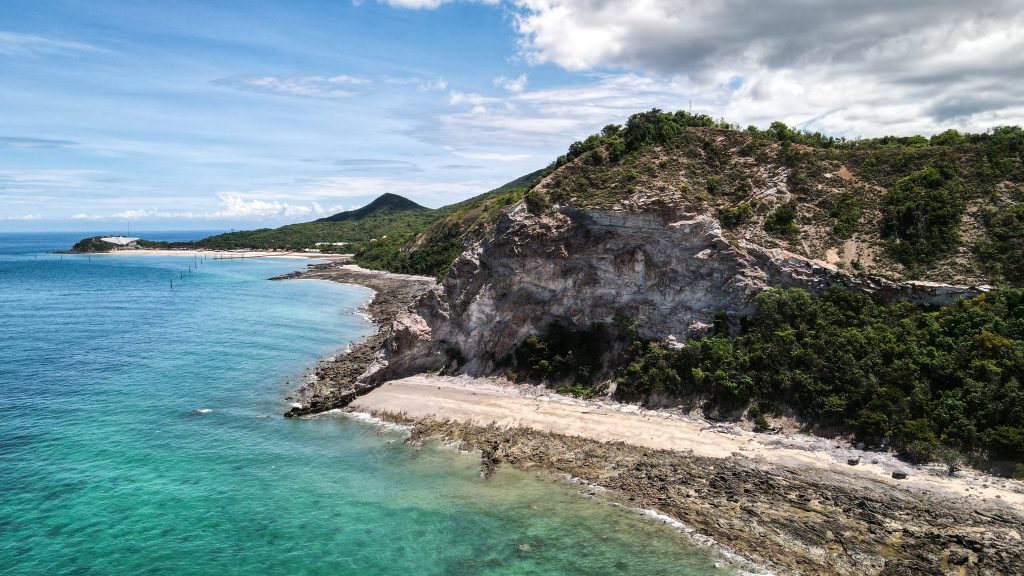
One of the small islands around Koh Hong
What to do on Koh Hong?
Besides admiring the views from the beach or short climbing to the viewpoint, there are other classic water activities available, such as kayaking or snorkelling or rather short hiking.
360° Viewpoint
It takes around 30 minutes to go to the top with more than 200 rather steep steps. The view up there is a simply stunning 360 degrees panorama. Definitely the highlight of the trip!
Amazing view from the top of Koh Hong!
Hong Lagoon
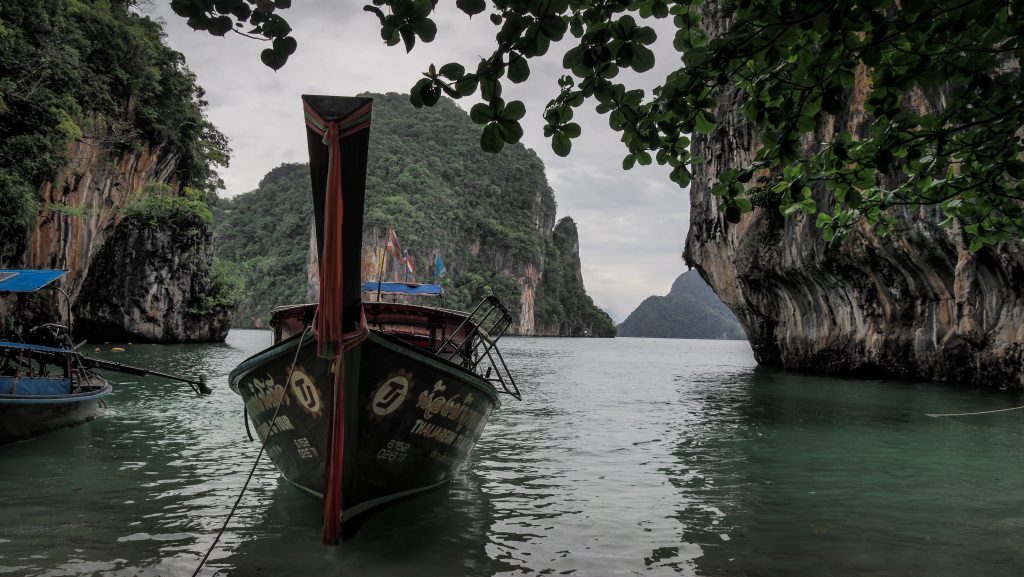
The Hong Lagoon is part of every Hong Island Tour. The boats enter inside through anarrow rock opening and then you get some time to enjoy the turquoise waters surrounded by limestone cliffs. The weather wasn’t very good at that time so we stayed on the boat but in general, you can do some snorkelling and swimming here.
Aerial view of Hong LagoonEntering the Hong Lagoon
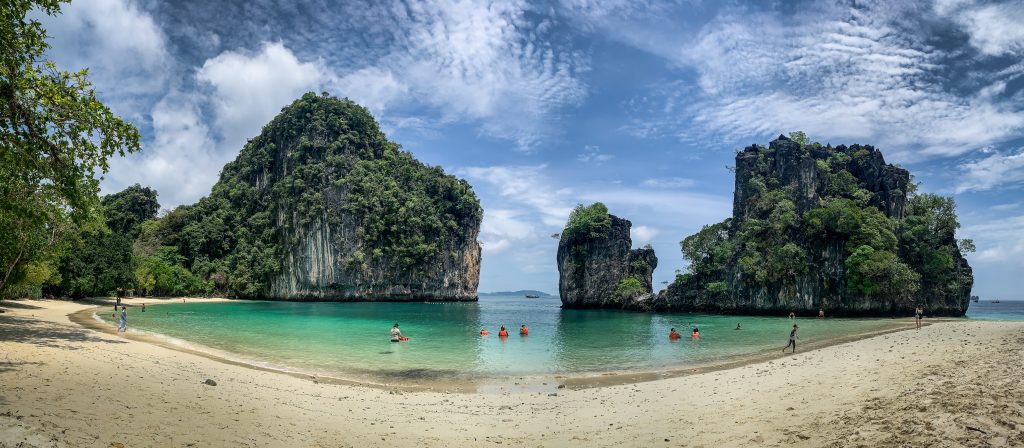
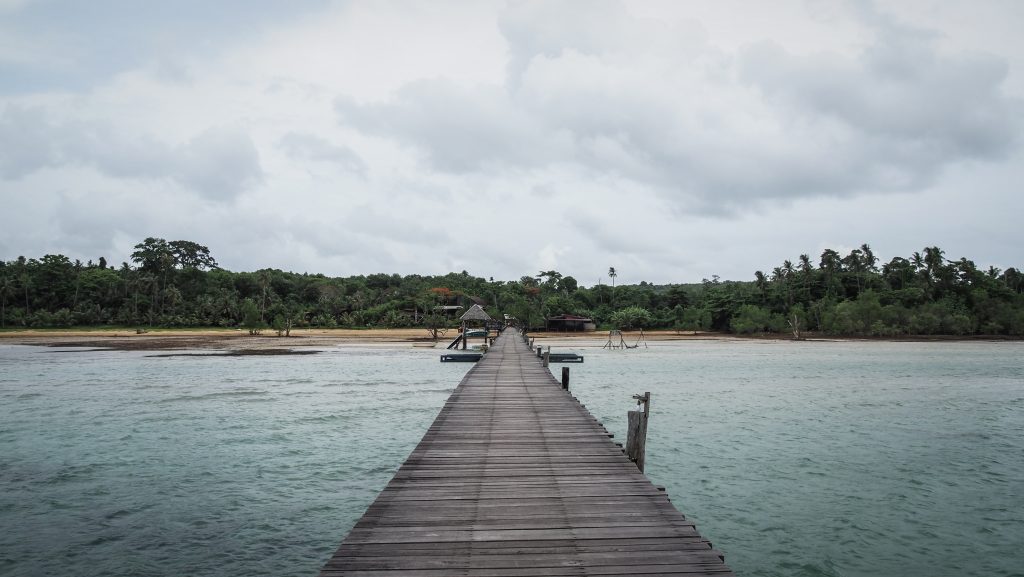
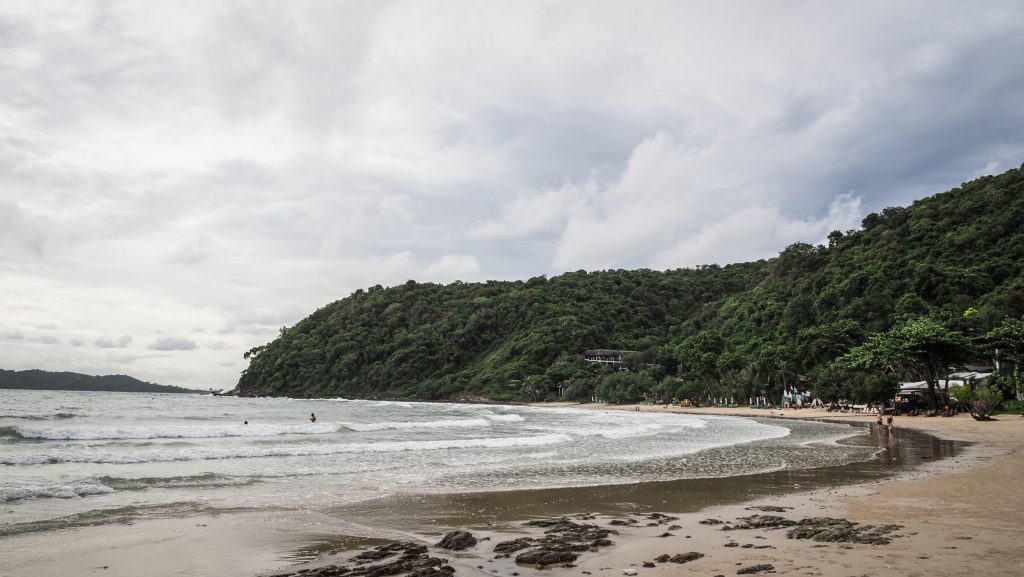
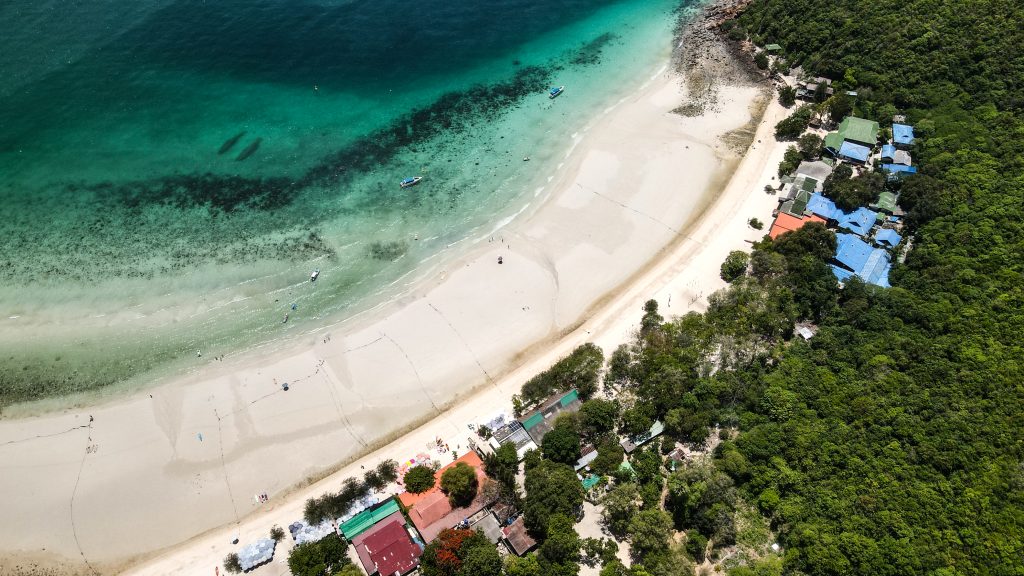
Beach
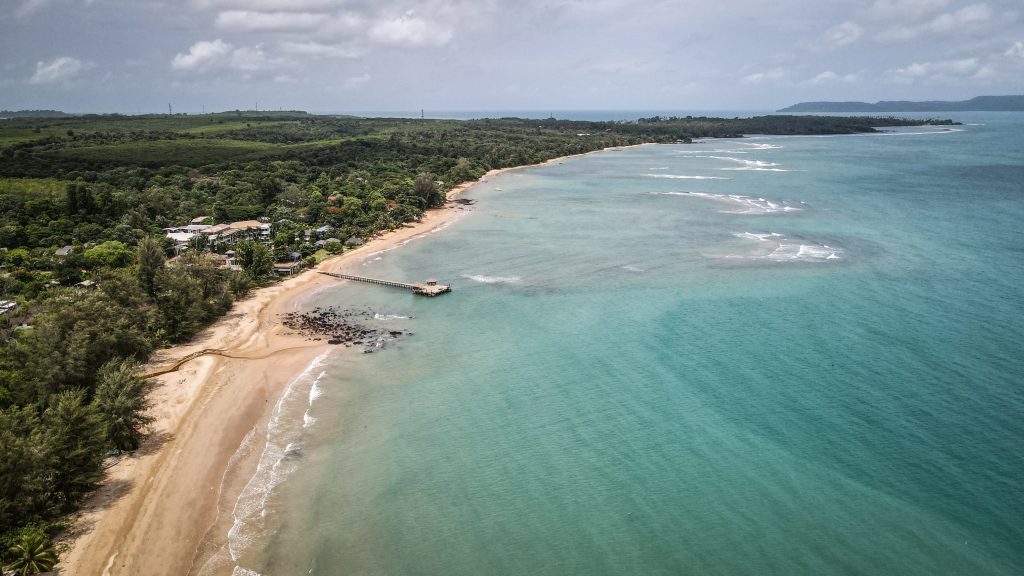
On one side there is the jetty for longtail boats and speedboats and on the other side is an amazingly soft white sandy beach with iconic rocks just in front. Crystal clear waters are perfect for snorkelling and exploring a wide range of colourful fish.
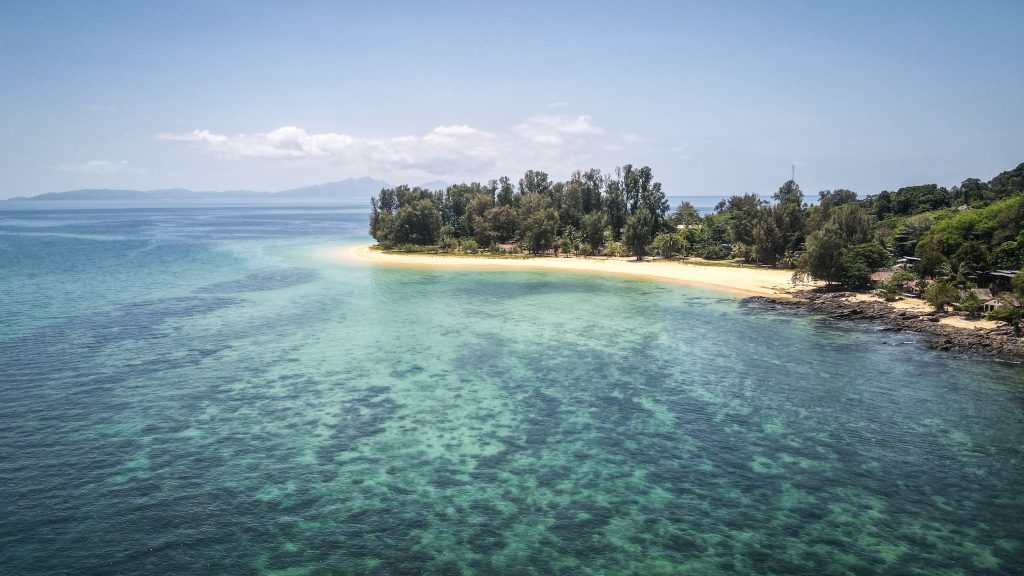
Superb beach on Koh Hong
Lading Island
Lading Island is about 2.5 kilometres north of Hong Island and is usually included in the itinerary of day tours. The beach is not too wide but very picturesque. There were some jellyfish in the water so we didn’t snorkel.
The small bay at Lading IslandThe weather in the morning was a bit cloudy!
Is there any better way for discovering a new region than doing it at your own pace, with your own vehicle, stopping where you want and for as long as you want? Northern Thailand is perfect for that and there is one famous route for that – Mae Hong Son Loop.
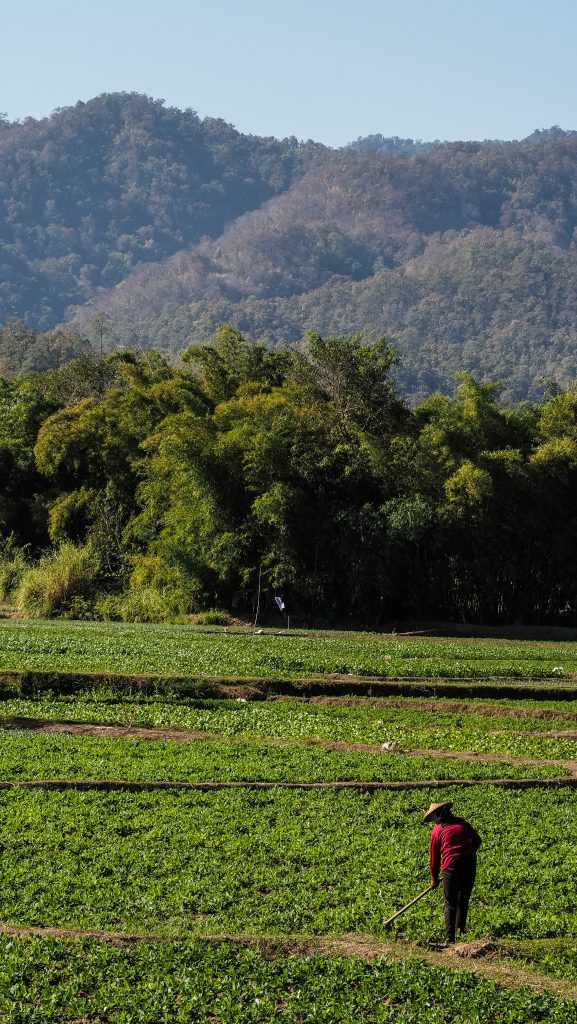
Mae Hong Son is the name of the whole province, bordering Myanmar to the west. The nature here is great, even though it’s not a typical landscape of Thailand that may be seen on postcards. There are mountains, forested national parks with waterfalls, lakes and caves as well as many ethnic hill tribe communities living around the rice fields. Driving the whole loop isn’t the most touristy thing to do either. Most people fly in or take a night train from Bangkok to Chiang Mai to hang around there, do a couple of hikes and see elephants but they rather don’t go further than Pai. But that will be a benefit to you, as there is no shortage of amazing sceneries in Mae Hong Son and you may experience them in a peaceful atmosphere.
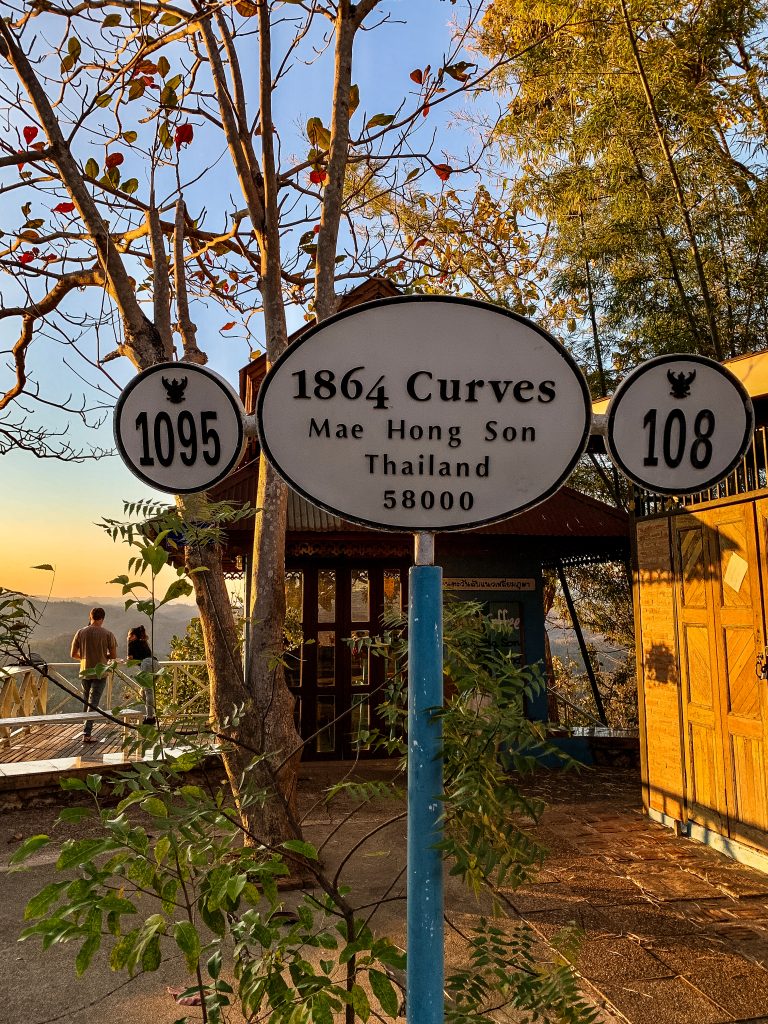
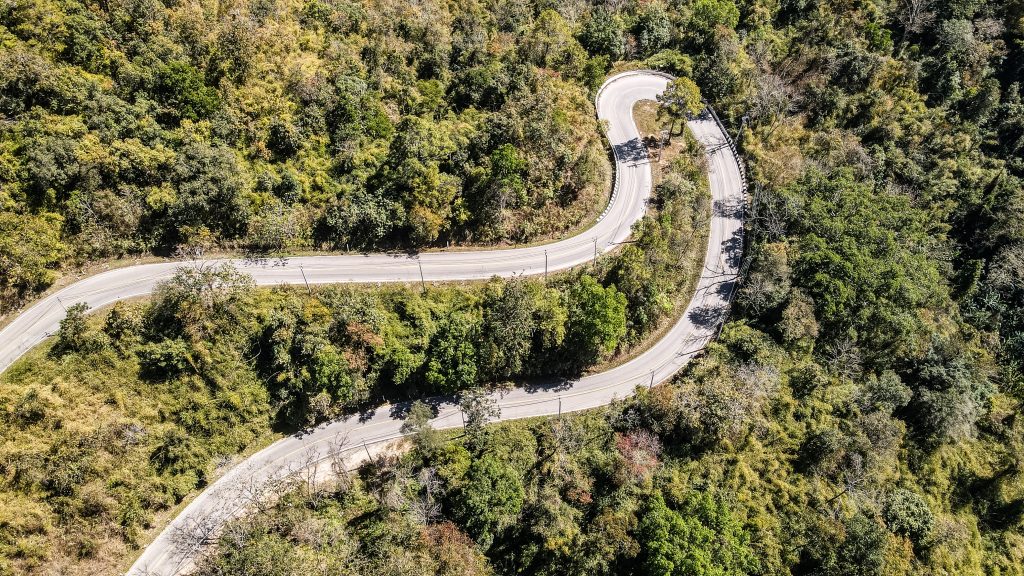
The basic version of Mae Hong Son Loop is over 600 km long but it can easily be extended for another 200 or even 300 km depending on the detours you are going to take. And there are so many beautiful spots that certainly you shouldn’t just stick to the main route. My guess is that I covered about 950 km in 5 days. It’s quite a lot and if I do it again, I would split this distance over a longer period of time. There are 1864 curves on the main route so take your time and better get some experience in riding a motorbike before you attempt the Mae Hong Son Loop.
Obviously, most travellers start and finish the adventure in Chiang Mai. There are good train connections with Bangkok as well as the international airport and motorbike or car rental companies. Here is the overview of the places that I visited as well as accommodation.
Where to rent a motorbike?
I rented a black Honda Click 125CC in very good condition at Mr Mechanic Shop No. 2. The cost was 250 THB per day plus 50 THB of optional insurance which I decided to take for the peace of mind. It was fine for travelling alone and I never had any situation when the engine was not powerful enough. Probably it would be fine for 2 people too, as long as you travel really lightweight. They don’t ask for your passport as long as you leave 3,000 THB of deposit. Better to lose some money than an official document if things go wrong. A driving licence is not checked but of course, it’s good to have the international version of your licence for a motorbike. If you drive illegally, cops can fine you about 500 THB which isn’t a big deal, but if you have an accident, your medical insurance won’t cover you and healthcare in Thailand isn’t cheap.
Here are the address and contact details for the rental company: 127/3 Mun Mueang Rd, Tambon Si Phum, Chiang Mai 50200, Thailand Phone: +66827628302
My rented Honda Click 125CC
There are 1864 curves on the main route
Itinerary and distances
Please remember that the total distance below includes additional attractions that I wanted to see even though they were pretty far from the classic route and longer detours were needed.
Day 1: Chiang Mai to Pai via Huay Tung Tao Reservoir, Mok Fa Waterfall and Huai Nam Dang National Park (~ 130-150 km)
Day 2: Pai to Sop Pong via Nam Lod Cave (~ 60-70 km)
Day 3: Sop Pong to Mae Hong Son via Ban Jabo, Ban Rak Thai and Karen Village (~ 170-180 km)
Day 4: May Hong Son to Hang Dong via Mae Surin National Park, Khun Yuam and Mae Sariang (~ 330-340 km)
Day 5: Hang Dong to Chiang Mai via Op Luang National Park and Doi Inthanon National Park (~ 200-210 km)
First curves of day 1
Day 1: Chiang Mai to Pai
Leaving Chiang Mai in the morning hours isn’t the most pleasant experience. The traffic is rough so be extra careful and ride slowly. For me, the whole section of Road 107 until the turn-off to Pai was the most stressful of the whole trip, with heavy traffic and big buses or trucks passing by.
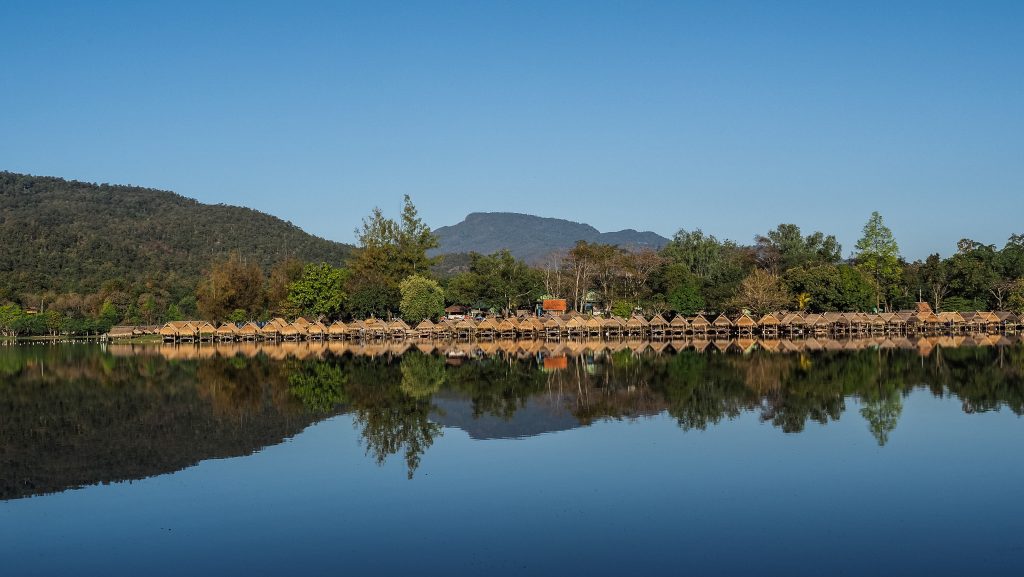
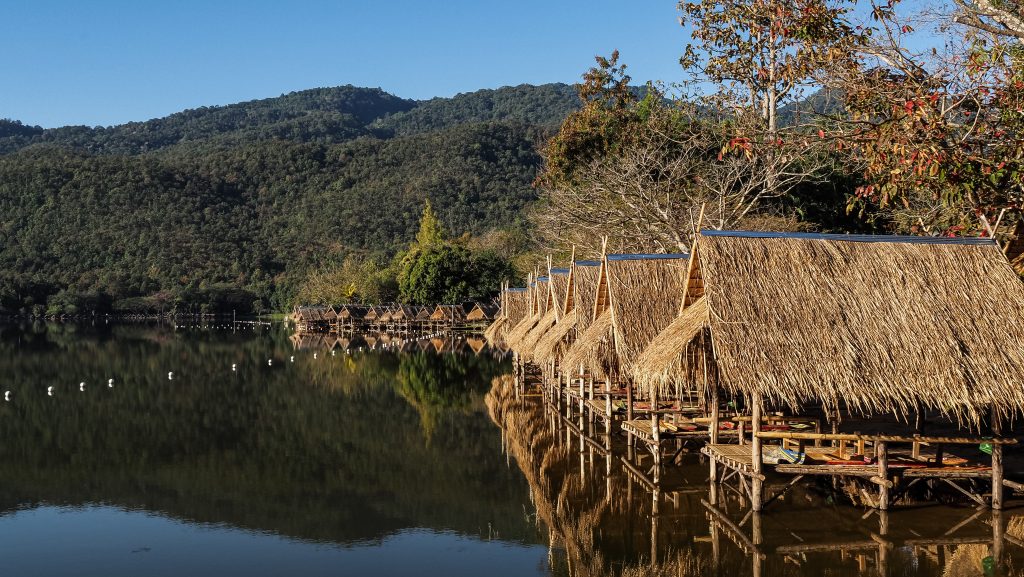
The first stop that I recommend is Huay Tung Tao Reservoir. It’s a man-made lake lined with bamboo huts and restaurants serving local dishes. Very good place for a second breakfast and a short break from the busy road. It’s about 20-30 minutes away from Chiang Mai centre, depending on the traffic.
Calm morning at Huay Tung Tao ReservoirAerial view of Huay Tung Tao ReservoirNice places to chill around the lake
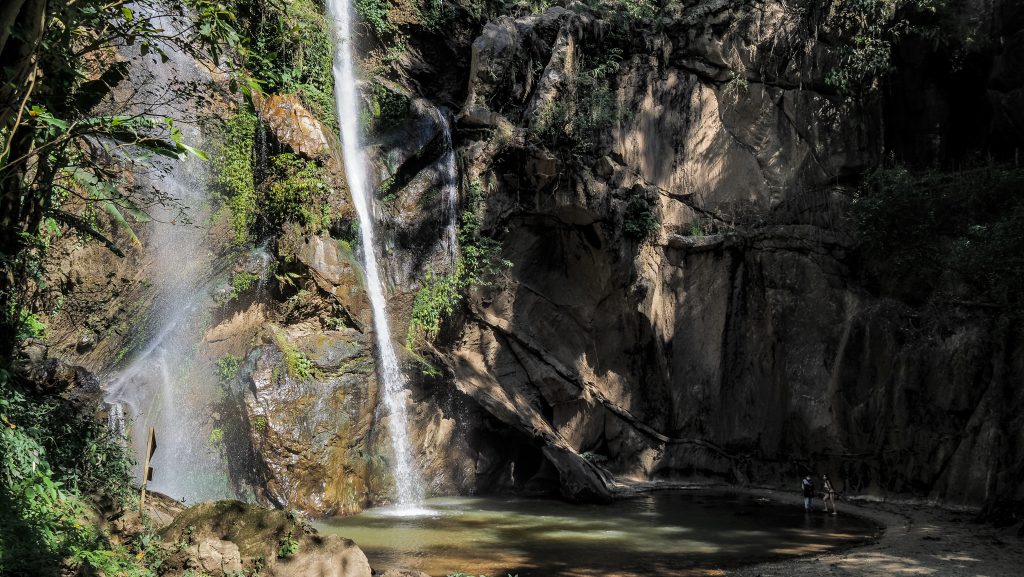
After that, return to Road 107 and continue north where at the major intersection you will need to turn left towards Pai. You can’t miss it because you can see a complete A330 airbus by the side of a road! From there, it’s about half an hour to the Mok Fa Waterfall.
The entrance costs 100 THB for foreigners plus 20 THB for motorbike parking but I think it’s worth it. There is a short way from the parking to the waterfall, about 500 m through the beautiful forest. You may also take a walking path to explore nature on the other side of the river and have a look at the waterfall from a different angle.
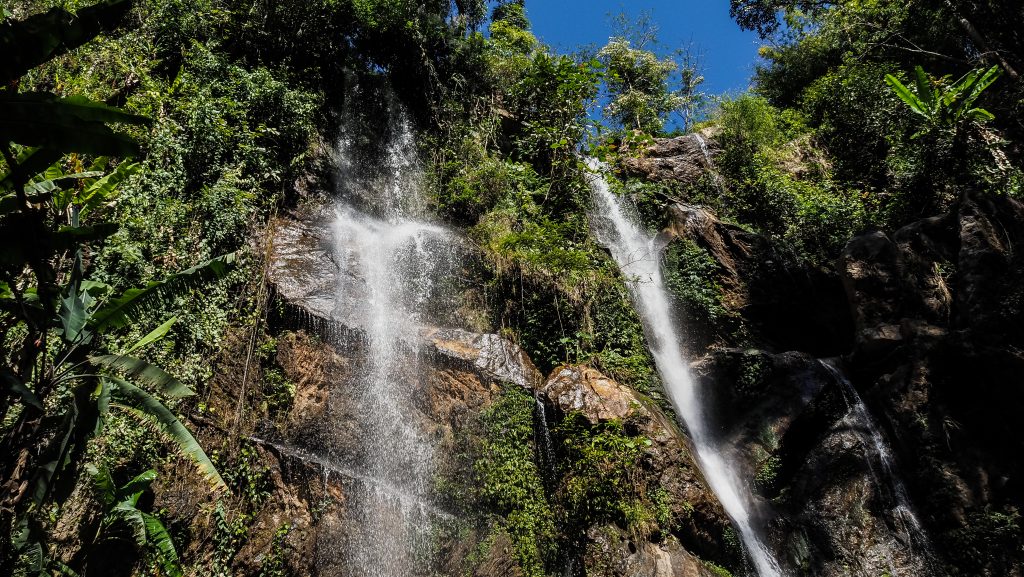
Great nature at Mok Fa Waterfall Mok Fa Waterfall
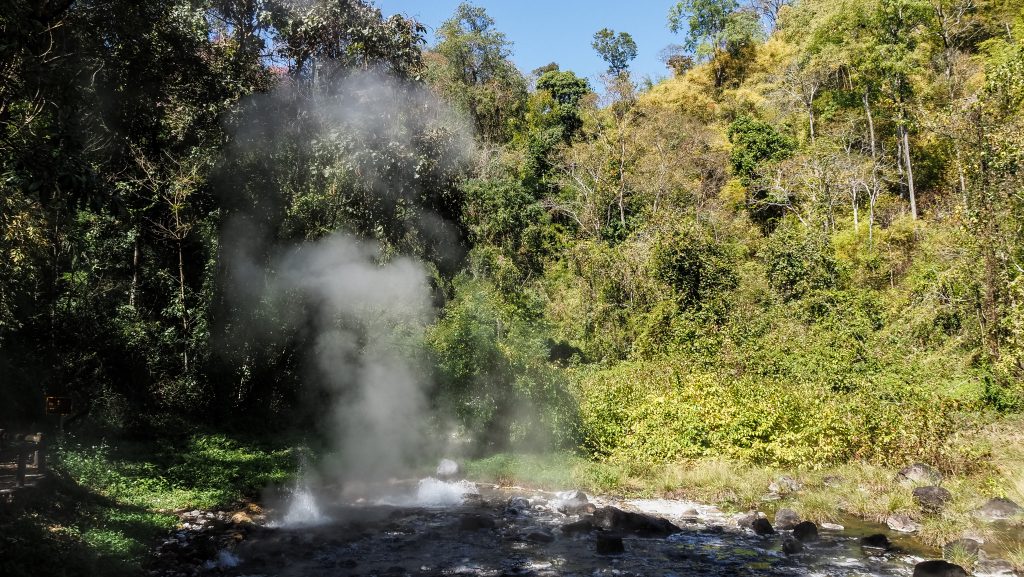
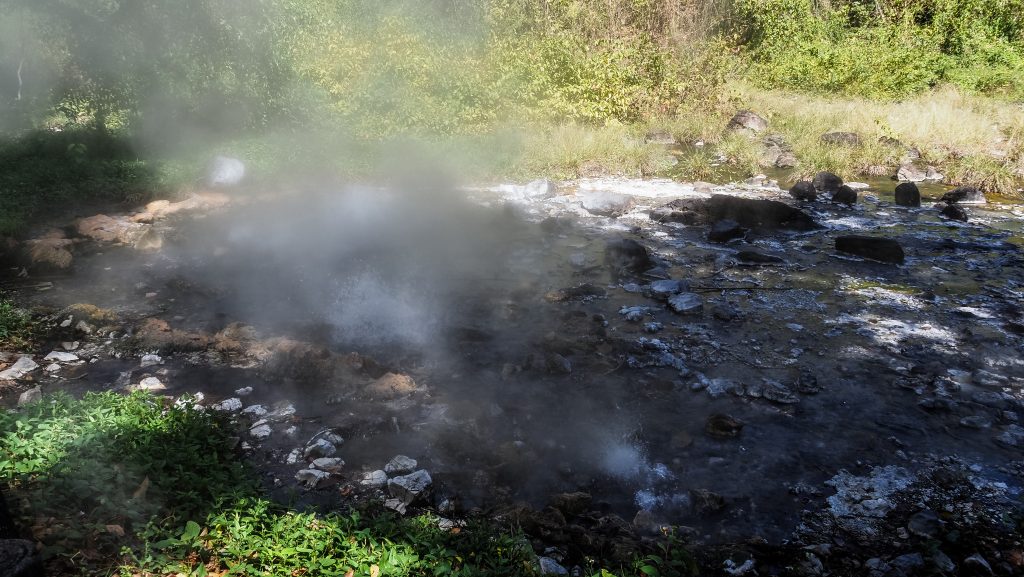
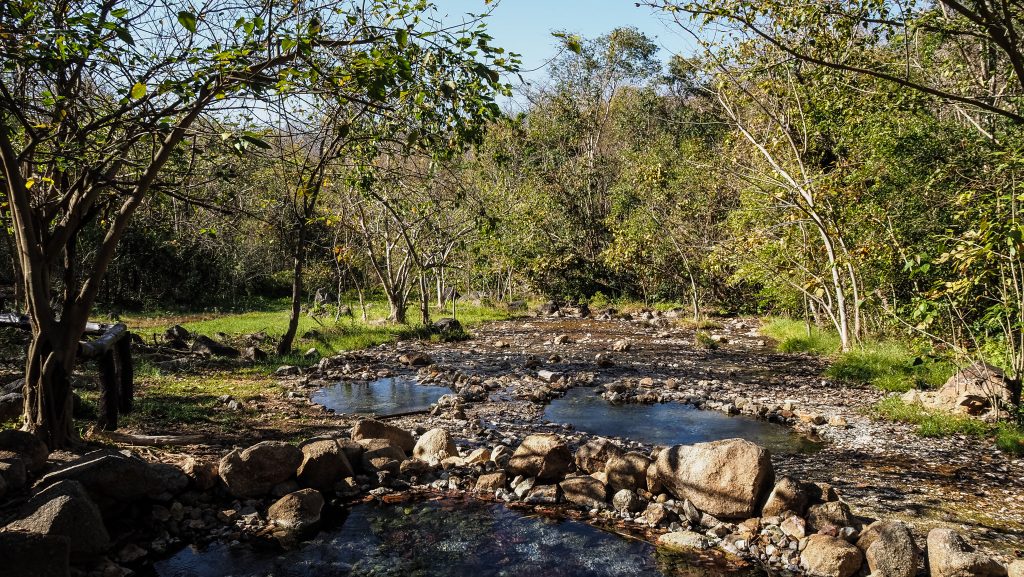
Get back to your motorbike and continue for another 30 km to Pong Dueat Hot Spring The road becomes more winding in that section so it should take you about 50-60 minutes to reach it. Unfortunately, the place seemed to become a bit neglected during the pandemic time and only some of the large thermal pools were open. The entrance fee for foreigners is quite high too, 300 THB per person but luckily it gives you also access to other sites belonging to the same national park. Besides pools, there is a nice loop walking trail where you can see a bubbling hot geyser. I definitely didn’t expect to see a place like that in Thailand!
Bubbling water holes at Pong Dueat Hot Spring Unexpected view in Thailand
If you continue towards Pai, soon you will see another entrance to Huai Nam Dang National Park on your right side. It’s worth making use of your ticket here and checking out the viewpoint with a fantastic panorama of Doi Luang Chiang Dao. There is also scenic camping, which might be an option in case you prefer staying in nature, rather than in the city of Pai.
Viewpoint in Huai Nam Dang National Park
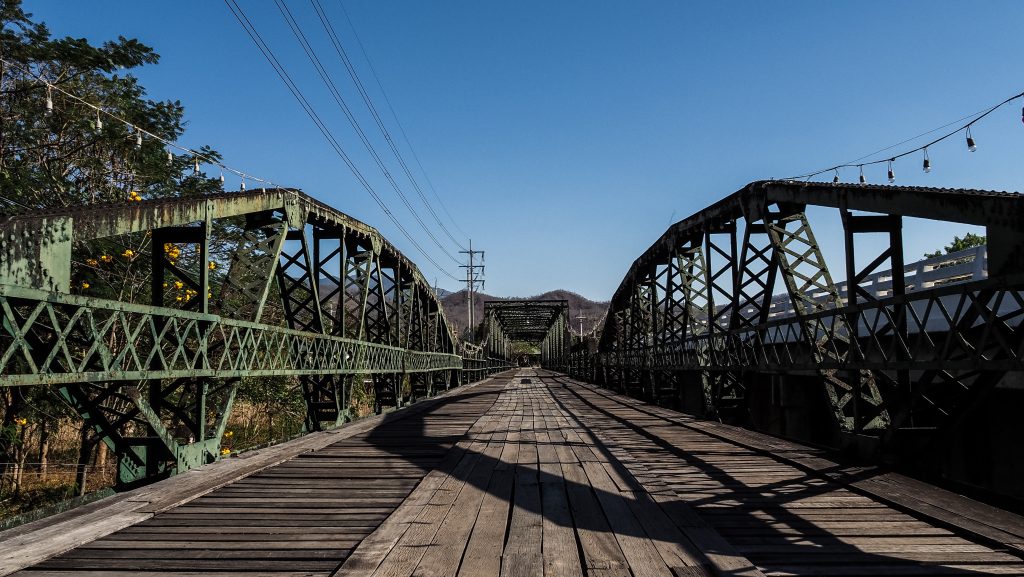
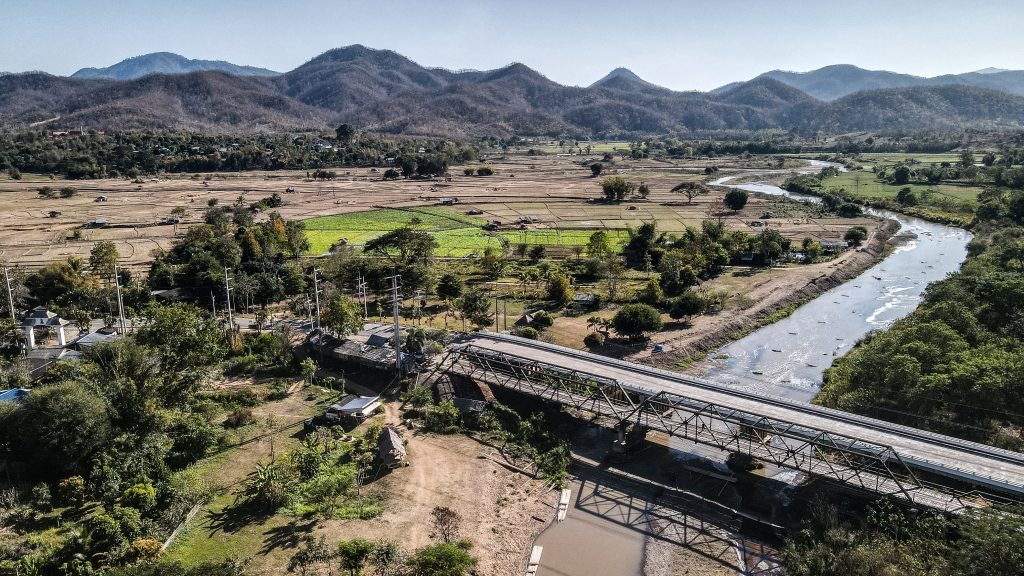
The next stop should be the scenic Tha Pai Memorial Bridge. In WW2 the Japanese used forced labour from the surrounding villages to construct a strong wooden bridge from which to attack British-held Burma. In their defeat, they burned down the bridge and the villagers constructed another wooden bridge which was swept away by floods in 1973 to be replaced by the metal one seen today. A good idea is to park the motorbike and walk across or even go down to the riverside.
Nice walk over Tha Pai Memorial BridgeThe landscape around the bridge is very scenic
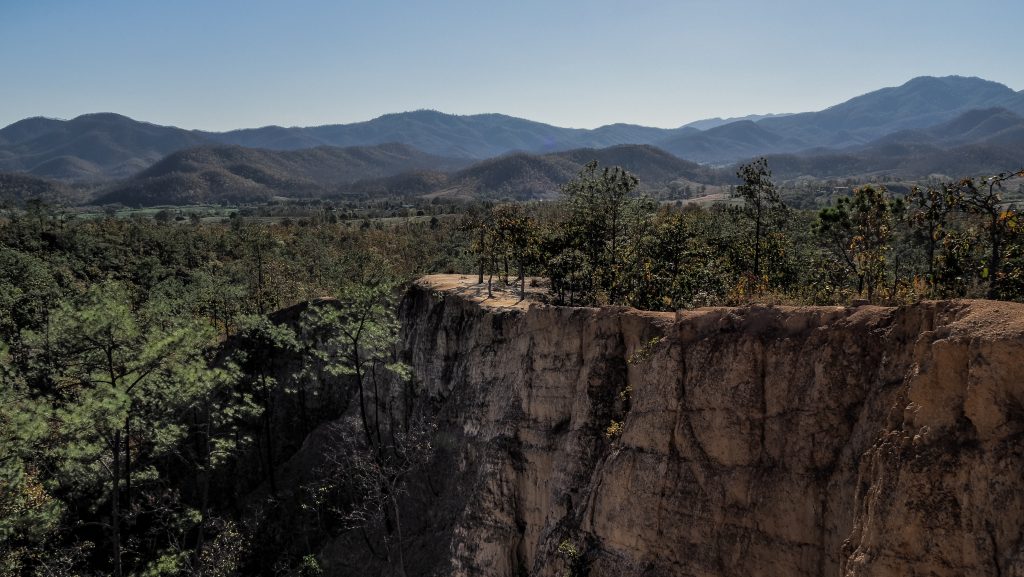
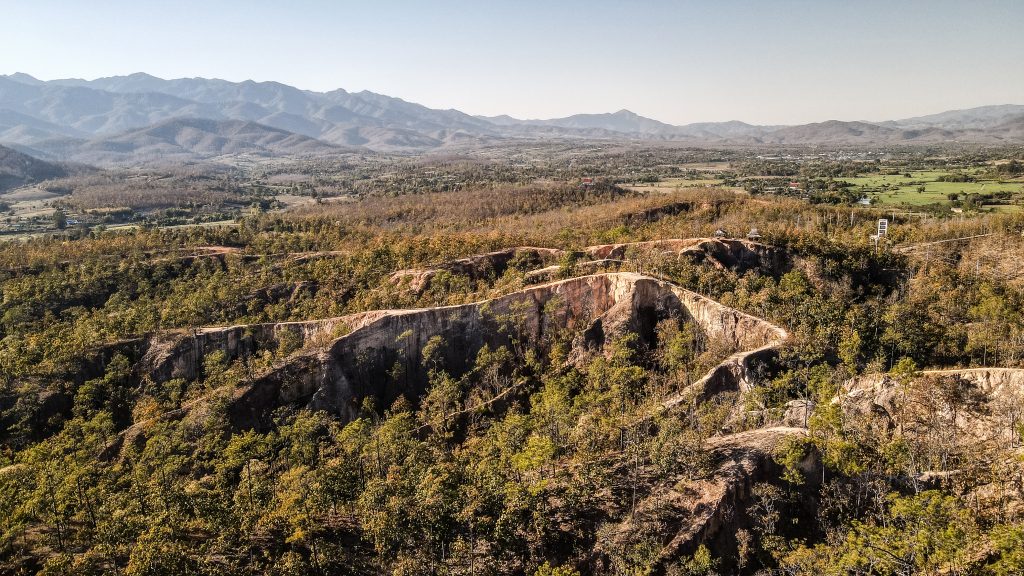
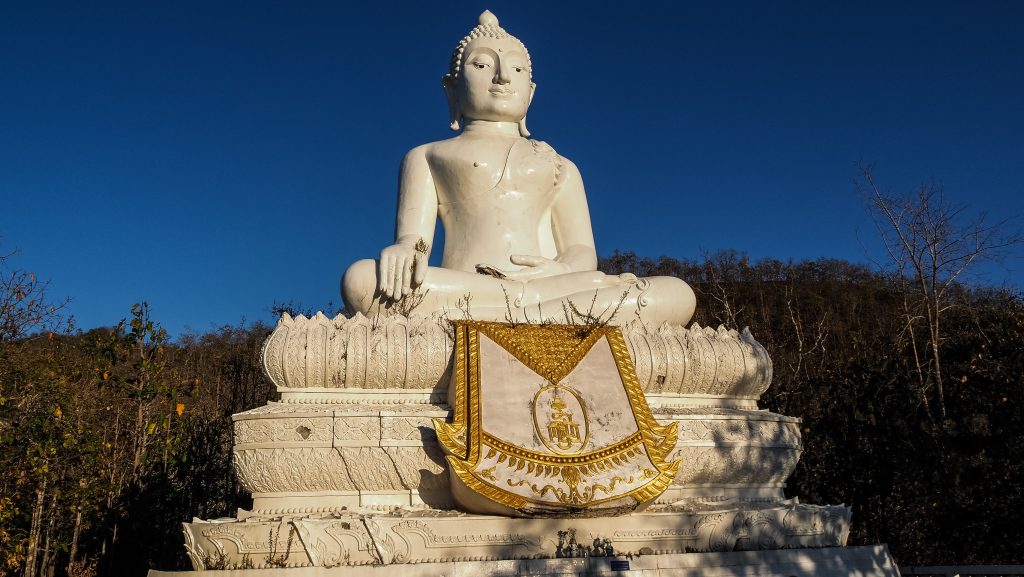
Further towards the city centre is the last stop for today – Pai Canyon. It’s a great place for watching the sunset and it’s free of charge. There is a short walk from the parking to the viewpoint but the fact is that you can walk around freely and discover the area by taking pictures from different angles. The ridges sometimes get quite narrow so better be careful and wear something better than flip-flops. An alternative place for sunset would be Big Buddha Pai or Wat Phra That Mae Yen, but you will need to climb 353 steps to the top. It’s hard to say which of these two places is better. I chose Big Buddha Pai and got some nice sunset footage from the drone.
Pai Canyon is a popular site for sunsetsNarrow edges of Pai CanyonAerial view of Pai CanyonBig Buddha in PaiAnother great spot for sunsets
After that, head to your accommodation for well-deserved rest. The classic choice for evening hangouts and street food is Pai Walking Street, which is compared by many to Khao San Road in Bangkok. I don’t fully understand this comparison and the big hype about Pai in general, but certainly, it is a nice place to stay when riding the Mae Hong Son Loop.
Optional: There are more places to dip in, such as Sai Ngam Hot Spring or Tha Pai Hot Spring. Having visited Pong Dueat Hot Spring before on that day, I decided to skip these ones and take a cold shower in my accommodation instead 🙂
Some people use hot water to boil eggsTha Phai Hot Spring
Day 2
This itinerary could easily be split into two days and I’m sure you would enjoy it way more without being in a rush. If you are a sunrise person, I recommend starting the day at Yun Lai Viewpoint. It’s 20 THB to enter and there is a cafe on site. Sunsets are not bad either, or you can even experience both while camping there.
Panorama from Yun Lai ViewpointIt’s an amazing place for camping!
On the way back, check out Santichon Village, a little Chinese-style site. It’s definitely set up as a tourist attraction and it doesn’t deserve anything more than a short stop, but it’s on the way to Pam Bok Waterfall. I made an unplanned stop here, just seeing the sign indicating tourist attraction and the fact that the counter was still closed encouraged me to have a look. If you arrive before 8 AM, most likely no one will be there so you can enter for free. Otherwise, the ticket for foreigners is 200 THB and I wouldn’t bother as the waterfall is really small.
A bit kitschy Santichon VillagePam Bok Waterfall
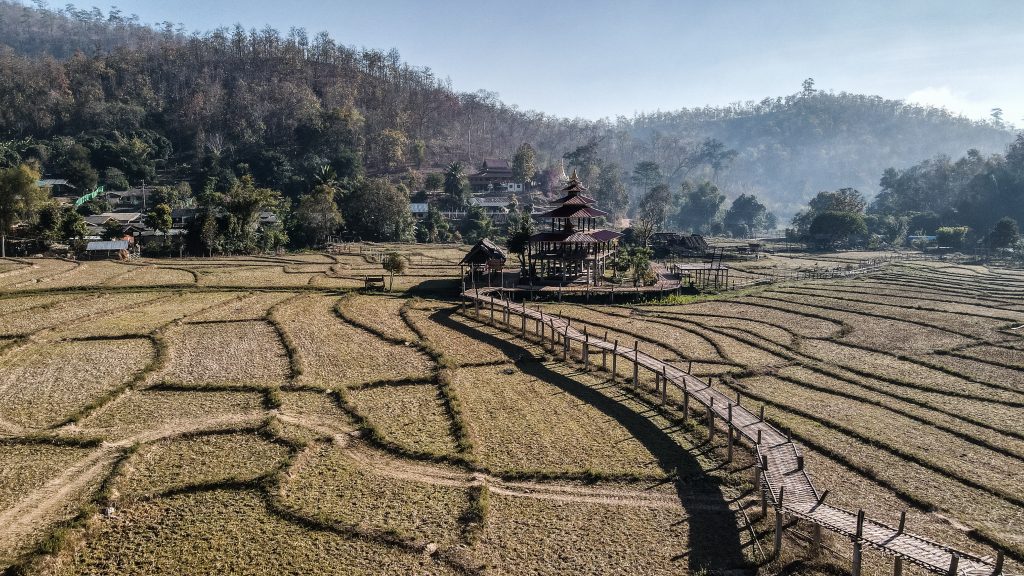
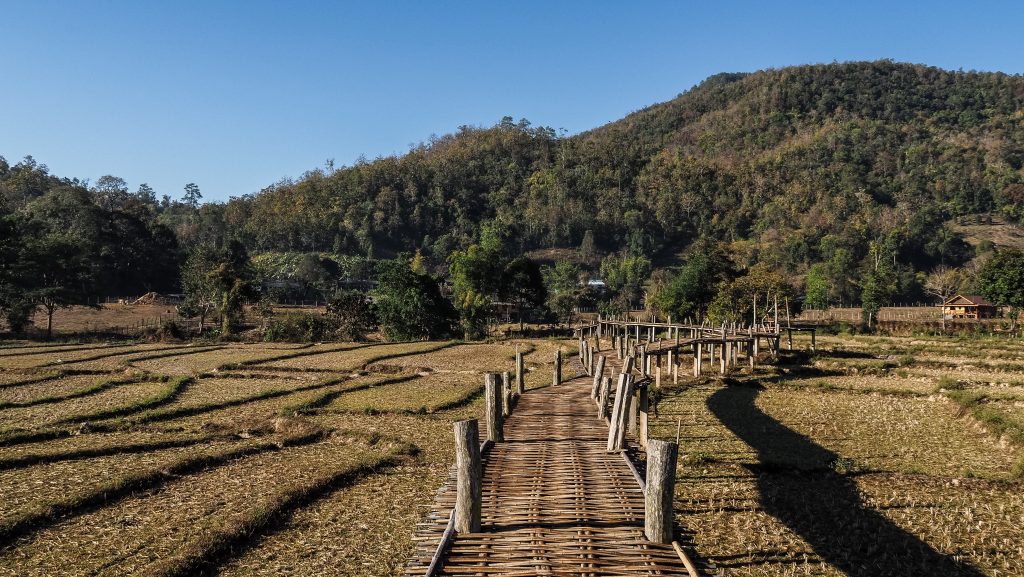
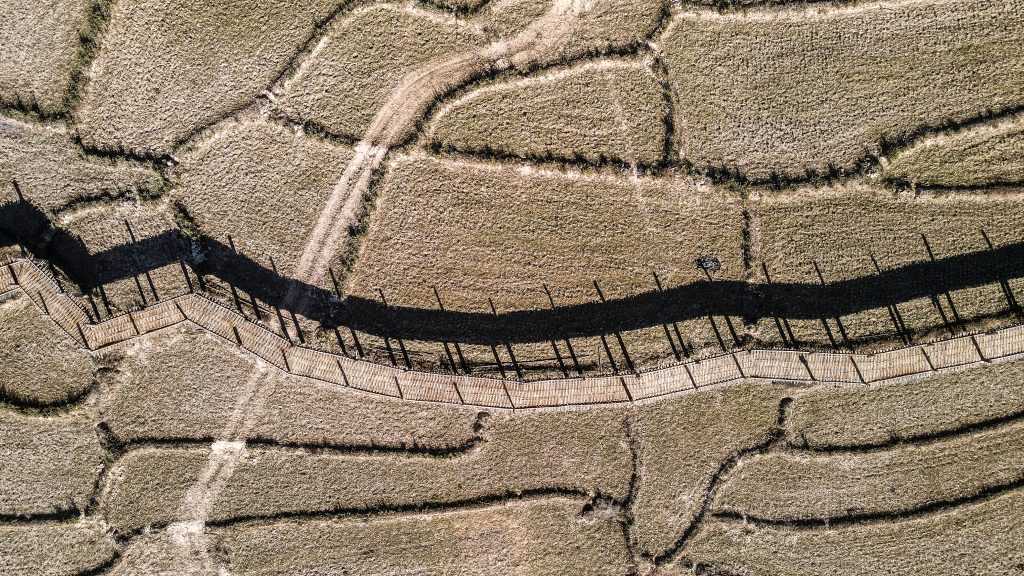
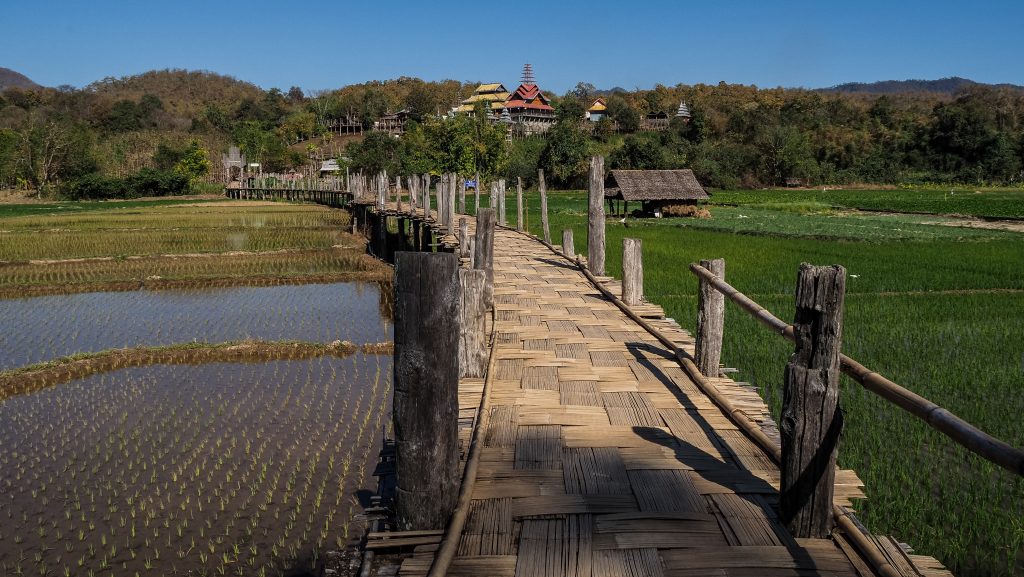
Further along, the same road was my initial destination: Kho Kuu So Bamboo Bridge. It’s an 815 metres long bamboo structure that runs through large rice fields, which was unfortunately dried at that time of the year (February). It’s free, but you can make a donation to the boxes provided at the entrance.
Morning mist around Kho Kuu So Bamboo BridgeUnfortunately, the ricefields are dry in JanuaryAerial view of Kho Kuu So Bamboo Bridge
After that, it’s time to answer the question: do I feel like going for a hike? If the question is yes, find “Starting point Mae Yen Waterfall” in your Google Maps and ride there. You might be able to cross the stream 2-3 times with your motorbike (depending on the water level) but then there is no other way but to park it and continue on foot. It will take you around 4-5 hours of hike, through the forest with multiple river crossings to get to this beautiful waterfall. Your shoes will definitely get wet so keep it in mind. I think the hike is doable in comfortable sandals (like Keen) but don’t attempt it in flip-flops. Take some snacks and water with you as there won’t be any opportunity to buy anything around the place.
Mae Yen Waterfall
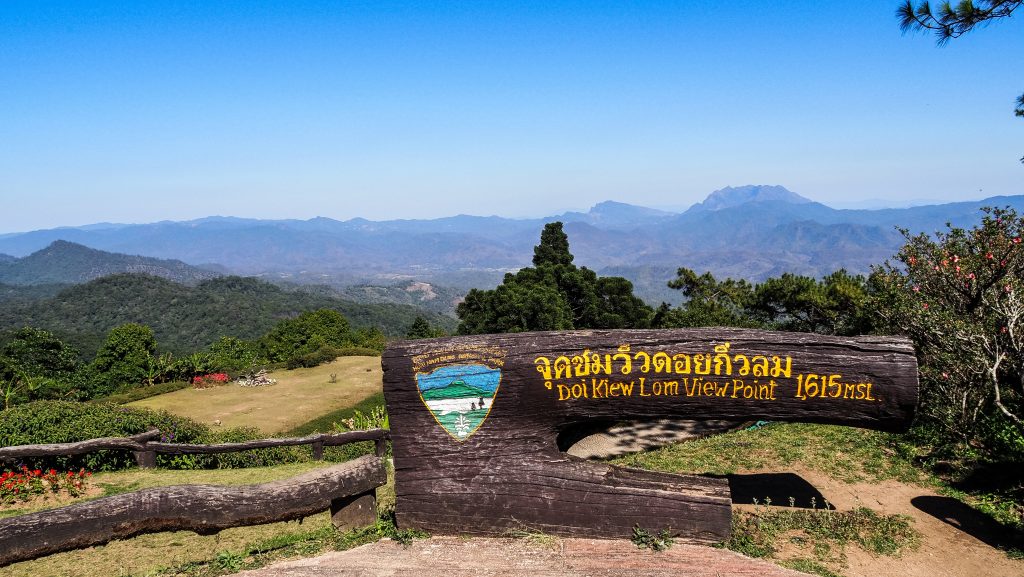
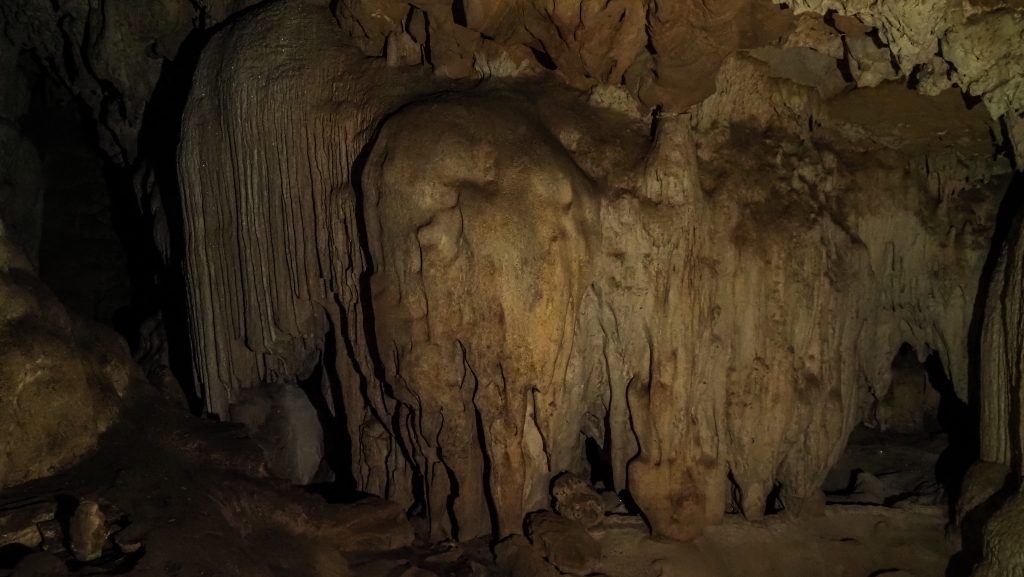
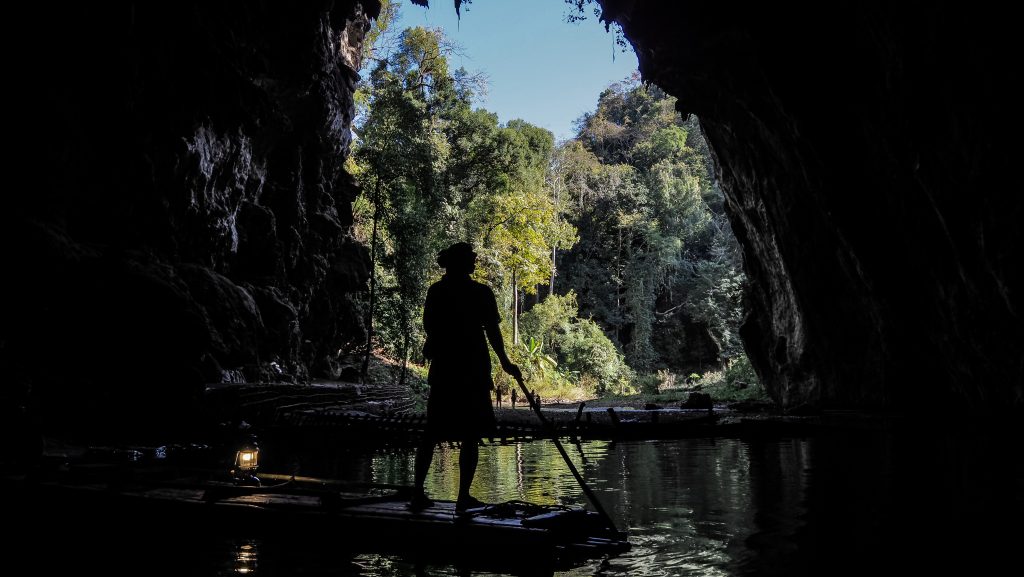
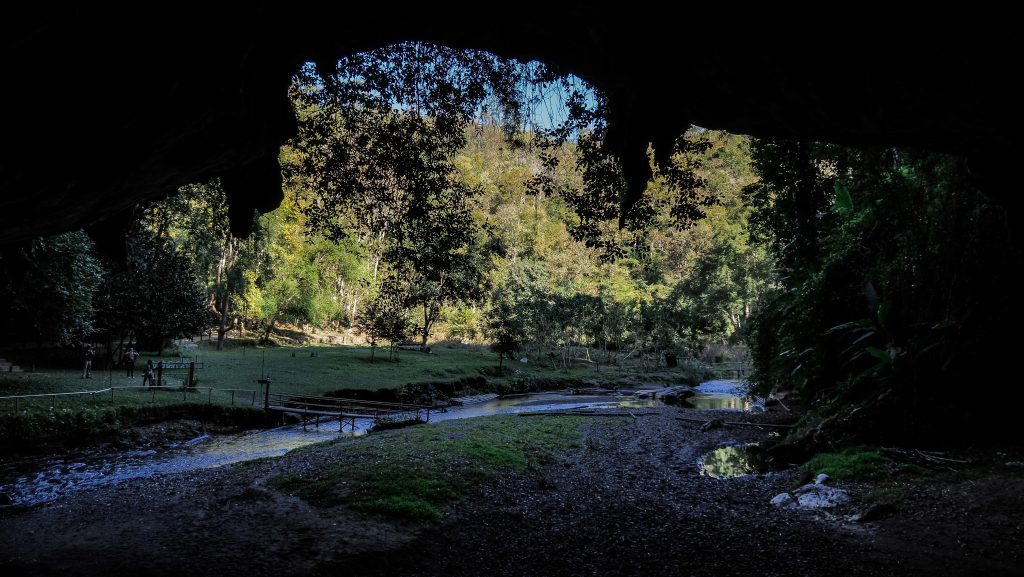
Finally, it’s time to say goodbye to Pai and hit the road towards Nam Lod Cave. You may take a photo break at Doi Kiew Lom Viewpoint which is on the way. Nam Lod Cave is definitely the most interesting cave to visit in Mae Hong Son province and one of the most interesting ones in the whole of Thailand! It is believed that the place was inhabited from 9000BC to 5500BC by the Hoabinhian hunting tribe.
You have to be accompanied by a guide to get inside and the cost of the tour is 500 THB for a group of 3 people. Taking into consideration that the tour takes about 1,5 – 2 hours and includes bamboo rafting, it’s certainly worth it. There are three main rooms: The Big Column Cave, The Dolls Cave and The Coffin Cave. The lighting inside is very weak and the guide has only a kerosene lamp so sometimes I really regretted not taking a good flashlight with me. If you time your visit around sunset, you may see plenty of bats going out of the cave for an evening meal.
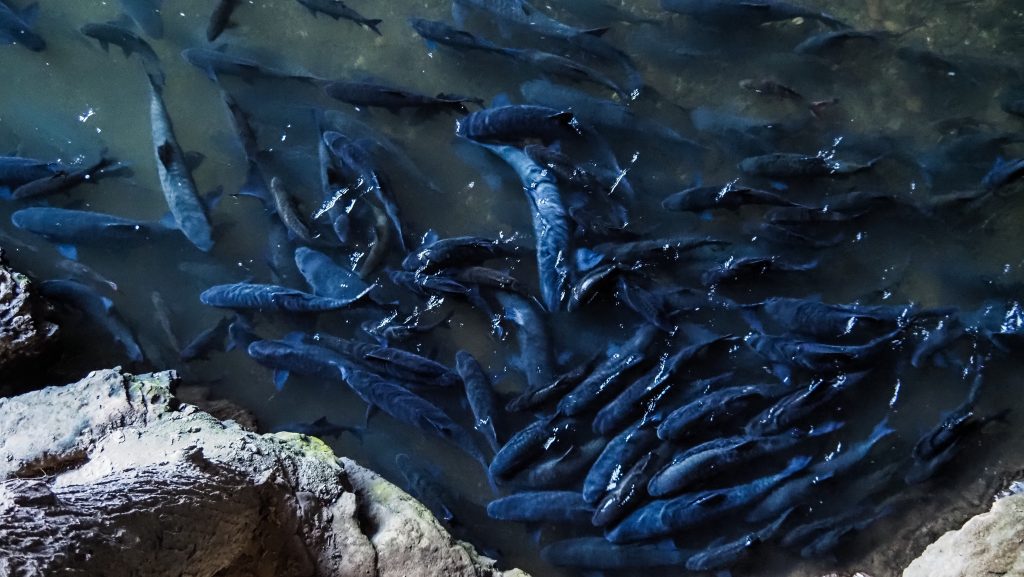
Inside of Nam Lod CaveFor better view, take your own flashlight!Boatsman on a bamboo raftBamboo rafts waiting for touristsExit from the cavePlenty of fish in the nearby river
Day 3
Day three started with amazing noodle soup and a decent drink on the terrace of Jabo Coffee in Ban Japo. It’s a small mountain village populated by the Lahu hill tribe overlooking an amazing landscape and located only within 5 minutes detour from the main Mae Hong Son Loop. If you arrive for sunrise, you may see the so-called sea of clouds rolling over the mountains.
Scenic Ban Japo VillageBreakfast with the view!
Return to the main road and soon on your right will be Scenic PangMapha, another viewpoint with beautiful scenery. There are some stalls opposite the road selling fruits and souvenirs.
About 17 km later, after a series of curves, take a turn-off to Wat Pa Tam Wua. This international meditation monastery is located in breathtaking mountain scenery with a cave, river and garden to explore. On the other side of the road is a Chinese Village in Ban Rung Arun. Nothing much for tourists, but if you are interested in the northern Chinese Thai culture, you could just ride around and have a quick look.
Beautifully located Wat Pa Tam Wua
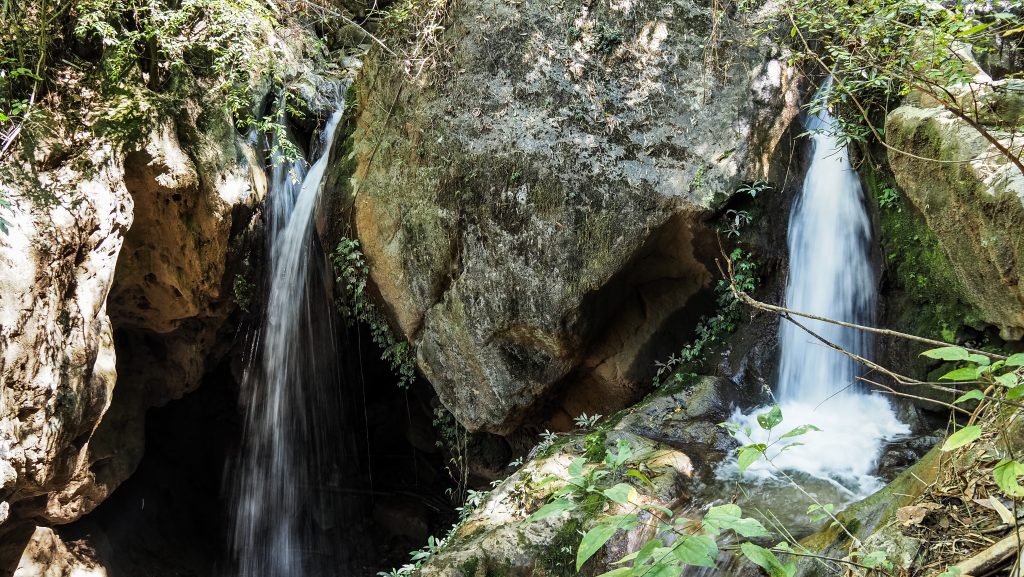
The next stop, Tham Pla (Fish Cave), is 23 kilometres away. There is a loop walk which could take you about 30-60 minutes to complete. The cave itself is hmm… not really a cave but a hole in the rock with lots of fish which you can feed. A ticket for foreigners costs 200 THB and if it’s only about the cave, I would say it’s not worth it. However, you can also visit quite a lovely waterfall, Namtok Pha Suea, which is about 12 kilometres further. Going there will be a detour from the main Mae Hong Son loop but it’s on the way to Ban Rak Thai which is another 18 kilometres from there.
Pha Suea Waterfall
Ban Rak Thai is a very atmospheric Chinese-style town right at the Myanmar border. It was founded by former Kuo Min Tang soldiers who were nationalists that migrated from Yunnan Province after the Communists took over power in China. Tea tastings at plantations, noodle restaurants and boat rides on Khuean Nai Mok Reservoir are the most popular attractions here.
On the way back, you may check out Pang Oung. It’s a park where you can enjoy bamboo rafting on the lake and watching swans swimming along. It’s a good place for camping if you prefer nature rather than the city, but otherwise, I would give it a miss.
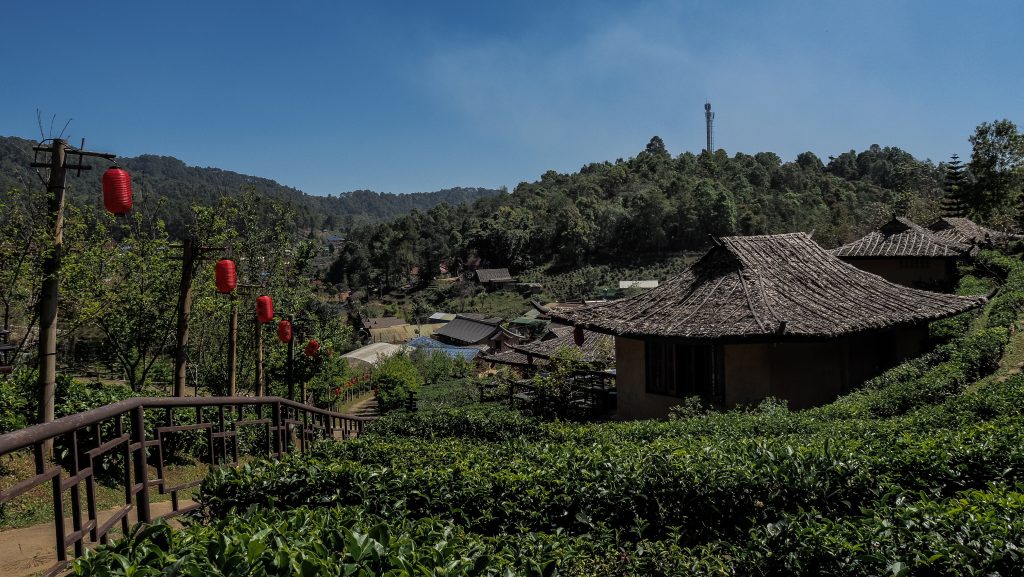
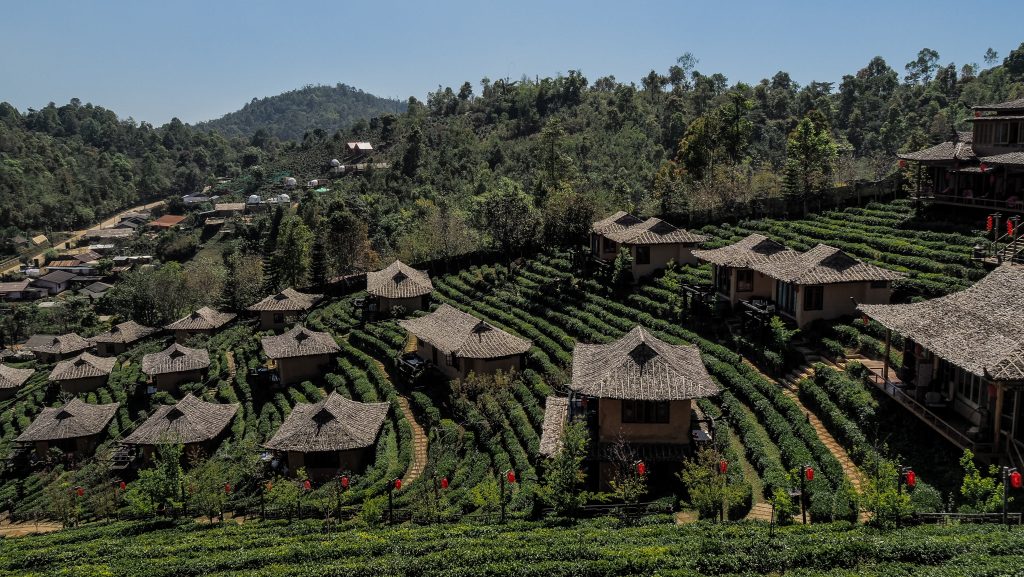
Boat ride on Khuean Nai Mok ReservoirChinese accents everywhereYou can rent one of the huts in the middle of tea fieldsTea tasting is a popular tourist attractionNext time I would definitely stay for a night in Ban Rak ThaiAerial view of tea fields
Once heading towards Mae Hong Son, I recommend making two more stops. The first one should be at Su Tong Pae Bridge. It’s a similar structure to Kho Khuu So Bamboo Bridge in Pai. It stretches for about 500 meters and was built by the villagers of Kung Mai Saak, for the monks to cross over the rice fields from the village to the Buddhist Temple (Wat Phu Sama), at the other end. The temple is nice to check out as well.
Walking over Su Tong Pae Bridge
Local lifestyle in the countryside
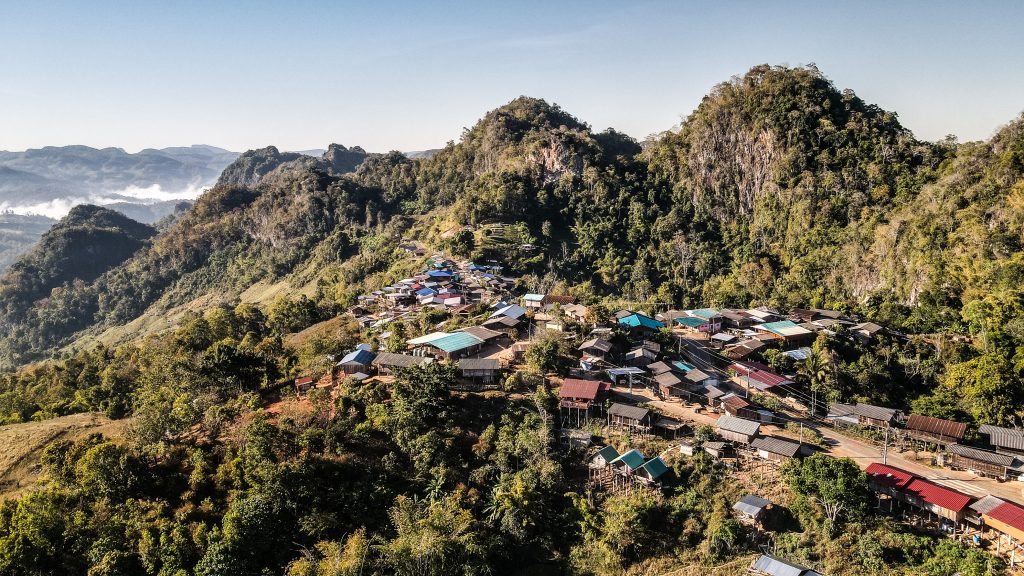
From there, it’s another half-hour ride to Kayan Taryar Village, party on the dirt roads. You can see the so-called ‘long-necked’ women there, wearing heavy brass coils around their necks. The coil depresses the collarbone and rib cage, which makes their necks look unnaturally stretched. There are different assumptions about the meaning of such a custom. It could be meant to make the women look unattractive to men from other tribes or maybe even protect them from tiger attacks. However, the most likely reason is just fashion. I was hesitating if I should go there because these kinds of villages are mainly tourist attractions with several trays with souvenirs and are even called ‘a human zoo’. Although they indeed had stuff for sale, I arrived late and I was the only tourist there so I actually didn’t have any negative feelings about the place. No one pushed me to buy anything, I could walk around freely, taking photos of local people living there and I received a lot of smiles from people living in very poor conditions. Another similar village in that area is called Huay Pu Keng.
Friendly people in Kayan Taryan Village
The last stop for that day was Wat Phrathat Doi Kongmu in the centre of Mae Hong Son. It provided a fantastic view over the city and mountains, both at sunrise and at sunset.
If you get hungry, there is a small night market around Nong Chong Kham Public Park.
Day 4
That day was definitely the day of one of the long rides. Before you set off from Mae Hong Son, you may check some more of beautiful temples in the town, such as Wat Jong Klang, Wat Jong Kham, Wat Hua Wiang or Wat Phra Non. After leaving the city, it’s worth stopping at Pha Bong Viewpoint, which overlooks mountains and valleys. Another good panorama can be seen from Hmong Microwave Village View Point which is located within 15 minutes detour from the main road. It’s a very photogenic place for a quick stop, especially in the early morning hours when the clouds could be still low.
Drone flight around Pha Bong Viewpoint
Then, continue for about 34 kilometres to Khun Yuam, where you have to make a decision if it’s worth doing one of the longest detours on the loop, to Namtok Mae Surin National Park. It takes about 1 hour one way. Taking into consideration that the road is very scenic, I don’t regret going there but it was indeed a long ride. There is a viewpoint called Thung Bua Tong Fields at Doi Mae U Kho, famous for its sunflowers, however, at the beginning of February, the blooming season was over. The ticket to the national park costs 200 THB for foreigners and it’s a short stroll to the viewpoint. It’s not possible to go down to the base of the waterfall, only to see it from afar, but it’s still a wonderful and relaxing place.
Mae Surin Waterfall
After coming back to road 1263, you may take a shortcut and ride directly to Doi Inthanon National Park. However, I really wanted to complete the full Mae Hong Son loop so I drove back to Khun Yuam where I also visited Thai-Japan Friendship Memorial Hall. It is a good place for anyone interested in the history of World War ll. The visit takes about 1 hour but is rather pricey – 200 THB for foreigners.
From here, it’s nearly 100 kilometres ride to Mae Sariang, but you can make a stop at Mae La Luang Viewpoint. Mae Sariang is a quiet town without many attractions but for amazing panoramic views, ride up to Wat Phrathat Chom Mon.
There is also Salawin National Park in that area which can be explored through a 1-hour hike around. Deeper exploration towards Thanlyin River at the Burmese border is possible too but the roads are apparently rough and you would need a decent 4×4 vehicle. I didn’t have enough time for this park so I decided to leave it for the next time.
From Mae Sariang, it’s 102 kilometres to Huen Hug Hod The Resort, where I decided to stay.
Day 5
The last day of the trip has some great nature and waterfalls. If you decided to spend a night at Huen Hug Hod The Resort and would like to visit Op Luang National Park in the morning, you need to actually go back around 15 kilometres on the same road you took yesterday. The park itself is a great little spot to walk around, with a loop trail to the summit taking between 60 – 90 minutes. The entry fee for foreigners is 200 THB.
Op Luang National Park
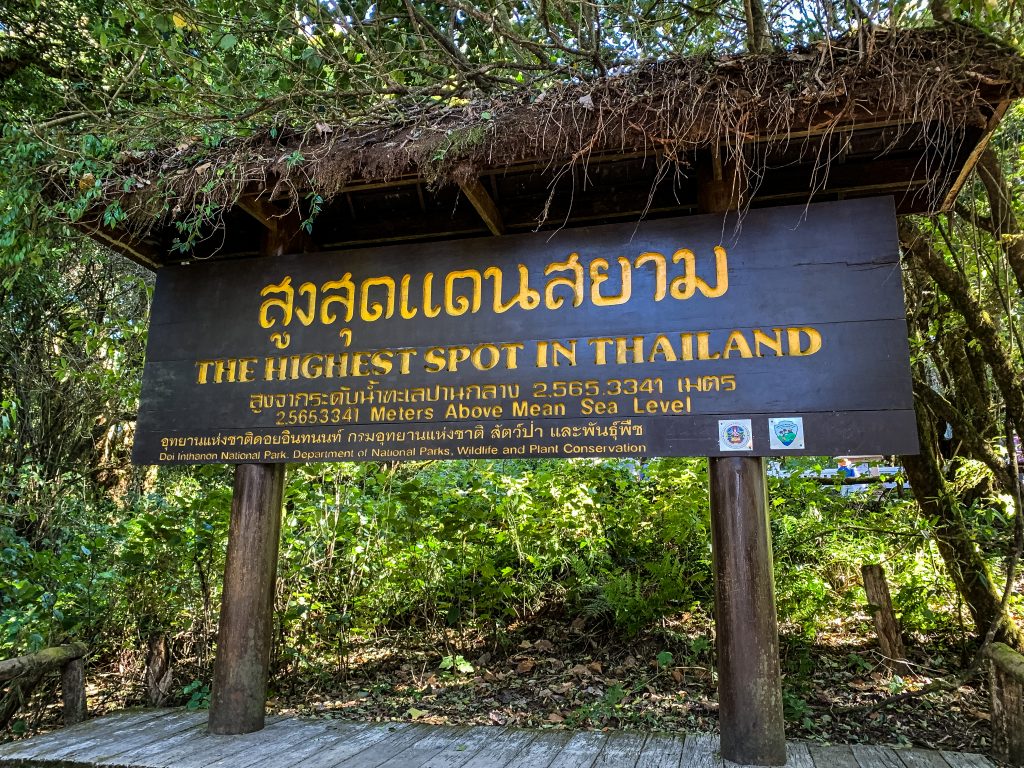
From there it’s about a 50-minute ride to Chom Thong where you can visit a very nice temple Wat Phrathat Si Chom Thong Worawihan and refuel your motorbike before hitting the road further to Doi Inthanon National Park. It’s home to the tallest mountain in Thailand standing at 2,565 meters above sea level as well as plenty of amazing waterfalls. The entrance for foreigners costs 300 THB.
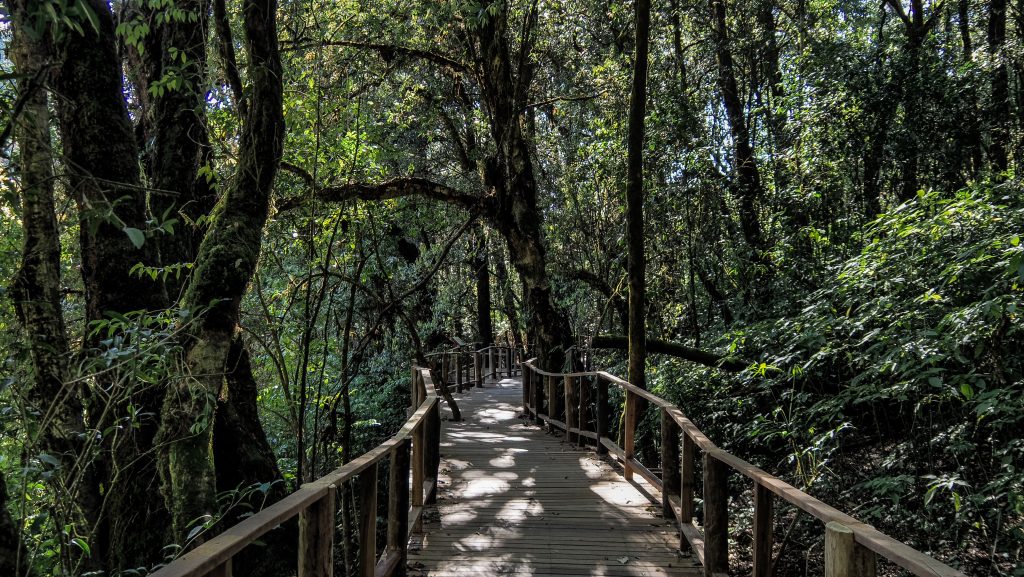
Reaching the summit of Doi Inthanon is a rather effortless short walk from the parking, without spectacular views due to dense forest. Take some warm clothes with you as the temperature may drop to well below 10C.
Wat Phrathat Si Chom Thong WorawihanThe top of Thailand!
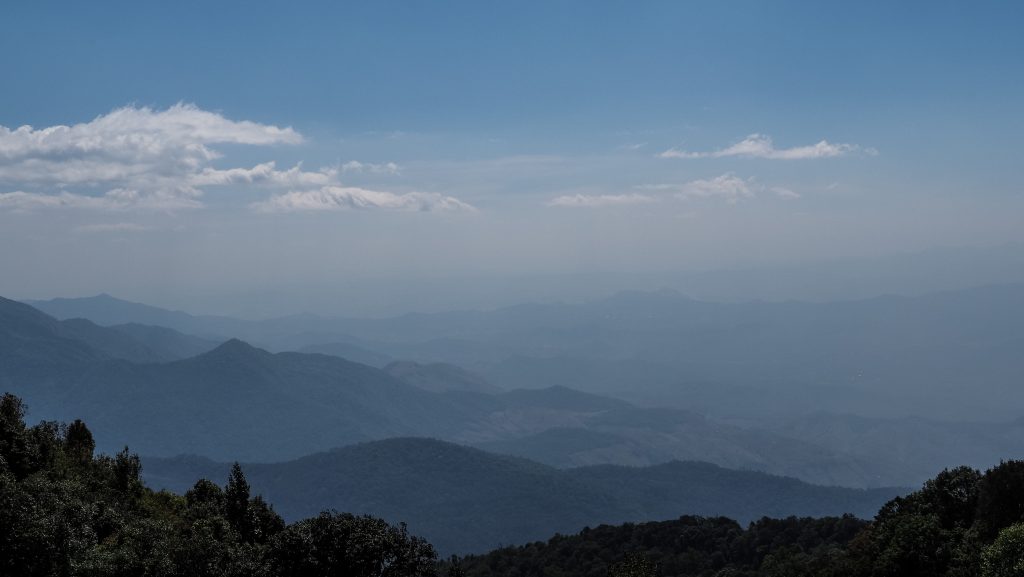
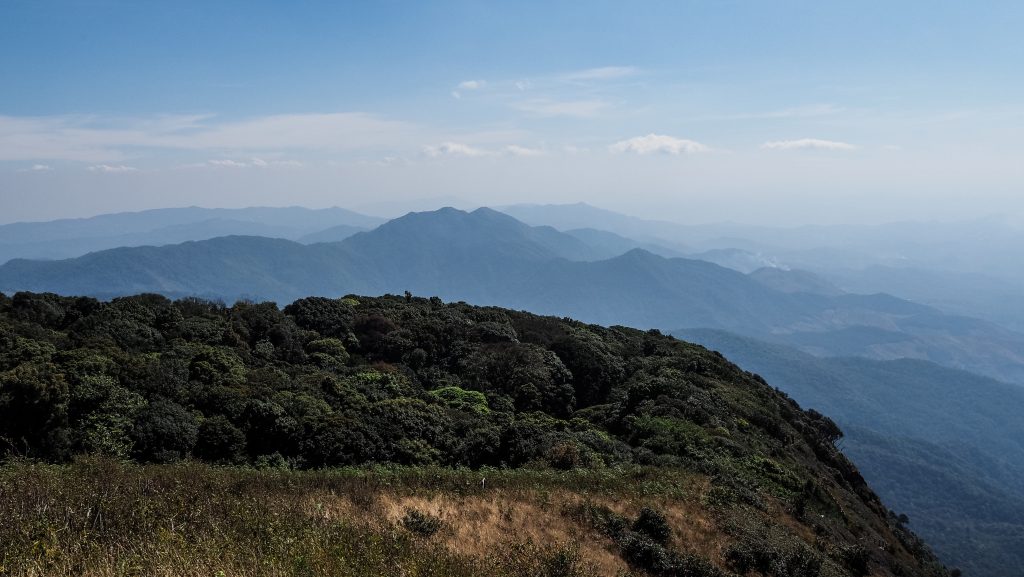
For hiking enthusiasts, there are 3 trails worth considering. The first one, Ang Ka Nature Trail is the shortest and can be done without a guide in about 15 – 20 minutes. It’s just at the base of the Doi Inthanon summit. The second one, Kew Mae Pan Nature Trail is about 3 kilometres long and overlooks the two pagodas. At the entrance, you need to hire a local guide. I see completely no point in that as the way is just obvious and you can’t get lost. The third, Pha Dok Sieo Nature Trail, has to be with a guide too (220 THB on top of the national park entry fee). Beautiful easy walk along the stream and waterfalls with stops to take a dip if you want. The walk ends with a walk through the local village to visit shops with handicrafts and to taste local coffee. I only hope that the extra money that tourists are forced to pay really goes to the guides’ pockets.
Boardwalk on Ang Ka Nature TrailPanorama from Kew Mae Pan Nature Trail Kew Mae Pan Nature Trail has to be done with a guideThe views are worth it!
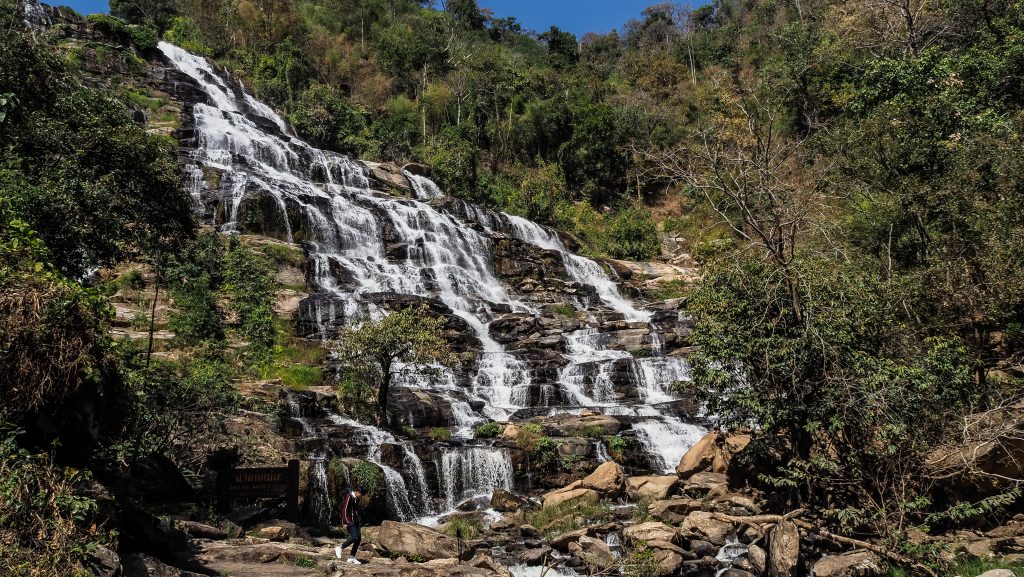
Mae Ya Waterfall is a bit off the main route but you can’t miss it! I think it’s the best waterfall in the national park and one of the prettiest in Thailand. It’s a short walk from the parking lot.
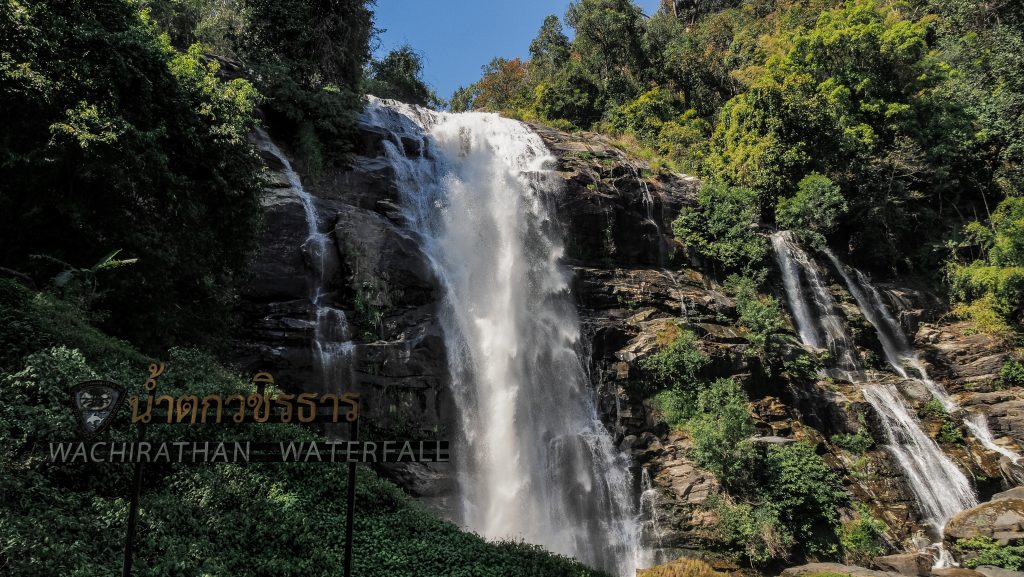
Other beautiful and powerful waterfalls are called Mae Klang and Wachirathan and both are very close to the parking areas. You may see the rainbow around Wachirathan if you are lucky. Then, you can make a quick stop at Sirithan Waterfall. Not that impressive but still a decent size.
Mae Ya WaterfallSpectacular Wachirathan Waterfall
Besides hikes and waterfalls, you certainly can’t miss the twin pagodas: Pra Mahatat Noppamethanedon and Pra Mahatat Nopphonphusiri. They were built to honour the late King Bhumibol Adulyadej and Queen Sirikit, and are surrounded by spectacular gardens. The panoramic views are great too.
The Royal Agricultural Station Inthanon is a huge garden for flower enthusiasts but other than that, there is not much else you can do there.
If you need to buy some souvenirs, you may stop at the Thai Hmong Community Market. There are fruits, vegetables, nuts, and various liquors available but the prices are rather high.
After such a busy day, it’s time to depart to Chiang Mai, the final destination on the Mae Hong Son Loop. It’s about 90 km and should take about 1,5 hours. I must say that the whole trip was simply incredible, but I got really tired and the last kilometres on the busy roads of Chiang Mai really drained all my remaining energy.
Nothing too fancy but a relatively cheap hut (375 THB), clean and with everything you need for a short stopover. It’s close to the city centre and a walking street too.
Address: 3/1 Moo 8 Tumbon Vieng Tai, Amphoe Pai, Mae Hong Sorn, Pai, 58130, Thailand Phone: +66 99 230 6599 GPS coordinates: N 019° 21.097, E 98° 25.979
Clean and well-designed huts. The lady showed me the cheaper version and a bit more expensive one. I decided to take the more expensive one for more comfort and it was a good choice. The bed was very comfortable and the owner can prepare some good food for you. The entrance is on a dirt road turnoff from the main road.
Address: 200 1095 สบป่อง อ.ปางมะผ้า, 58150 Mae Hong Son, Thailand Phone: +66948283865
Another clean, comfortable and well-managed guesthouse. The price is very affordable (450 THB). I had air conditioning, a double bed and a private bathroom.
Address: 6 Soi Padung mauitau, Muang, Mae Hong Son, 58000, Thailand Phone: +66 88 435 9258 GPS coordinates: N 019° 18.124, E 97° 57.851
The resort is easy to reach from the main road. At night time the road is quiet enough to not disturb the sleep. Nice garden around the bungalows. The rooms are quite large and clean. Breakfast is simple and basic.
Address: 296 Moo.1, T. Hang Dong, A. Hot, Hot, Hot, Thailand, 50240 Phone: +66850307356
I must be honest that I had serious doubts when I arrived here for the first time. Let’s say that from the outside, the building doesn’t look too appealing. But I ended up staying here easily for more than a week and the owner helped me with my visa extension. It’s a great place with a soul. There is motorbike parking and some seating area in front of the house, cheap bicycle rental and laundry. The room has air conditioning and very fast internet. The bathroom is shared, but it wasn’t a big deal.
Address: 32-34 Ratchaphakinai Rd, T.Pragin, A.Muang, Phra Sing, Chiang Mai, 50200, Thailand Phone: +66 89 700 9971GPS coordinates: N 018° 46.944, E 98° 59.397
Tips
Wear a helmet and protective clothing
I know it can get hot during the day and riding a motorbike wearing a helmet, gloves and long sleeves isn’t comfortable, especially when you see all the locals doing their freestyle, but it’s better to be safe than sorry. You are not as experienced on these roads as they are so don’t try to show off.
Travel lightweight
Riding a motorbike for hundreds of kilometres a day won’t be easy with a heavy backpack. Keep it small and light. Make use of the space under the seat or keep the bag between your legs if it doesn’t bother your while riding.
Take warm clothes
In the mountain regions or at the summit of Doi Inthanon, the temperature can drop well below 10C, especially at the night or in the morning. Needless to say, it feels even colder when riding a motorbike.
Plan enough time
I planned 5 days and even though I saw the places that I wanted, I am the person that likes sightseeing in detail and there were moments when I felt in a rush and a bit tired. If I ever did the loop again, I would plan at least 3 days more, especially in the area of Pai, Mae Sariang or Doi Inthanon.
Take a flashlight
It might be very useful for easier exploration of Nam Lod Cave or any emergencies that may happen at the night.
Avoid riding at night
Mae Hong Son loop has many curves and outside of cities, there is no lighting. Do yourself a favour and plan to be around your accommodation without the need for long rides after sunset.
Save important phone numbers
You don’t want to nervously browse the Internet looking for the correct number in case of emergency.
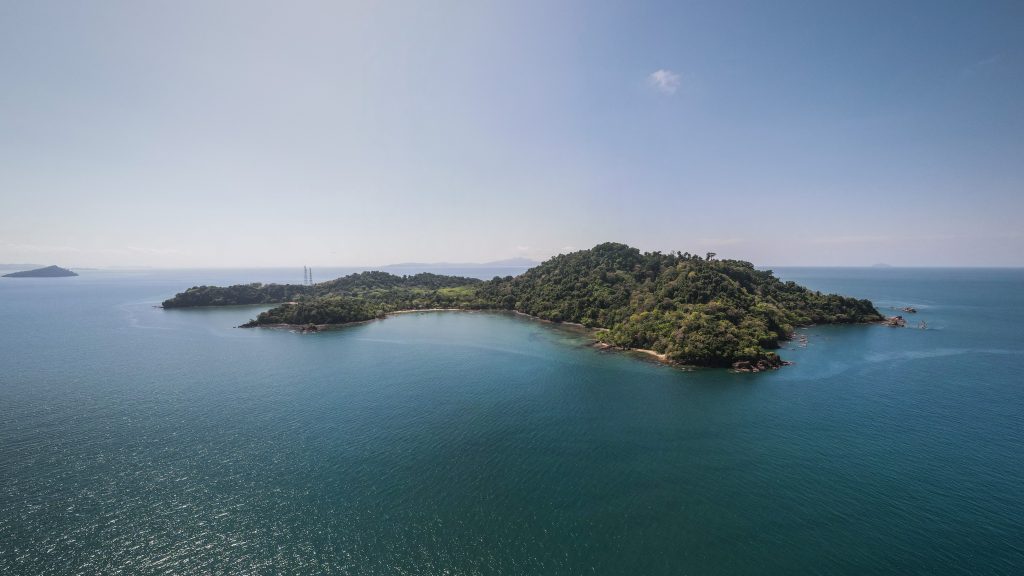
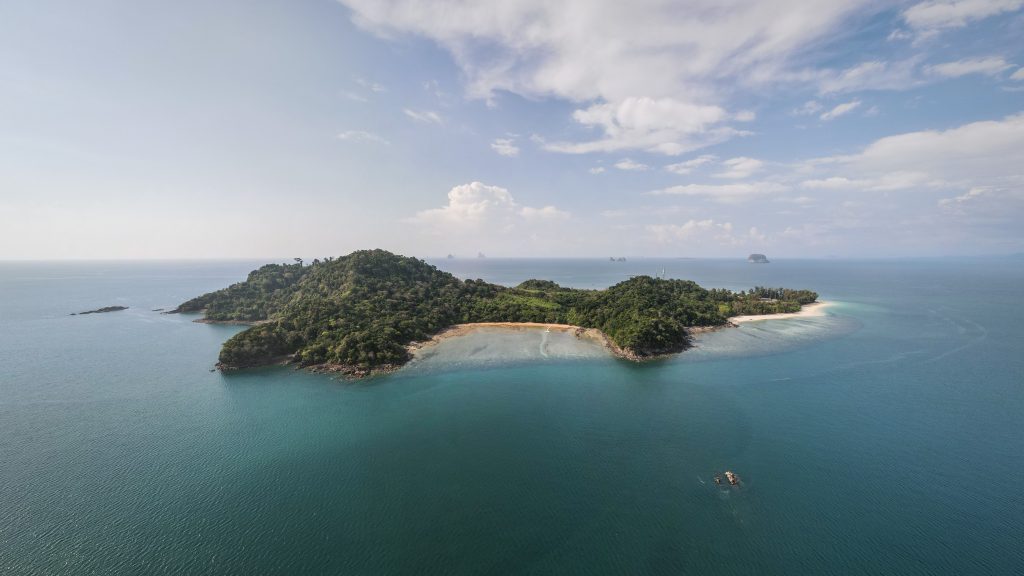
Koh Bulon Le is definitely one of the most unspoiled and untouched by mass tourism islands in Thailand. There are no big parties, no speedboats going back and forth and electricity is available only for a few hours per day. It’s a big contrast compared to nearby and very popular Koh Lipe.
With a size of about 3 square kilometres, it’s a really small piece of paradise that can be walked around easily in a few minutes without any stress related to traffic as simply there are no cars and only a few motorbikes owned by the locals. Sounds interesting?
How to get to Koh Bulon?
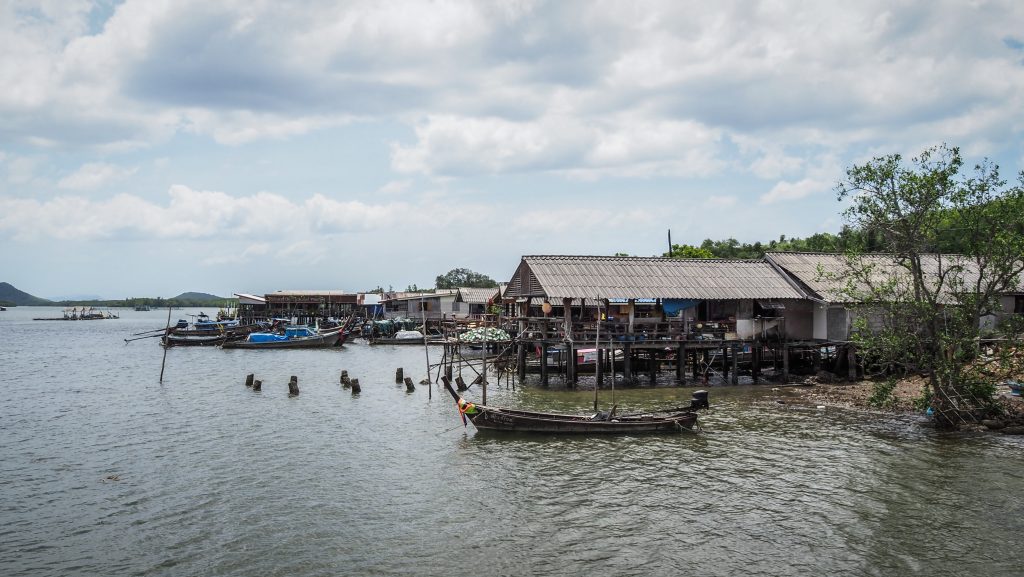
First of all, I travelled to Koh Bulon Le in March 2022 when tourism in Thailand still wasn’t back to its pre-pandemic shape. The minibus took me from Trang to Pakbara Pier where I got on a speedboat to Koh Lipe. After spending a few days there, I took another speedboat directly to Koh Bulon. It was quite a fun experience as there is no proper pier on the island and instead, the speedboat approached the beach as close as possible and then I had to jump over the side into the water and just walk to the shore. Luckily, a staff member helped to carry my luggage!
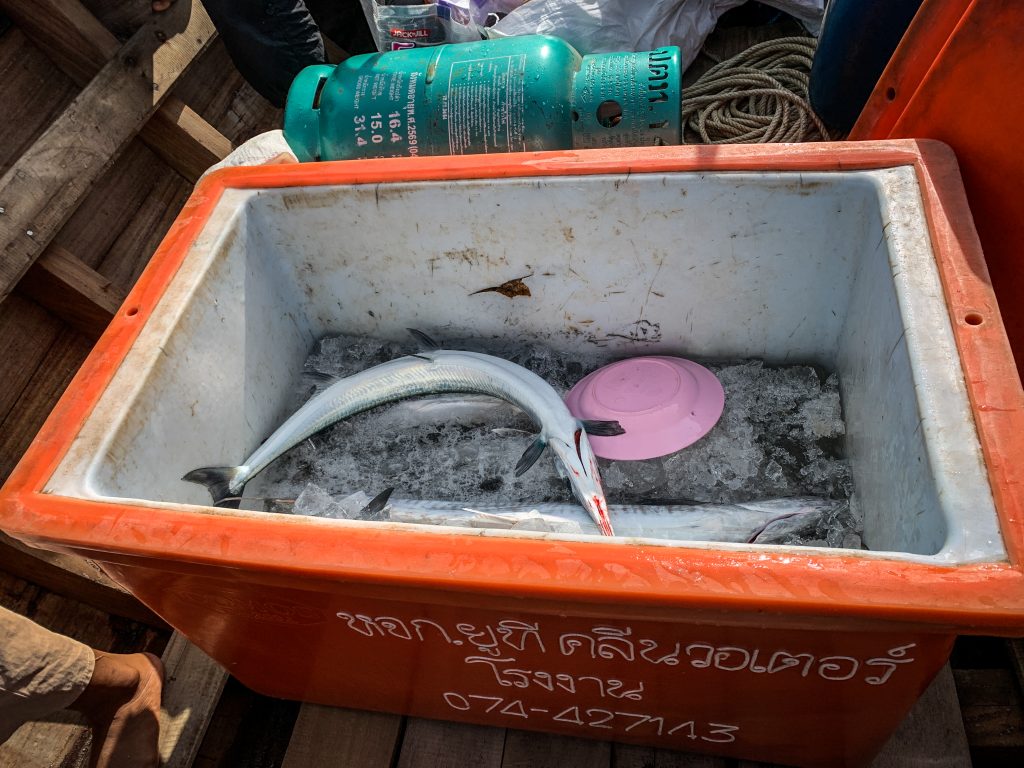
Unfortunately, getting out of the island wasn’t that easy as there were no speedboats connecting the island back with Pakbara Pier. But, it is Thailand and nothing is impossible! After chatting with a very kind receptionist at my accommodation, she made a few phone calls and found someone who knew someone who was going to Pakbara Pier the next day with a longtail boat to sell fish. For me, such local transport is always better than a speedboat and we even had a short stop at Koh Don!
Travel in a longtail boat with a local fisherman
In normal seasons, speedboats are operating en route from Phuket to Koh Lipe, usually making stops and picking up passengers at Phi Phi Islands, Krabi, Koh Lanta and Trang Islands. Koh Bulon isn’t that popular but it is on the way and most operators can drop you off there.
Alternatively, you can get a bus from Trang to Pakbara Pier and then continue to Koh Bulon Le. Or make your way from Pakbara Pier to Koh Lipe and then stop at Koh Bulon Le on the way back, exactly as I did.
If coming by air, the closest airports are in Hat Yai and Trang. You can check all the transport options and timetables, as well as book your ticket, on 12Go.Asia.
When to go?
I strongly recommend travelling in the high season, between October and April. In the rainy season, getting to Koh Bulon Leh isn’t impossible but much more difficult and definitely more expensive. You will rely on local longtail boats and your negotiation skills. There also might be days when the sea is too bumpy to go.
How long to stay?
It’s a small island so I would say that 1 full day should be enough to visit all the exciting places and enjoy beach time. However, if you want to slow down and simply live life without any pressure and worries, consider staying a bit longer.
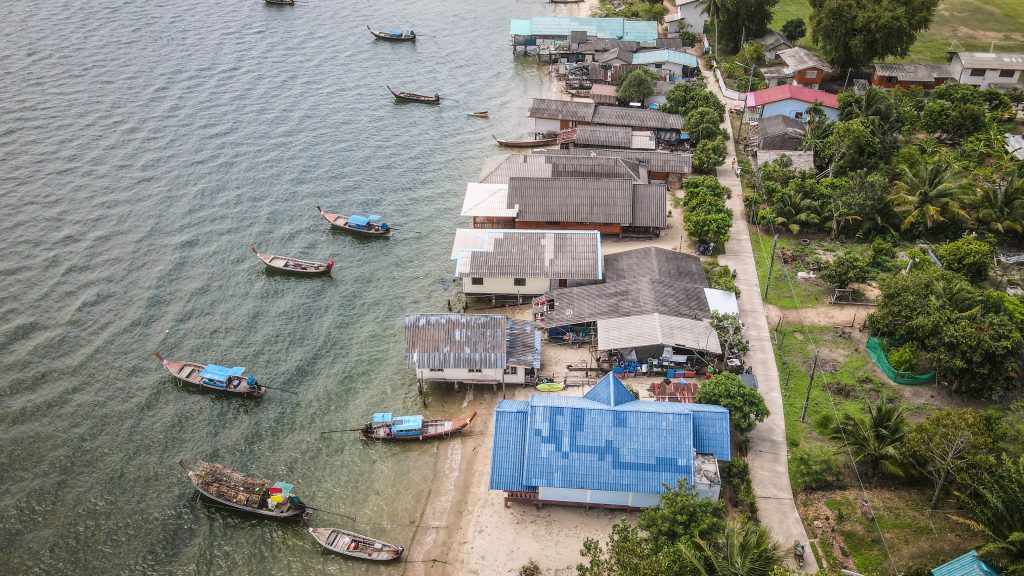
North side of Koh Bulon LeSouth side of Koh Bulon Le
Where to stay?
The East side of the island has the best beach and good resorts, such as Pansand Resort or Bulone Resort. If you want to save some money, you may look for accommodation in the northern part. I recommend Chaolay Homestay. It was a bit of a walk from the speedboat drop-off point as you basically need to cross the whole island. With a bag and in heat, but that’s ok 🙂 For 600 THB per night, you get a bamboo bungalow with a really good mosquito net, fan and a private bathroom. The host is very friendly and courteous. Electricity is switched on from about 6 PM and it goes off at about 11 PM, so it would be just you and the sound of millions of cicadas. Probably it’s a good idea to have a flashlight, just in case.
I couldn’t find this place on booking.com, nor on agoda.com, so here is the phone number: +66 86 967 0716. In my case, I just found it on Google Maps, by reading recommendations and went there without booking.
Typical bungalow in Chaolay Homestay
Getting around the island
Options are limited to… walking! It takes about 20 minutes to walk from one side of the island to the other, so really don’t bother about any kind of bike. Koh Bulon Leh is covered in thick jungle, but narrow footpaths are clearly visible.
What to do on Koh Bulon?
There is not a lot to do, but that’s exactly the point. Besides spending time on the beach, there are other classic activities available, such as kayaking, snorkelling or rather short hiking. There are a few nice places to eat but don’t expect the nightlife to be much wilder than some beers while chatting with friends.
White Sand Beach
Long sandy beach with shallow water and good snorkelling opportunities not far from the shore. There are some resorts around, but don’t worry – access isn’t for guests only and everyone can enjoy this place.
White Sand Beach and its crystal clear watersAerial view of White Sand Beach and the resortsAlmost completely empty piece of paradise
Ao Panka Noy
Another nice beach with fine restaurants. Not as good for swimming as White Sand Beach but it’s only a short walk so why not check it out?
Aerial view of Ao Panka Noy and Ao Panka Yai
Ao Panka Yai
The closest beach to Chaolay Homestay. There are some hammocks so you can chill and watch the sunset, but unfortunately, there was quite a lot of rubbish too.
Enjoying the sunset at Ao Panka Yai
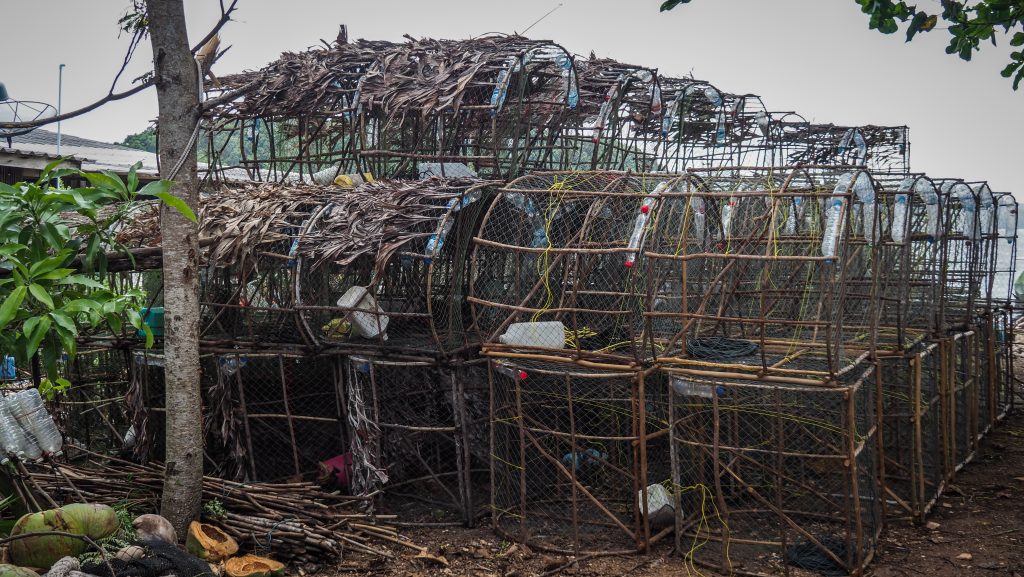
Mango Bay
It’s a hotspot for local fishermen so there are a few fishing boats and lots of nets on the beach. I wouldn’t say it’s a good place for relaxing, but the walking path to this place is nice and you may even walk a bit further on the rocks on the right side of the beach if the tide allows.
Mangroves around the Mango BayAerial Views of the Mango Bay
Koh Mak is a mid-size island, much smaller than its popular neighbours Koh Chang and Koh Kut, but that gives it additional charm. In fact, it’s only 10km from east to west and 5km from north to south, so you could basically walk around. The landscape isn’t too exciting though and you won’t find here any jungle or mountains. What you will find are mostly coconut groves and rubber plantations. Koh Mak is a quiet place, which probably isn’t the best spot for nightlife enthusiasts. But if you like peace and the feeling of the local community, you will like it.
How to get to Koh Mak?
Getting to the island in the high season is quite easy as there are boat connections with both Koh Chang (Bang Bao Pier) and Koh Kut. If you travel from the mainland, then head to Laem Ngop Pier and take a speedboat to Ao Nid pier on Koh Mak. The cost should be about 450 THB one way.
If you travel by public transport from Bangkok, the best would be to take a direct bus from Ekkamai to Laem Ngop Pier or if not possible, then to Tratand continue by taxi or by pickup truck to the pier.
Trat has also its own small airport with flights from Bangkok operated by Bangkok Airways. However, the total cost of travel, including transfer to the town or pier to the islands is totally not worth it.
Travelling outside of the main season is a completely different story. On most of the websites, you can find the information that boats between islands stop operating between June – September. In practice, when I was there between May 21st – May 22nd, the boats were already cancelled. According to a travel agent, it happened a bit earlier this season (for whatever reason) and I was one week too late. In such a case, the only option was to come back from Koh Chang back to the mainland, take a taxi to a different pier and then a speedboat to Koh Mak. Very complicated and a bit annoying travel, taking into consideration how close these two islands are and what a big detour you have to make to get from one to another.
When to go?
I strongly recommend travelling in the high season, between October and mid-May. Getting around the islands in the Koh Chang archipelago is just so much easier and cheaper, not the mention better weather. There are not many things to do on Koh Mak rather than water activities and spending time on the beach, so when it’s super windy or it rains, the fun is gone.
How long to stay?
It’s a small island so I would say that 2 full days should be enough to visit all the exciting places and enjoy beach time.
Where to stay?
Hotels, bungalows and resorts, all of these are available on the island at various prices. I stayed in Sea View Resort, which was affordable and quite clean (at least the room), but not as close to the beach as popular resorts. Unfortunately, the area around the bungalows was messy and overgrown. The owner arranged a pickup taxi from the pier for 100 THB and assisted in booking return boat tickets. They rent motorbikes too, but they look like they have never been cleaned before. It’s the okayish place for one night, but I would definitely look for an alternative in case of a longer stay. You can make a reservation on booking.com or agoda.com.
View to Ao Nid Pier
Getting around the island
Options are limited to pick-up trucks or rental motorbikes and classic bikes. I always opt for my own wheels and that time was no different. I got a black Honda Click, one of the most popular motorbike models in Thailand, from my accommodation. The cost for 24 hours was 250 THB, including fuel.
A classic bicycle would be fine too as the island is very flat and there is little car traffic, but temperatures over 30C could be exhausting.
If travelling in a bigger group, getting pick-up truck taxis would be the best but sometimes they can be difficult to find and you may need to ask for them in a restaurant or nearby shop, so they can call the driver. 50 THB per person will get you to most places on the island or you can negotiate your own itinerary with the driver.
Beaches
Koh Mak has the shape of a starfish with many picturesque bays and beaches that can be reached within a couple of minutes on a motorbike. If it’s windy on one side, just go to the other. Here is an overview.
Ao Kao
Long sandy beach with shallow water. However, rubbish can be a problem, especially after periods of bad weather. From here you can also take a boat or rent a kayak and paddle to Ko Rayang Nai and Ko Rayang Nok.
Aerial view of Ao KaoPier at Ao Kao BeachAo Kao Beach
Maruey Beach
Pretty narrow but beautiful with coconut tree shades.
Ao Lom
The road here goes through the jungle and it’s not for first-timers on the motorbike. You can see the small island Ko Phi just in front. It’s a good snorkelling spot too but be aware of the currents.
Ao Phra
I recommend parking your motorbike in front of Mira Montra Resort and accessing the beach from there. You can also rent a kayak and paddle to Ko Kham Island for a good couple of hours.
Low tide at Ao Phra BeachSeem like the rain is coming!Other islands of the Koh Chang archipelago visible from Ao Phra
Ao Suan Yai
Nice place to swim in shallow waters and has good sunset views. There are a few restaurants and bars around to chill. Ko Kham Island is just in front and you can easily get there by kayak.
Ao Tao Khai (Turtle Beach)
20 minutes walk through the jungle and you get to a beautiful deserted beach, where most likely you will be alone.
Ao Tan
Just around Cinnamon Resort and wooden pier. This beach is quite lonely and not very good for swimming as the shoreline has more mangroves, but worth checking out nevertheless.
Wooden pier around Cinnamon Resort Wooden pier and Ao Tan
Ao Pai
Next to Ao Nid Pier. Nice to walk on with great views of Koh Kut but not ideal for swimming. There are red sand and stones.
Laem Son
A very cool place which is accessible via a paved road and a dirt track to the far northeastern tip of the island. There is a small place where you can get a cold drink and something to eat. A kilometre offshore is the island of Koh Kradad, famous for a large herd of deer living there. if you want to go there, ask the locals in a bar.
Nearby islands
Koh Kham
Take a kayak and paddle yourself or use one of the regular longtail boat services from Koh Mak Resort or Prompakdee Resort. You will need to pay the entrance fee of 200 THB upon arrival. The sand on the beach is soft and white and there is some good snorkelling around.
Ao Soun Yai and Koh Kham
Koh Kradad
Head to Cinnamon Art Resort or Laem Son Beach to rent a kayak or find a longtail boat that will take you there. It’s flat and quite easy to walk around. The beach is nice and long and there is a herd of deers wandering around.
Completely flat Koh Kradad
Koh Phi
The kayak can be rented from Cococape Resort. I didn’t see any longtail boats going there but apparently, if you book an island tour by boat then Koh Phi will be among the places you stop off at. There is nothing to do on the island itself, just the snorkelling around is quite worth it but also not mind-blowing.
Koh Rayang Nai and Koh Rayang Nok
These two islands can be easily seen from Ao Kao Beach. Koh Rayang Nai has one small shrine in memory of one of the founders of the island and that’s basically it. On Koh Rayang Nok, there is a small Rayang Nature Resort that can be visited. The admission fee is 200 THB in case you rent a kayak and paddle there by yourself. Otherwise, ask around for the boat at Ao Kao Beach. Generally, it’s an excellent place to rest on the beach and do some snorkelling
Other interesting places
Wat Koh Mak
The best spot to have a panoramic view of the island. The temple is quiet and has an impressive big Bodhi tree as well as a beautiful statue of Buddha overlooking the sea.
Viewpoint around Wat Koh Mak
Ride to the south
From Ao Nid Pier just turn left and lose yourself in these country roads. Head towards Banana Sunset Bar, Koh Mak Panorama Resort or Ta-Lay Time Resort. There are some nice viewpoints along the way.
First of all, it has to be said that elephant watching is one of the top tourist attractions in Thailand. In such cases, profit is usually more important than animals’ safety and comfort. In many places all over the country, you may see that activities including elephants are widely promoted, e.g. bathing but unfortunately also riding on their backs.
Would you like to carry a bunch of monkeys on your back because they want to take a nice picture for their monkeygram? I guess the answer is no.
Of course, not all the places are bad and very often they say straight away that if you want to ride an elephant, you must go elsewhere. But how about elephant watching in their natural environment, where they can walk around freely wherever they want, where you can’t touch them or feed them because actually, it isn’t a ZOO?
If you aren’t lucky enough to bump into the elephants on your hike in the jungle, and most certainly you won’t be, then I would recommend visiting Kui Buri National Park. It covers an area of 969 square kilometres, right next to the border with Burma. More than 300 elephants live in the park so you have decent chances to see some, but remember it is not guaranteed. Gaurs, bantengs and deers are also quite common. In theory, you may also spot golden jackals, langurs, white-handed gibbons, Burmese hares, Malayan porcupines, wild boars or even tigers, leopards, Malayan tapirs and dholes (Asiatic wild dogs). Chances? Close to zero.
The road through the national park
How to get to Kui Buri National Park
Kui Buri is about 280 km and a 4-hour drive from Bangkok. Otherwise, it’s over a 1-hour drive from Hua Hin and even less than 1-hour drive from Prachuap Khiri Khan. All these cities are connected by railway. The weekend trip to Kui Buri can be easily connected with another great national park – Sam Rot Yod. The best would be to have your own car or a motorbike, but if not, you can join a tour. Just ask around at the tourist agents.
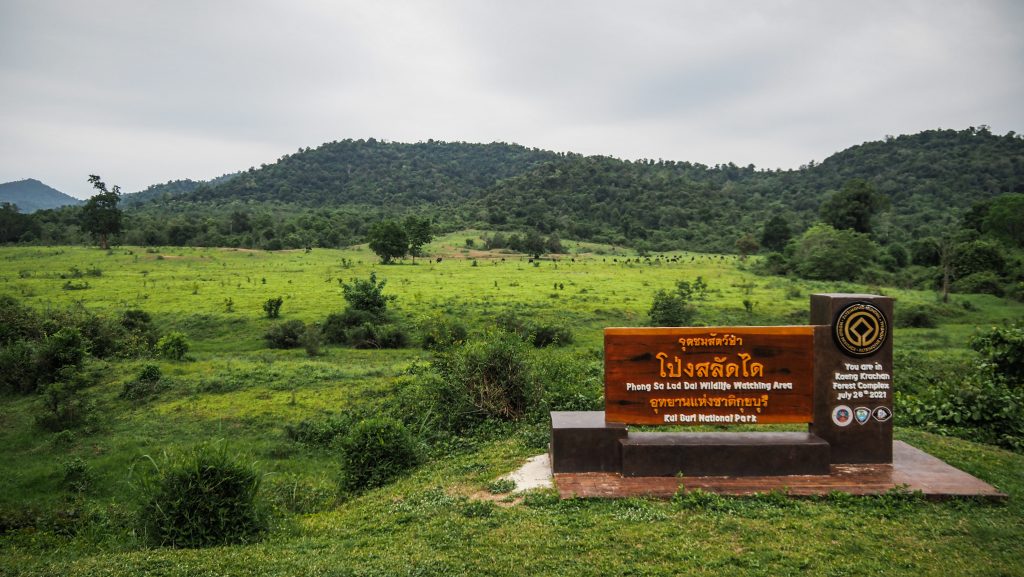
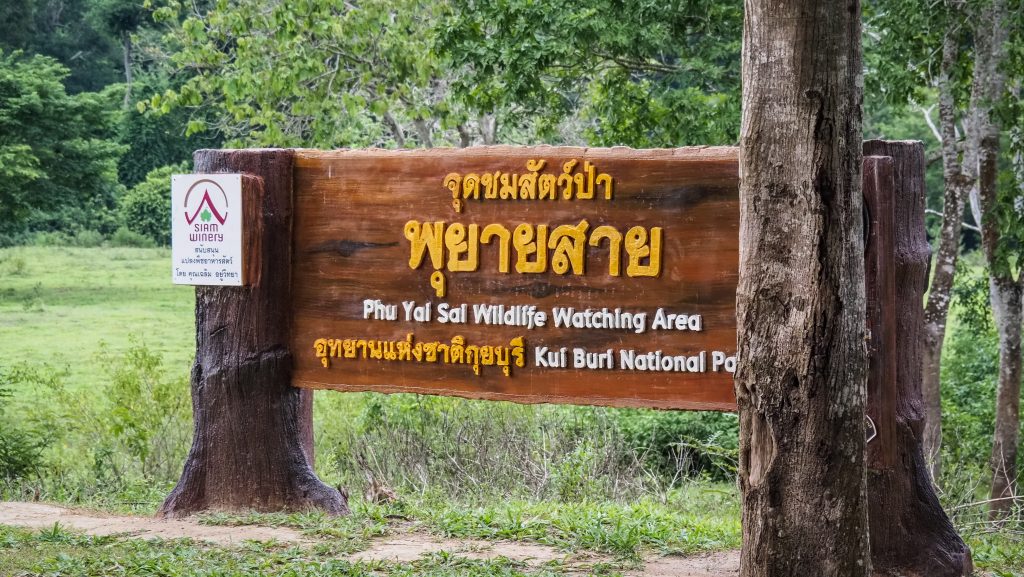
If you drive yourself, make sure you are heading to the correct place. Google Maps may lead you to the headquarters area of the park which is not where the wildlife watching area is. The actual wildlife watching area is at Huai Luek Ranger Station, about 16 km north of the headquarters.
Opening hours
Kui Buri National Park is closed from 1st September until 31st October due to the rainy season. In other months, the wildlife watching area is open from 2 pm to 6 pm daily, but it’s recommended to arrive no earlier than 3 PM as the wildlife activity increases in the late afternoon and the chances to see anything are higher.
Entrance fees
As of June 2022, the entrance fees for international tourists are 200 THB for adults and 100 THB for children 3-14 years old. Thai citizens pay 40 Baht for adults and 20 THB for children. Cars will be charged with 30 THB.
But it is not the only cost. Driving your own vehicle into the national park is not allowed, so you have to organize the safari-style vehicle which is a converted pickup with seats mounted on the trunk. The safari vehicles don’t have any roofs, providing you with 360 degrees of visibility. In each of the cars, there is a local driver and also a guide, but they don’t speak much English so don’t expect a lot of interactions. Getting a car costs 850 THB per group/vehicle.
The safari
Before you hop on the pickup truck, consider renting binoculars. Most of the animals can be seen from a distance so if you don’t have a good zoom lens for your camera, it might be difficult to see them clearly.
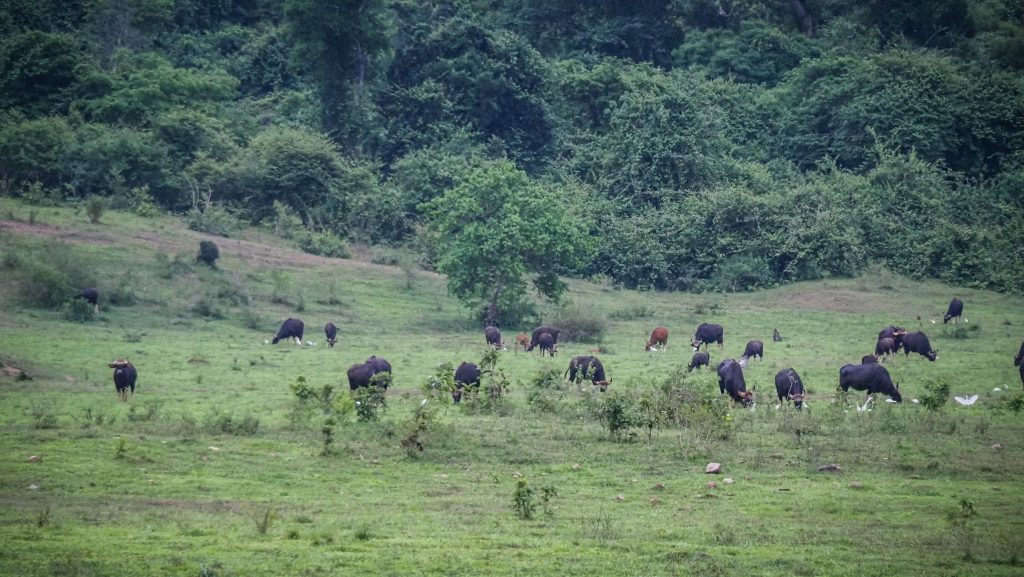
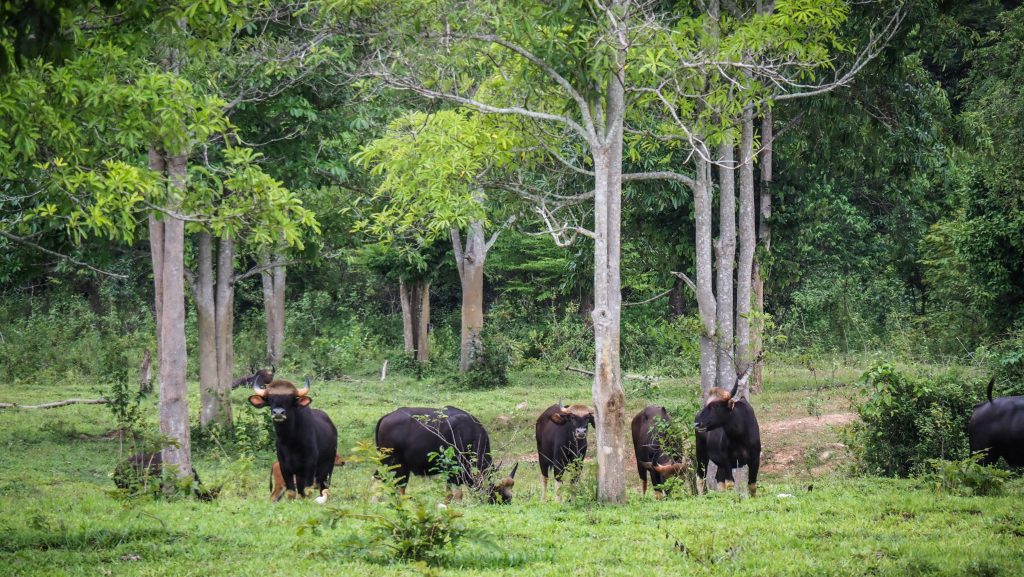
The safari in the restricted part of the national park takes about 2-3 hours, which I think is just enough. After about 15 minutes of driving, we spotted a big herd of gaurs as well as some deers. We didn’t leave the car but the driver gave us plenty of time to take pictures and even moved the car slightly forward to change the angle.
First encounter with gaursMore gaurs just hanging aroundThe gaur, also called Indian bison, is the largest extant bovine, native to South Asia and Southeast Asia The gaur is the tallest species of wild cattleMales are about one-fourth larger and heavier than females.
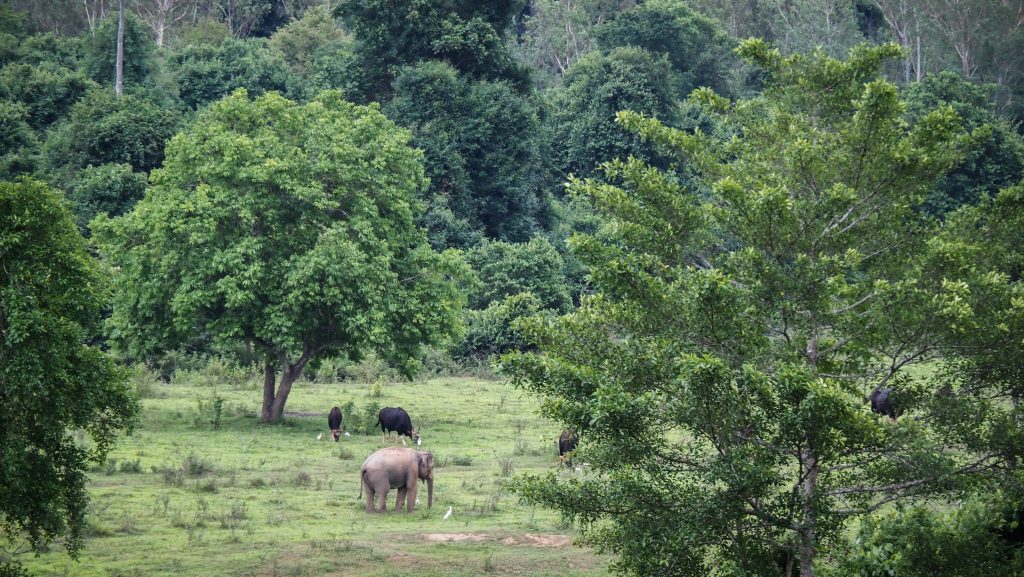
As the driver was in radio contact with rangers, we continued to the furthest viewing area as apparently some elephants were seen there. We saw just one, at a pretty far distance but it was still an awesome experience to see a free elephant just walking around through the huge plains. There were some gaurs too. Here we were able to get off the truck and walk around trying to spot more elephants, unfortunately without any success.
The first elephant spotted in Kui Buri!More gaurs seen at the distanceOne of the viewpoints – Phong Sa Lad Dai Wildlife Watching Area
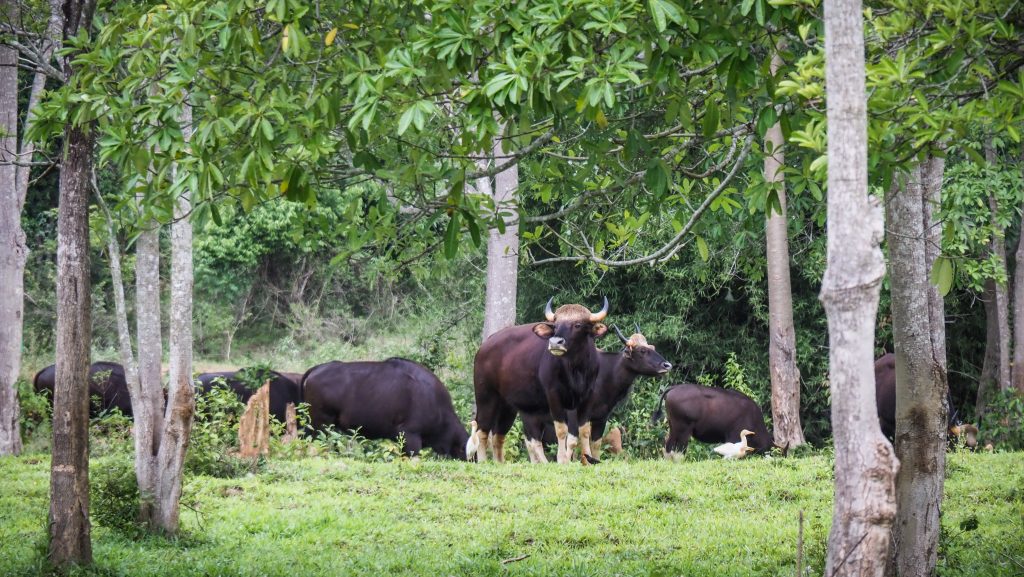
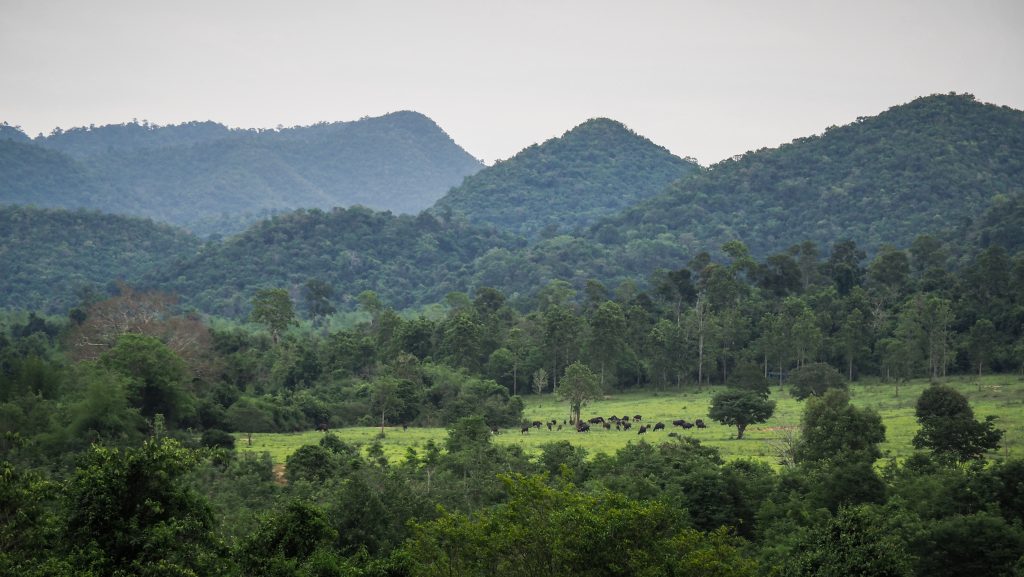
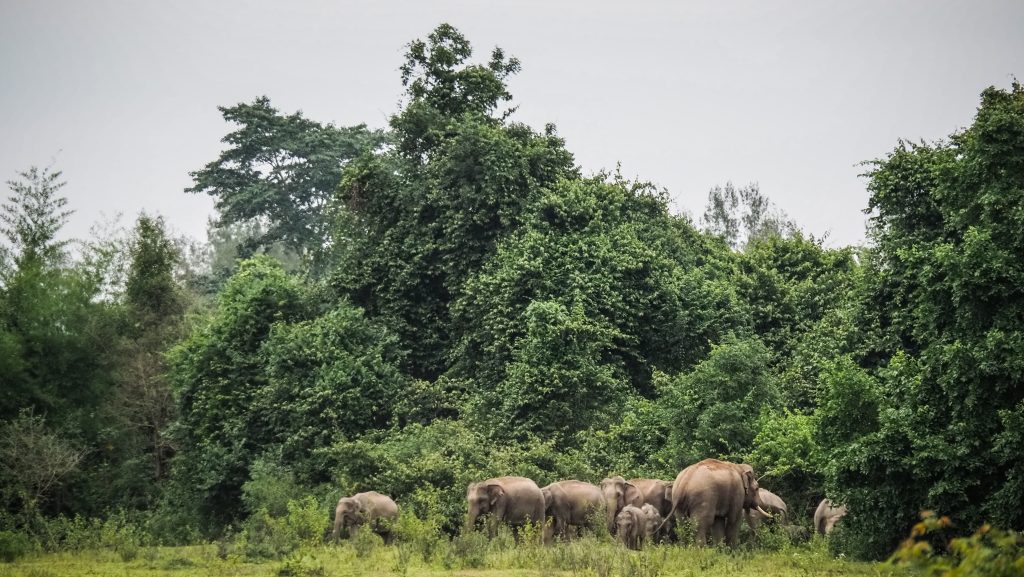
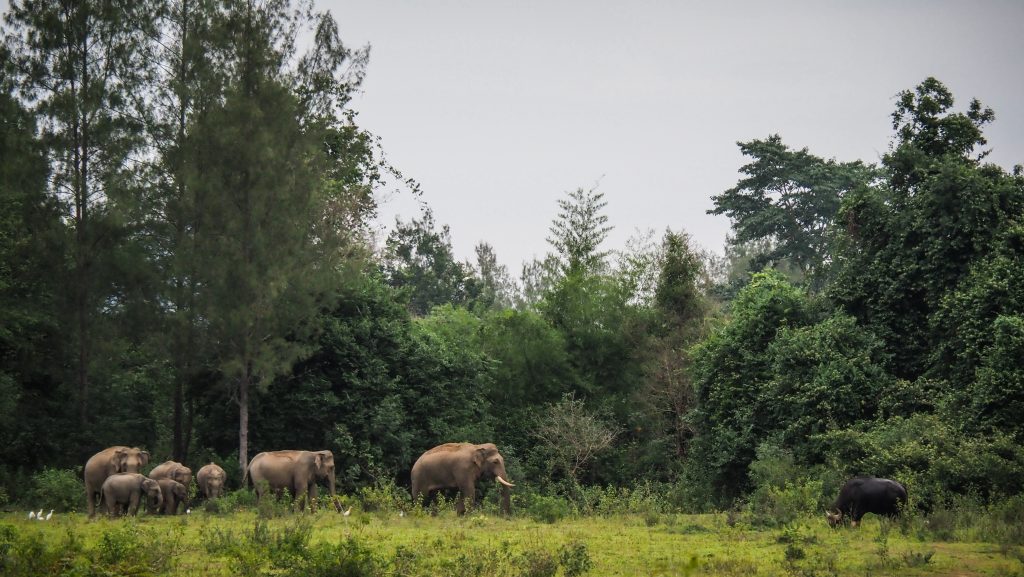
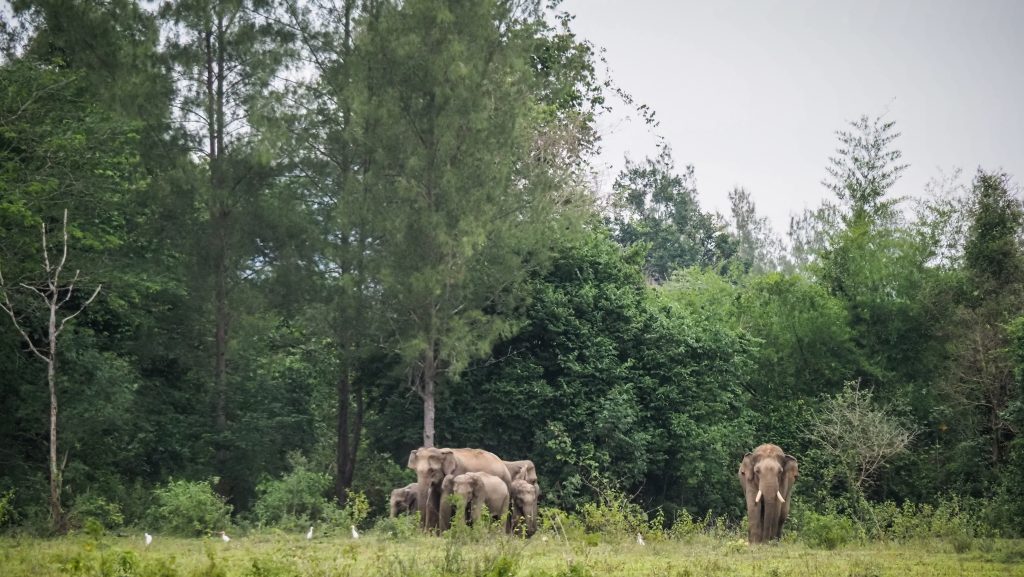
The third stop was definitely the best one. A big group of around 12 elephants were hanging out there, including some baby elephants. We weren’t able to get off the truck but the animals were closer than before and could be seen quite well, especially with binoculars or a zoom camera lens. We spent here a lot of time, even though one viewpoint was still left to be seen, but probably the rangers had known that there were no animals. They were right! At the last stop, we were able to get off the truck, but the only photo opportunity was a panorama of the beautiful landscape, which was satisfying as well!
About 10-12 elephants were in that area, including small onesA small conflict for territory between elephants and gaurElephant family looking for foodPhu Yai Sai Wildlife Watching Area – definitely the best place to see elephants on that day
Is visiting Kui Buri National Park worth the money?
In my personal opinion, it is, even though the price is rather high for Thai standards. You may notice negative reviews saying that some tourists were able to see just 1 or 2 elephants at a really far distance. Of course, there is a risk of that. You may even see no elephants at all, but it is a national park and not a zoo. Don’t expect animals to come and pose for your photos because you paid and came to see them. They are wild animals, free to do what they want and that’s the beauty of it.
Koh Samet is located in the Rayong province, about 200 km from Bangkok. It’s definitely off the main tourist track but in my opinion, it gives the island even more charm. Especially on the weekdays, the atmosphere is rather quiet and you will have no problems with finding a piece of beach just for yourself.
Upon arrival, you will have to pay a 200 THB entry fee as the whole island is declared a national park. Road traffic is limited to pick-up trucks taxis and motorbikes only. Therefore, you will certainly feel the specific island vibe here!
Besides relaxing on beaches or enjoying water activities, there is not much more to do on Koh Samet. But if those beaches are extremely picturesque with a truly paradise atmosphere, aren’t they enough?
How to get to Koh Samet?
The island can be reached only by sea and you will need to get to Ban Phe Pier or Nuanthip Pier. The public ferry costs about 120 THB for a return trip and it takes about 30 minutes of travel time. More expensive speedboats are available as well but even though they are faster, I wouldn’t say it’s worth spending extra money unless you are travelling in a bigger group.
If you travel from Bangkok, Nuanthip Pier can be reached from the Ekkamai bus terminal and the trip there takes about 3 hours. You can also start a trip in Pattaya or Rayong as both of these cities are on the way from Bangkok.
The area around the piers is full of shady sellers and scammers so stay focused and don’t let them trick you into an expensive boat ride.
Panorama of the southern part of Koh Samet
When to go?
The best time to visit Koh Samet is the same as for all the other islands in that area, so from November to May, outside of the rainy season. The weather is stable and showers are rather occasional. In other months, it’s better to check the boat schedule and availability of accommodation well in advance.
Due to its location not far from Bangkok, try to avoid coming here on the weekend as it can get crowded.
How long to stay?
It’s a small island so I would say that 2 full days should be enough to visit all the exciting places and enjoy beach time. If you are short on time, it’s doable in 1 day too but in my opinion, Koh Samet deserves an overnight stay.
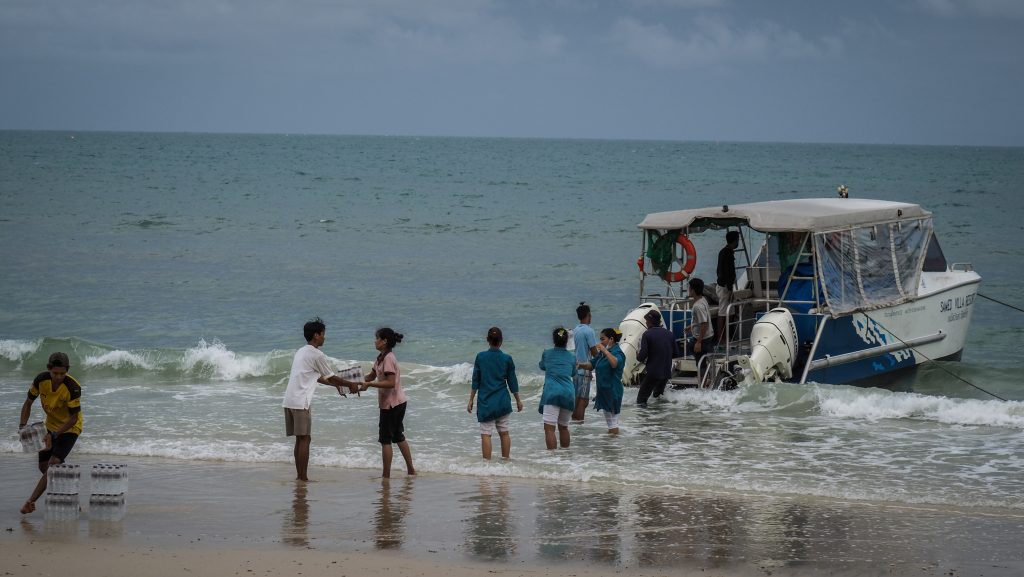
Teamwork when unloading supplies
Where to stay?
Hotels, bungalows and resorts, all of these are available on the island at various prices. I stayed in Runa Runa The Best Guesthouse which was affordable and clean, but not as close to the beach as popular resorts. You can easily make a reservation on booking.com or agoda.com.
Getting around the island
Options are limited to pick-up trucks or rental motorbikes. I always opt for my own wheels and that time was no different. I got an orange Honda Click, one of the most popular motorbike models in Thailand, and it was in excellent condition. When you leave the ferry terminal, just walk straight to the other side of the small square until you see the shop renting scooters. The cost for 24 hours is 300 THB, including fuel.
Beaches
Most of the beaches are located on the east coast of the island with Sai Kaew Beach being the most popular one. You may want to look for a more quiet alternative during the day but anyway it’s a good place to come back and chill while watching a fire show in the evening in one of the bars or restaurants there. Other beaches on the east coast are:
Ao Hin Khok
Ao Phai
Ao Nuan
Ao Chor
Ao Wong Duean
Ao Thian
Ao Wai
Ao Kiew
On the west coast, Prao Beach is an awesome place to spend a few hours and I honestly think that it might even be my favourite spot on Koh Samet. White sandy beach, clear water, palm trees, and the possibility to do some snorkelling or paddling on a kayak or SUP board that can be rented from the nearby hotel. And on top of that – amazing sunsets! What else would you need?
On the north coast, you may visit Noi Na Beach. It’s a good place for sunrise and there are restaurants around but other than that, it’s a rather ordinary beach.
Panorama of east coast beachesSmall beach on the east coast of Koh Samet Panorama of east coast beachesAo Chor BeachPanorama of east coast beachesPrao Beach
Other places to visit
The Mermaid at the Na Dan Pier
Tourists arriving on the island are greeted by an interesting but also a bit weird statue coming straight up from the sea. It is Phi Suea Samut, a mystical mermaid made of bronze. It relates to one of the most famous epic poems of the Thai past, Phra Aphai Mani by Sunthorn Phu.
Mermaid welcoming tourists at the Nan Dan Pier
Cape Laem Toei
A beautiful place at the southern tip of the island, to just stay and look out into the sea. It has two great viewpoints (one of them with a swing) and a rugged rocky coastline. Probably the best place to watch a sunset on Koh Samet.
Rugged coastline at Cape Laem ToeiSmall island off the coast of Koh SametRocky coast around Cape Laem ToeiRocky beach and incoming storm
Wat Koh Samet
The main temple of the island is a bit hidden from the main road and I got there by accident by taking a detour on a random road. Having seen hundreds of other temples in Thailand, that one isn’t really that special but it’s worth a quick stop to check out the large smiling Buddha statue in its centre.
Diving and snorkelling trips
Popular and inexpensive snorkelling trips go around other small islands in the area where you can get to know the richness of the underwater world. Of course, more serious diving trips are also on offer.
If you are wandering around Pattaya Beach, you may wonder what those small islands visible on the horizon are. One of them, called Koh Larn or Coral Island, is a perfect place for beach and water enthusiasts. And just to be honest, who wouldn’t like to escape Pattaya for a day or two?
Don’t get me wrong, it can still get super crowded. Being one of the closest islands to Bangkok makes it a very popular destination, especially on the weekends. But if you are looking for a nice beach and island vibe, don’t hesitate and come to visit.
How to get to Koh Larn?
Frequent public ferries go from Bali Hai Pier in Pattaya and arrive either at Na Baan Pier or Tawaen beach. The first location is around the busy village, full of restaurants and local life and the second one could be better for those willing to stay at the beach for the whole day. But after all, it doesn’t make a big difference. Transportation options can be found in either place and can take you further if you wish.
The cost of the ferry is 30 THB each way per person and the travel takes about 45 minutes. There are also plenty of much more expensive speedboats (200 – 300 THB for the return trip) and the sellers are very aggressive. Just ignore them. From my point of view, using that kind of service doesn’t make too much sense, unless you are really in a hurry or you travel in a bigger group and share the cost.
If you travel from Bangkok, Pattaya can be easily reached from the Ekkamai bus terminal.
Aerial view of Koh Larn
When to go?
The best time to visit Koh Larn is the same as for all the other islands in that area, so from November to May, outside of the rainy season. The weather is stable and showers are rather occasional. In other months, it’s better to check the boat schedule and availability of accommodation well in advance.
How long to stay?
It’s a small island so I would say that 1 full day should be enough to visit all the exciting places and enjoy beach time. However, if you want to really rest from big city life, staying overnight is definitely a better idea than coming back to Pattaya or Bangkok. Certainly, you won’t regret it.
Panorama of Pattaya City seen from Koh Larn
Where to stay?
Hotels, bungalows and resorts, all of these are available on the island at decent prices. Most of the options are located around Na Baan Pier. I won’t recommend any because I didn’t stay overnight on the island, but you shouldn’t have problems with finding what you are looking for on booking.com or agoda.com.
Getting around the island
Rent a motorbike at one of the places around the pier. It costs between 200 – 300 THB per day, including fuel. For me, it’s always the best way to explore the place at your own pace. I recommend taking a few pictures of the bike, especially if it has scratched places, just to stay on the safe side. Ahh and don’t forget that besides watching the breathtaking scenery of Koh Larn, you should also look at the road 🙂
Baht buses/songthaews can be easily found not far from the main pier. Once you leave the ferry and come to the crossroads, turn left and head towards the temple until you see bus parking. Then, simply ask which bus goes to the beach you want and how much is the ride. You may need to wait a bit until the bus fills up with other passengers but it usually doesn’t take long, especially on the weekends. At the beaches, there are usually a few buses waiting too, and if not, just ask local sellers or at the resort.
Motorbike taxi drivers wait for tourists at the main pier. They have maps and fixed prices for different locations. If you need a tailored fit excursion, this is when negotiations begin.
Aerial view over Tien Beach and Samae Beach
Beaches
Tawaen Beach
The longest (700 metres) and the busiest beach on the island, with plenty of restaurants but also speedboats and jetskis making noise.
Aerial view over Tawaen Beach
Sang Wan Beach
Within walking distance from Tawaen Beach. From the 7-11 store, turn left and keep walking straight to the pier and the across a small bridge. The beach is nice and quiet, especially in the morning. Good place for snorkelling with crystal clear water and colourful fish.
Tonglang Beach
Another beach that is very close to Tawaen Beach. You can easily walk there or drive the motorbike. Water sports are available and some good local restaurants can be found just at the beach.
Samae Beach and Tien Beach
Both are located on the west of the island, very close to each other. Samae Beach is 500 metres long and similar to Tawaen Beach, it can get very very busy. Tien Beach is within walking distance from Samae (around 10 – 15 minutes). It’s a bit quieter as there is no direct road access and a short walk from the main road is required. The further you go towards the end of the beach, the more privacy you will have.
Aerial view of Tien BeachTien Beach
Nual Beach
Located in the south of the island and nicknamed “Monkey Beach”, it’s actually much less crowded in comparison to the beaches mentioned above. If you are adventurous, follow the narrow path on the right side of the Nual Beach and then hop over a few stones to reach Laem Thong Bay and Hat Kruat Beach. Please be aware that this way is passable probably only during low tide. There is an alternative path higher in the hills but it isn’t marked and the best is to use online maps (e.g. MapsMe) for navigation.
Nual BeachLaem Thong Bay and Hat Kruat Beach
Ta Yai Beach
Located at the far northern end of the island. It’s about 100 metres long stretch of white sand which is more difficult to get to, therefore significantly less crowded and commercial. There are also good snorkelling opportunities at both ends of the beach. You will need to get a motorbike taxi or rent your own two wheels to get here.
Other places to visit
Windmills Viewpoint
The highest viewpoint at Koh Larn provides a 360° panorama of the island and the Pattaya area. You will need a motorbike to go here and be careful because the road is narrow and winding.
Big Buddha and Kuan Yin Viewpoint
Definitely a must-see place on Koh Larn. On the way up, you will come across a big Buddha statue with breathtaking views down to Tawaen Beach. You can continue climbing 250 steps up to the small pagoda, but it will be rather for pure satisfaction rather than for views, which are covered by the trees.
Wat Yai Samraan and Wat Mai Samraam
Small temples near the Naban pier, which is convenient for quick sightseeing and taking some rest before boarding the ferry back to the mainland.
For most tourists, the city of Trat is only a transit point for trips to the popular Koh Chang, Koh Mak and Koh Kut islands. But is it worth stopping for a little bit longer?
There aren’t any breathtaking sights or big resorts or party streets full of bars. It’s a normal town. Just that. So if you are looking for a local atmosphere, away from the crowds of tourists that you may encounter on the islands, make at least a few hours stop in Trat and you won’t regret it.
Trat is also a paradise for fruit lovers as it is, next to Chanthaburi, one of the main fruit growing areas of Thailand. Especially between March and August, local markets are full of inexpensive varieties of locally grown fruits.
Historic background
The history of Trat starts in the early 17th century during the reign of King Prasat Thong of the Ayutthaya Kingdom. It was known as Mueang Thung Yai and due to its strategic location, it had an important role in the development of the country’s stability. The town of Trat later become a community of Chinese merchants.
When Ayutthaya fell to the Burmese in 1767, Trat served as a checkpoint and buffer city and was responsible for providing provisions to King Taksin the Great before he moved his forces from Chanthaburi to Ayutthaya. King Taksin later on succeeded in getting rid of the Burmese invaders and freed the kingdom from foreign rule.
In the Rattanakosin era, during the 1893 Paknam crisis, French troops landed and occupied the western part of Chanthaburi province. In 1904, Siam was forced to surrender Trat to French Indochina to regain Chanthaburi. Three years later, however, finding that Trat with its almost entirely Thai population was hard to rule, the French returned Trat to Thailand on 23 March 1907, in exchange for larger areas along the Mekong river, which included Battambang, Siam Nakhon, and Sisophon, which all had a Khmer majority population.
During the French-Thai War of 1940–1941, the Vichy French navy sailed from Saigon to seize Trat. The unprepared Thai warships were caught by surprise. By the end of the 17 January 1941 Battle of Ko Chang, three Thai ships had been left sinking: the HTMS Chonburi, HTMS Songkhla, and HTMS Thonburi. French casualties were light with no ships lost. The Japanese government negotiated a truce, which ended the conflict without further fighting.
When the Vietnamese pushed the Khmer Rouge out of Cambodia in 1985, Pol Pot fled to Thailand and made his headquarters in a plantation villa near Trat. It was built for him by the Thai Army and nicknamed “Office 87”.
The town can be easily reached by buses or minibuses from Bangkok. It’s more than 300 km and takes about 5 hours of travel time.
If you travel from Cambodia, Trat is about 90 km west of the border and one of the frequent buses that depart from Had Lek can take you there.
By plane
Trat has also its own small airport with flights from Bangkok operated by Bangkok Airways. However, the total cost of travel, including transfer to the town or pier to the islands is totally not worth it.
When to go?
The town itself can be visited at any time of the year but if you want to continue the visit to the islands, the best would be the cool season, which runs from November to the end of February, and the hot season, which runs from March to April. The remaining part of the year is the rainy season, with unpredictable weather and a quiet atmosphere.
How long to stay?
It’s a small town so I would say thatone full day or even half of it should be enough to visit all the interesting places and try local food.
Where to stay?
I spent one night in Mukda Guesthouse and it was perfectly located within walking distance of all sights. The room was very clean and comfy. I can totally recommend it!
Getting around
The best is to just walk. Alternatively, you may want to rent a bicycle or take a motorbike taxi. Grab transportation doesn’t work here, so you have to look around on the street to find a driver.
Places to visit
Wat Buppharam
It is thought to be the oldest temple in the city, built in the Ayutthaya period. Have a look at the praying hall, the chapel and the Vikhara temple. There is also a folk museum with Buddha images and potteries.
Residence Kampot
Located on Lak Muang Road in Talat Yai area in the center of Trat. The place was built during the reign of Chulalongkorn The Great (Rama V) when Trat was taken over by the French. It was a residence of a French bureaucrat authorized by the French government to govern Trat province and became a governor’s residence later. The Residence is a 3-storey semi-wooden house, topped with a hip roof.
Residence Kampot, Trat
Trat Museum
Housed in former City Hall on Santisook Road. It is a large wooden building that was originally built during the French occupation. Over the years it fell into disrepair and was unused before being rebuilt in the early 2000s. The museum covers the history of the Trat area. From prehistoric settlements to its early days as an important stopover for Chinese traders and further to the occupation by the French in the early 1900s and the World War Two Battle of Koh Chang. Most information is in both Thai & English. Entry to the museum is 30 Baht for foreign visitors.
Trat Museum
City Pillar Shrine
When King Taksin came to gather troops here, he ordered to build this city pillar which was believed by the Chinese to protect the city from enemies and to bring peace to the people. . The City Pillar is the centre of the Thai-Chinese relationship. Apart from the city pillar, an ancient Khmer style Shiva Linga, found in Huai Raeng Sub-district, is on display.
Wat Pai Lom
Due to the fact that it is the residence of Than Chaokhun Phra Wimonmethachan Worayannurak, the father of education, Wat Phai Lom seems to be the most important temple in Trat. Visitors can visit the Buddhist Garden which is open to the public as a meditation practice place.
Around Trat
Ban Nam Chiao Community
Ban Nam Chiao Community is an ecotourism community, which represents the coastal fishermen’s way of life. The villagers were originally Thai Buddhists. Later on, the mixture between two ethnicities was created since many of the Chinese merchants cruised in with goods to sell at the Ban Nam Chiao Pier, and finally settled in the area. In the reign of King Rama III, the Khmer Muslims (also known as Khaek Cham or Champa) immigrated from the war in their homeland to settle along the canal in Ban Nam Chiao. More of them kept coming in, so the two religions were allowed to get married, and they became like siblings and lived together in peace. Nowadays, most of the locals earn their living from fishery, rubber and orchard plantations, as well as trade.
Ko Chang Naval Battle Memorial
On 17 January 1941, one of the most important battles in the history of the Royal Thai Navy took place. At that time, the French advantageously invaded the Thai territorial waters in the Ko Chang area with its 7 battleships whilst the Royal Thai Navy only had 3. Yet, they had the spirit to fight bravely even though the battle ended with the sacrifice of 36 marine lives and all 3 battleships which sank into the sea.
Namtok Saphan Hin
Beautiful waterfall, well off the beaten track. Free entry!
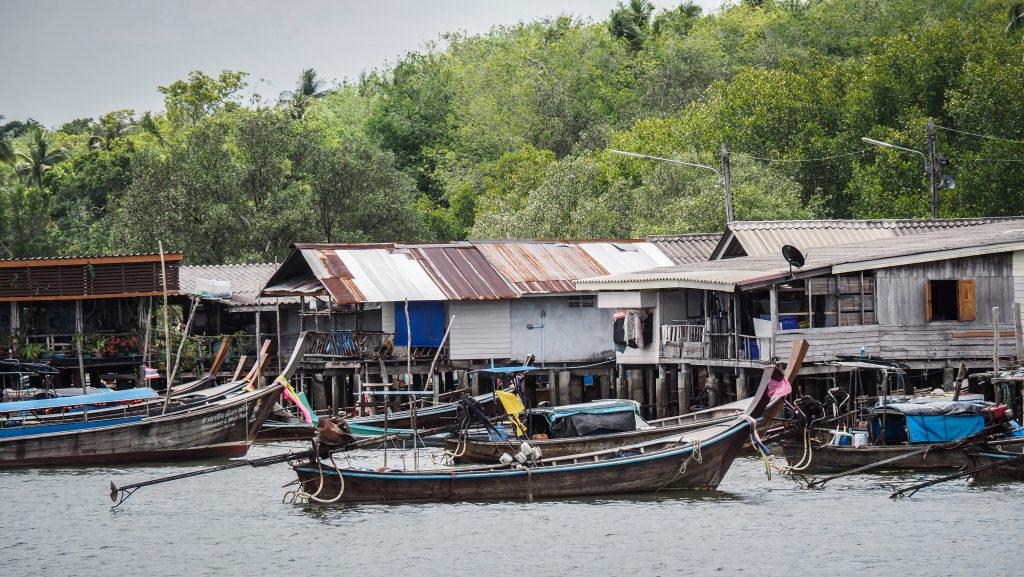
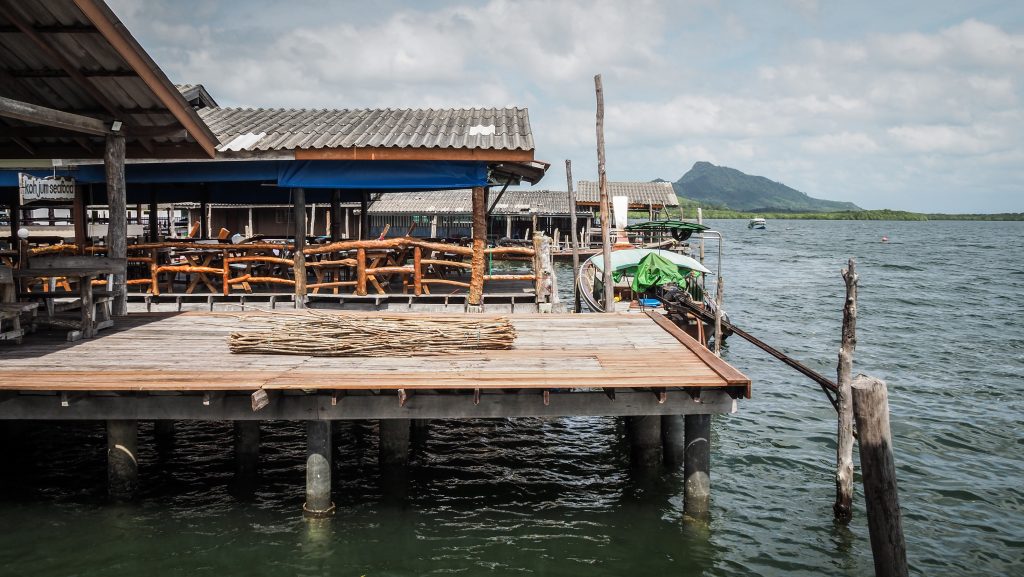
Koh Jum is a peaceful island located in Krabi Province, between Koh Lanta and Krabi town. The beaches are long and very often completely empty, accommodation prices are more than affordable and local people are relaxed. It’s not a place for parties though, so if you are after fun, your destination should be elsewhere. For those who enjoy a quiet atmosphere, the island is definitely worth visiting. Have a look at some more details!
How to get to Koh Jum?
Transfer to Koh Jum is possible by ferry, speed boat or longtail boat. In the normal seasons, ferries used to operate between Krabi Town and Koh Lanta, stopping at Ko Jum which is located just between them. During the pandemic and even when writing this post, (15/04/2022) such an option isn’t possible. There might be a speedboat doing that route once or twice a day but it’s better to ask at one of the travel agents and get the most up to date information. Certainly, it’s still possible to charter longtail boats but it will be quite an expensive option.
Another way to get from Krabi to Ko Jum is via Laem Kruat harbour, only 30 minutes from Krabi Airport. This is how I got there and it was really easy. Longtail boats leave for Koh Jum every hour. The price is 100 baht per person, plus some extra baht in case you want to take your motorbike to the island, which I did too. The only disadvantage was that the last return boat was at 3:30 PM, so if you are planning just one day trip, arrive at the pier as early as possible.
When to go?
The best time to visit Koh Jum is the same as for all other Andaman sea islands: from December to April. The weather is stable and rain is rare. If you are planning to go outside of the main season, check the boat schedule and availability of accommodation well in advance.
How long to stay?
It’s a small island so I would say that 1 full day should be enough to visit all the interesting places. However, if you want to soak more into the local community and just relax doing nothing on the beach, consider staying overnight. Certainly, you won’t regret it.
Where to stay?
Resorts are mainly located on the southern part of Koh Jum, along the Golden Pearl Beach / Long Beach. I won’t recommend any because I didn’t stay overnight on the island, but you shouldn’t have problems finding what you are looking for on booking.com.
Getting around the island
There are rather no other options than renting a motorbike or arranging a tuk-tuk service at the pier. A bicycle might be nice as well, as the terrain is mostly flat, but yeah, it’s still hot as hell.
Places to visit
Koh Jum Village
It is the biggest village on the island. There are some shops and restaurants, as well as motorbike rental points and tour agencies offering trips and transfer options. But the best thing to do is just stroll around and observe the local lifestyle.
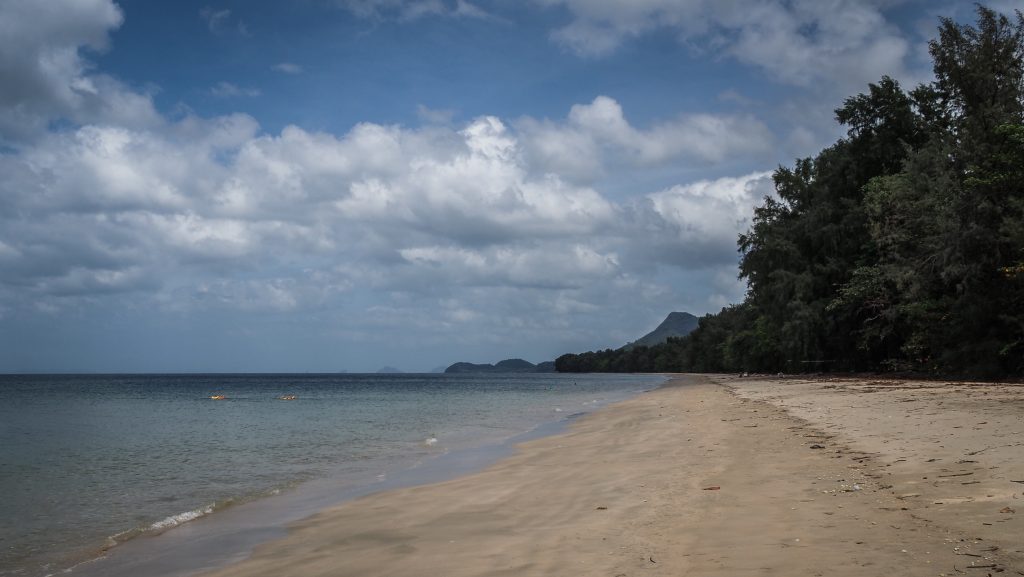
Golden Pearl Beach and Long Beach
Long white sandy beach, crystal clear water under the blue sky. Does it sound idyllic to you? For more active ones, it’s nice to take a walk to the eastern tip of the island with Ko Pe Lat just in front of it.
Ao Si Beach and Magic Beach
Another good spot for swimming and sunbathing. Locals like to gather here so it’s a nice observation to see how life goes on. And it goes on slowly.
Coconut Beach
A good place to see the sunset, most of the time it’s perfectly empty. Unfortunately, trash is a big problem here.
Sunset Beach and Secret Beach
These two are more remote and more difficult to access as you need to follow dirt road which is also very bumpy. On the plus side, you will most likely be alone there. As of February 2022, the new road leading to a nearby resort was being built, so I guess in the future access will be easier.
Is it worth going to Koh Jum?
If you are looking for a calm and relaxing place, far away from the crowds, with not much more to do than just laying in your hammock, then it’s definitely a good place to be. Otherwise, Koh Lanta or Ao Nang, both with much more activities to do but also more tourists, would fit you better.
Albarracín is a small town with just over a thousand inhabitants on the southern edge of Aragon. Similar to Teruel, which I described in the previous post, it totally stole my heart! Both towns are less than 40 kilometres away and can be easily visited one after another.
The history of the city dates back to ancient times when the Romans established one of their fortified camps here, called Lobetans. In the 1st century, they built an 18-kilometre aqueduct, which is one of the most impressive hydraulic systems in the Iberian Peninsula. In the 9th century, the city was conquered and occupied by Arabs, and then taken over by the Berber Dynasty of Banu Razin which established its independent taifat. In fact, it is believed that the present name of the city comes from the phrase: Al-Bani-Razin, which means Razin’s children.
The territory was taken by the Almoravids in 1104. From 1167 to 1300, Albarracín was an independent lordship known as the Sinyoría d’Albarrazín which was established after the partition of the Taifa of Albarracín under the control of Pedro Ruiz de Azagra. It was eventually conquered by Peter III of Aragon in 1284, and the ruling family, the House of Azagra was deposed. The last person to actually hold the title of Señor de Albarracín was Juan Núñez I de Lara, although his son, Juan Núñez II de Lara continued on as the pretender to the title until 1300 when the city and its lands were officially incorporated into the Kingdom of Aragon [wikipedia.com].
I suggest staying at least 1 night in town, especially if you want to do some hikes in the area (and you definitely should). Ruins of the Roman Aqueduct, Paseo Fluvial or Sendero del Arrastradero with prehistoric rock paintings, are perfect examples.
Where to stay?
I can fully recommend Hotel Messon del Galo, located along the main street with two big paid parking sites close by. A single room with fast internet and a private bathroom cost me about 35 EUR (in October 2021).
Places worth seeing
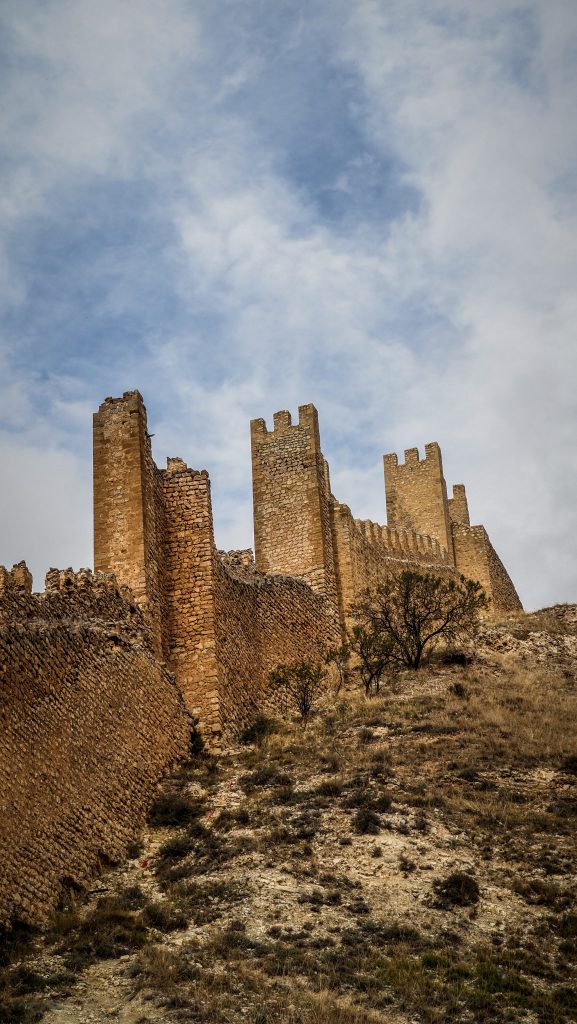
City Walls (Murallas) – Admire a great panorama of the town and surrounding hills from Torre del Andador, the highest point of the walls. Technically, climbing the structure is forbidden and believe me, the views are great even from a bit lower level. It’s free to visit.
Panorama of the Albarracin and its city walls
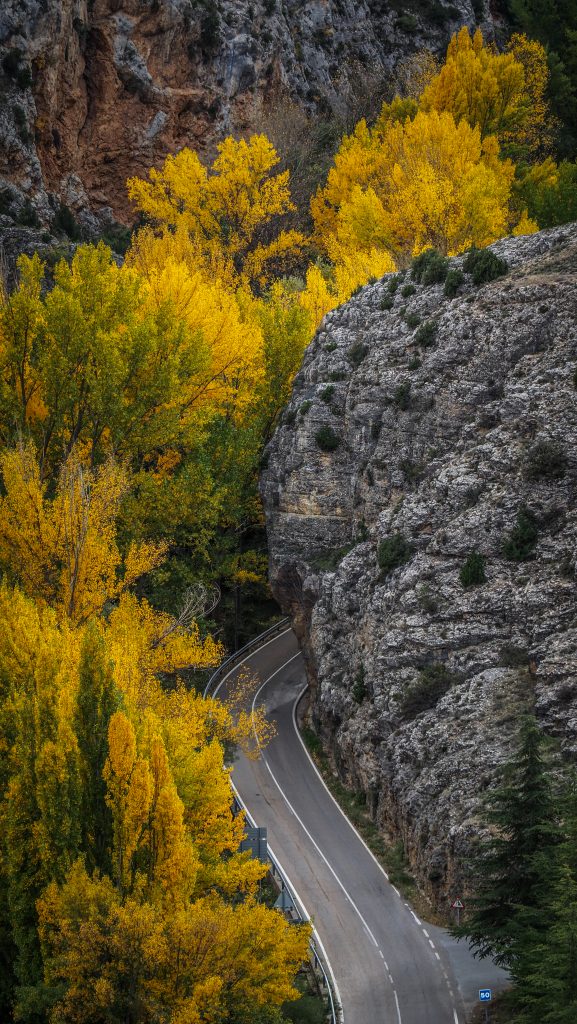
City walls and winding road around the hills in autumn scenery
Castle (Castillo) – Built in the 9th century as an Islamic military post, today it can be visited only with guided tours during very limited opening hours which is a bit discouraging. Ask for more details and tickets at the information centre.
Catedral del Salvador – Roman Catholic church with a single nave, built between 1572 – 1600, on the remains of Romanesque temple from the 12th century. It can be only visited with a guided tour organized by Fundación Santa María.
View around the town the city wallsAnd another one for the surrounding hillsAmazing colours! Autumn is here!
Museo de Albarracin – Located in the old hospital of Albarracín from the 18th century. During the civil war, the building was used as a district prison and then transferred into the museum. It presents the history of Albarracín, both Islamic and Christian periods as well as the Modern and Contemporary periods in the form of various dioramas. Unfortunately, everything is in Spanish only.
Museo Diocesiano – Located in the old Episcopal Palace, just next to the cathedral. The museum presents a collection of religious art.
Museo de Juguetes – Visiting the Toys Museum could be a good idea, especially if you travel with kids. It’s a bit off the main tourists’ path, but in Albarracin, everything is within walking distance.
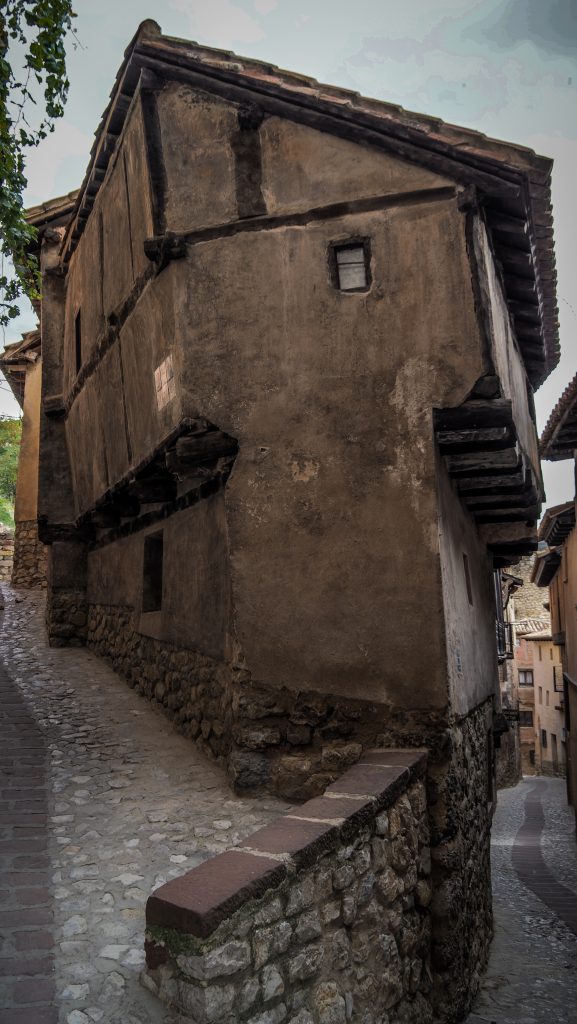
Casa de la Julianeta – The most emblematic building of the town and also the most photographed so if you want your perfect shot, come very early in the morning. It’s made of plaster and wood, which is the typical style of Albarracin.
Casa de la Julianeta and another typical house of Albarracin
Plaza Mayor Albarracín – Main square surrounded by wonderful buildings, including the 14th-century Town Hall.
Casa – Museo Albarracín – Noble house dating from the 17th century that once belonged to Pérez and Toyuela family. The interior is definitely worth visiting but again, only with a guided tour.
Dona Blanca Tower – It was built in the 13th century as part of the defensive system of Albarracin. There are three floors which sometimes host small photography exhibitions but most people visit for the viewpoint on top of it. Unfortunately, it was closed on the day of my visit.
Hiking trips in the area
Roman Aqueduct – One of the most important hydraulic systems in the Iberian Peninsula, built in the 1st century AD by the Romans. It’s almost 25 kilometres long and initially run next to the Guadalaviar river on the route Albarracin – Gea – Cella. There are several entry points along the road but one of the best ones is shortly after Gea de Albarracin, where you can admire magnificent walls with tunnels inside. It’s marked in Google Maps as Acueducto romano en Barranco de los Burros and can be easily accessed by car. So impressive what people were able to construct such a long time ago without modern tools! If you want to learn more about the history of this place, stop by Centro de Interpretacion in Gea de Albarracin.
Views around the Roman Aqueduc
Paseo Fluvial – Circular river walk following Rio Guadalaviar, starting in the Municipal Park. It’s about 2 km long and rated as easy.
Sendero del Arrastradero – The whole area of Pinares de Rodeno is famous for prehistoric rock paintings, such as livestock, horses or human figures. There are many interesting hikes to do but as I was running out of time, I decided to follow 2.5 km long Sendero del Arrastradero. Several sites with drawings protected by metal bars can be seen along the way or within a short detour. Sometimes it’s actually difficult to find anything on the walls. There is also a nice viewpoint to the landscape of Aragon.
Rock painting with human figure……and here some livestockViewpoint along Sendero del Arrastradero Viewpoint along Sendero del Arrastradero